 Help Center
Reports are packed with useful tools that help you analyze your team's and LiveChat's performance in detail. In this tutorial, I’ll show you what features are available and how you can use them in your work.
Filter data
Filters come in handy when you want to look for trends, see data for a specific period, or check how particular agents or groups are doing.
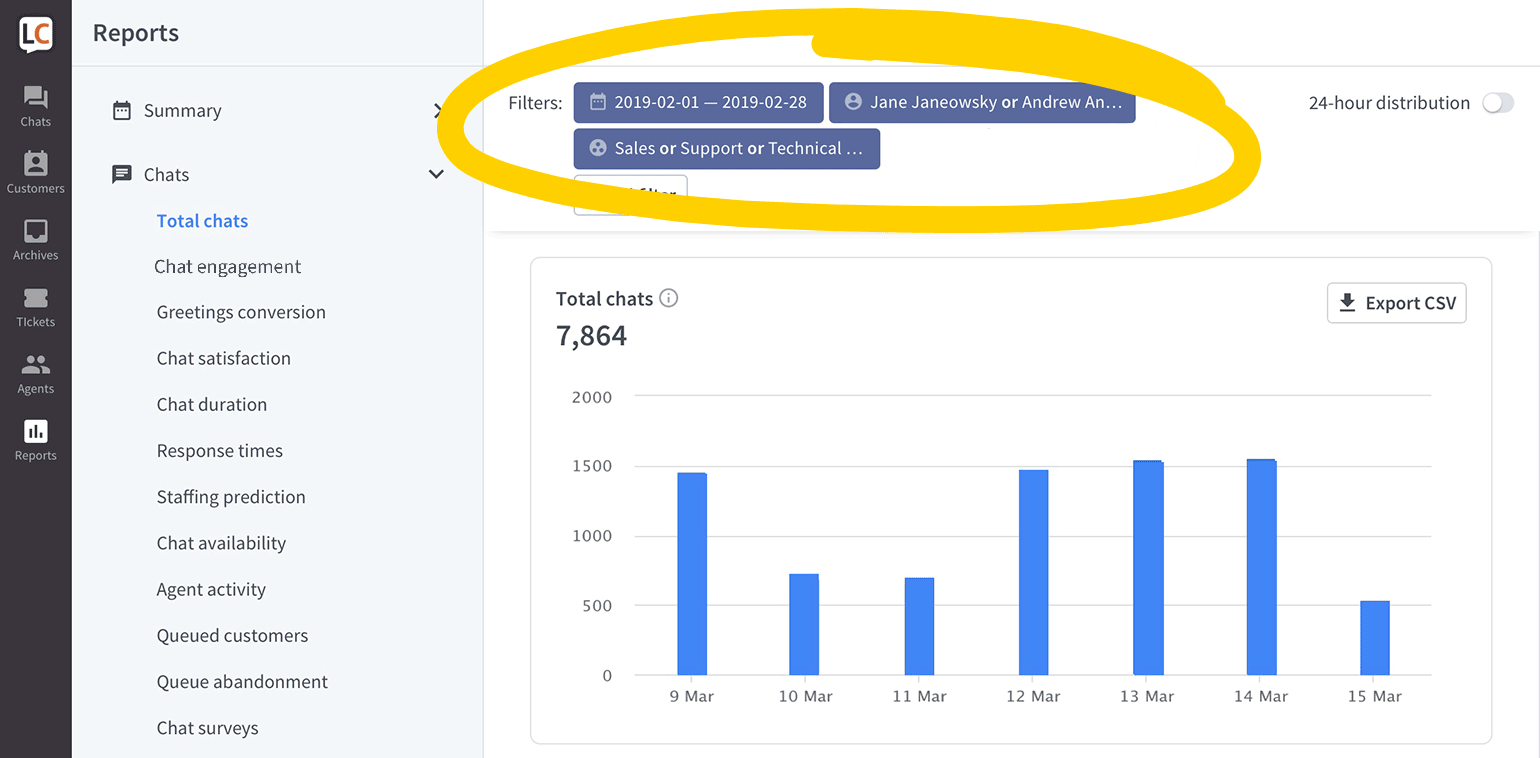
Filter by tag
Using the 'tag' filter, you can get precise information on a particular type of case or see if there are products that are getting very popular. For example, you can check how many chats were tagged as 'product_request' to know if you shouldn't add them to your store.
To learn more about tags, check out this guide.
Filter by date
Filter by a particular 'date' to check your LiveChat activity during various campaigns, holidays, or other seasonal events. Just started a new ad campaign? See how the chat traffic went up for that period. Noticed a decrease in the number of chats during the summer? Your customers are probably on vacation.
Filter by agent
To check on a particular agent, select him or her using the 'agent' filter. This option is beneficial during agents' evaluation as it shows data for one agent only.
Filter by group
Filter the data by 'group', to see how many chats all of your departments had. If you are using groups to offer chat on multiple websites, this filtering option allows you to check the data for each of those websites separately.
Filter settings are remembered when you go through different reports. You can check the same date or the same agent when looking at different metrics.
Compare past and present data
You can check how your metrics change from day to day, week to week, or month to month in one report. It's perfect for keeping track of the results of your actions.
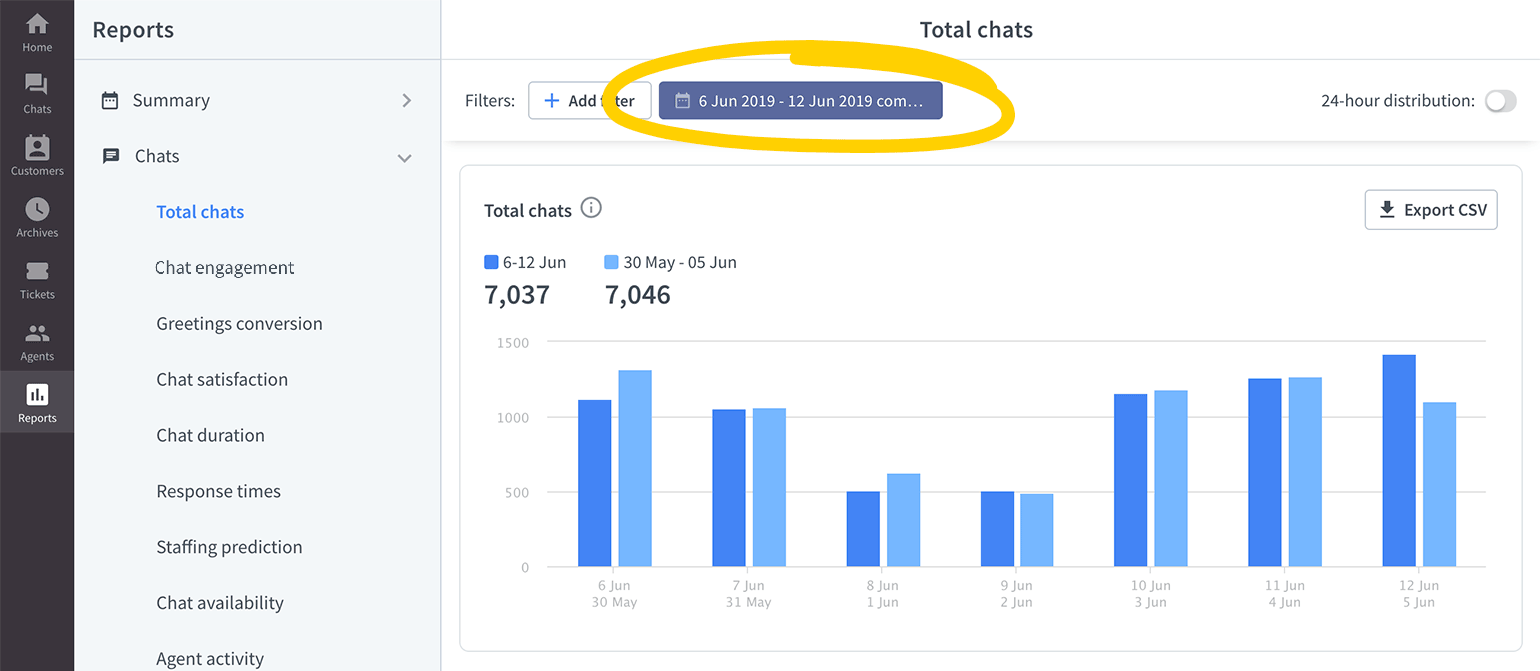
Let's say you wanted to increase the number of chats coming from your product pages by adding greetings and changing the look of the chat widget. After having introduced the changes, you can check if they've brought results.
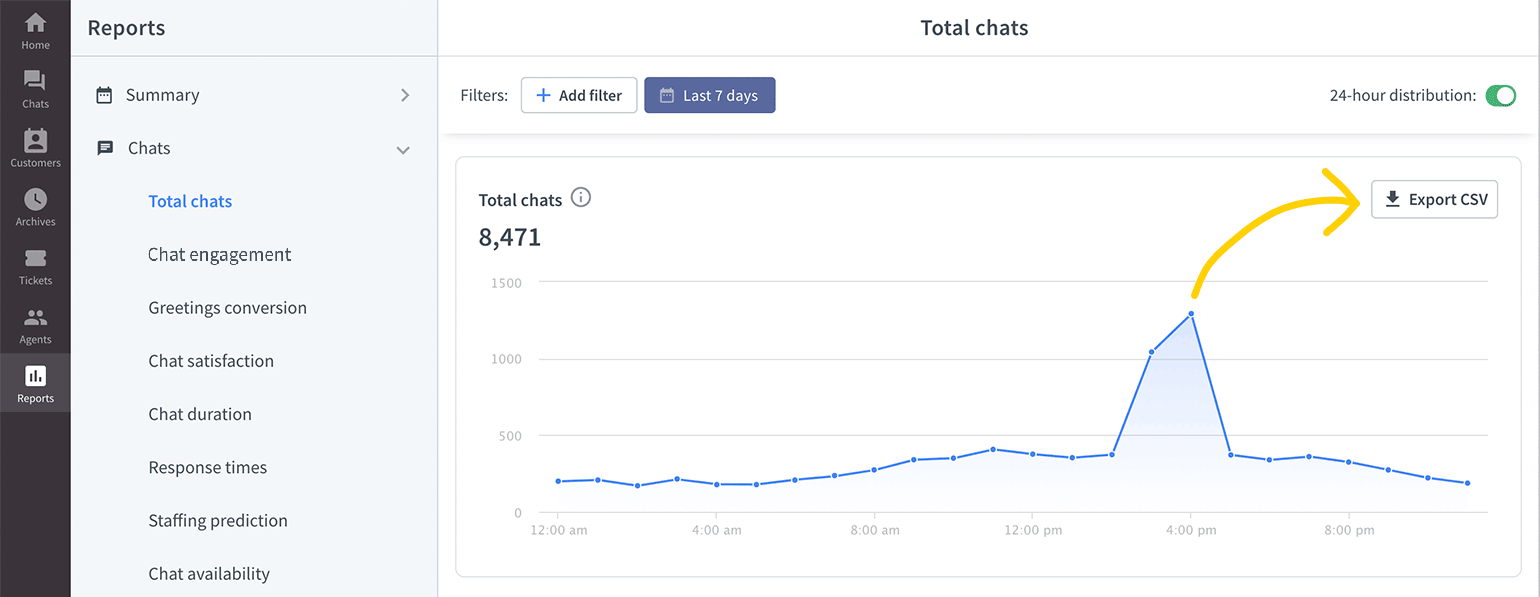
See hourly data
To see how data distributes during the day turn on the 24-hour distribution. You can do it by clicking on the toggle button in the top right corner of a report.
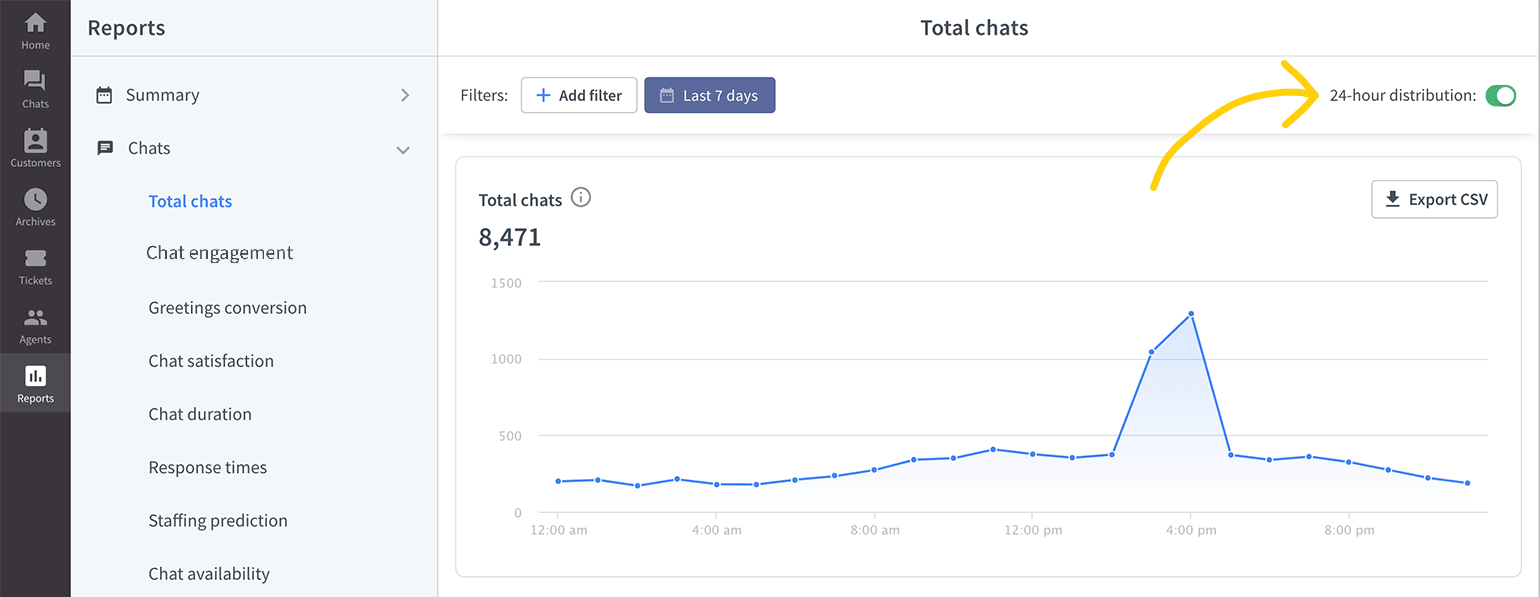
It's convenient if you want to predict how many agents you need based on the number of chats you receive at a particular time of the day.
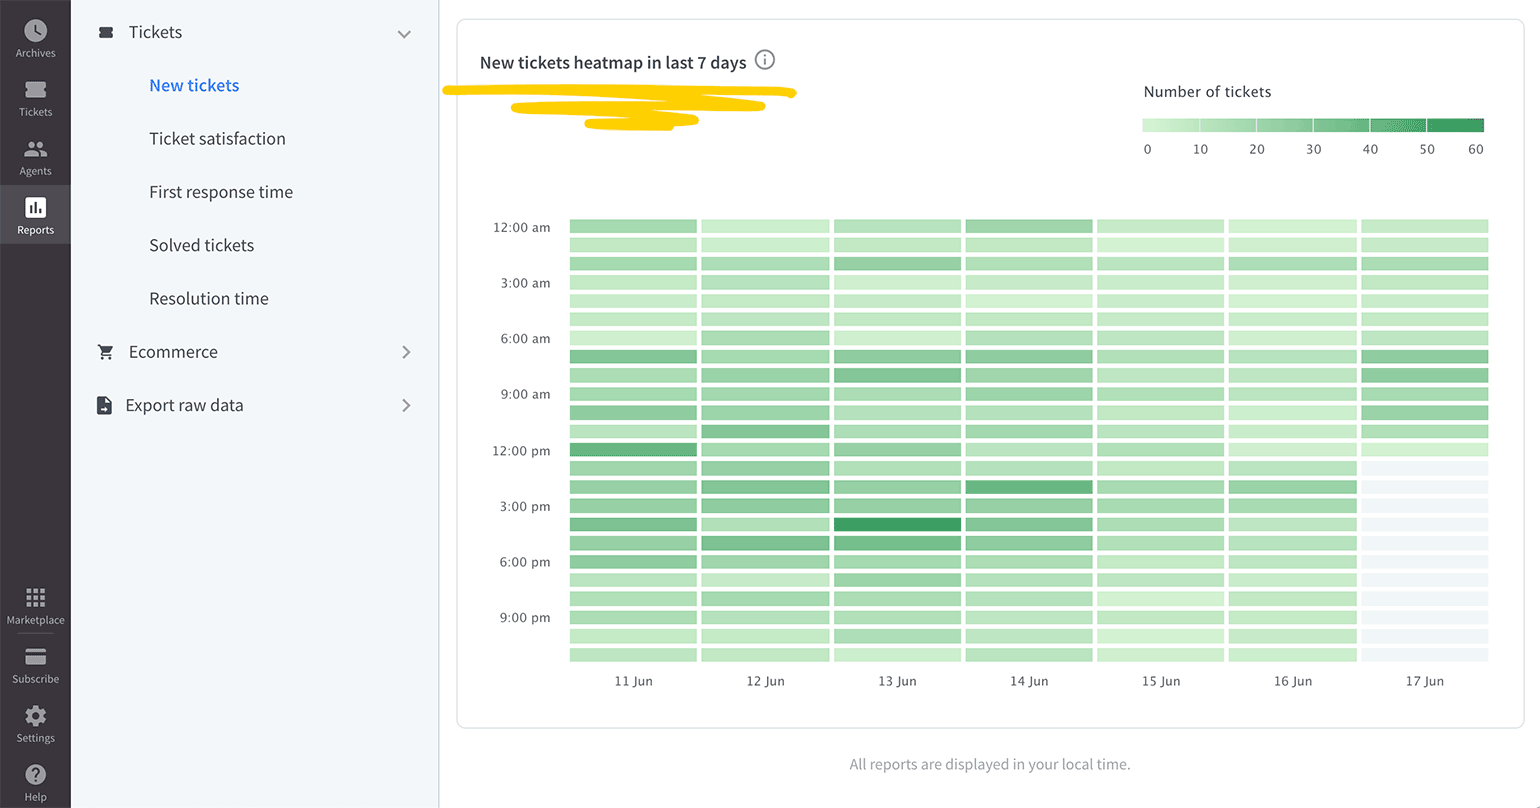
Get an even closer look at how your workload changes throughout the day with heatmaps available in 'total chats', 'queued customers', and 'new tickets' reports.
Get more info with interactive reports
Some of the reports offer more detailed data when you hover over or click on them.
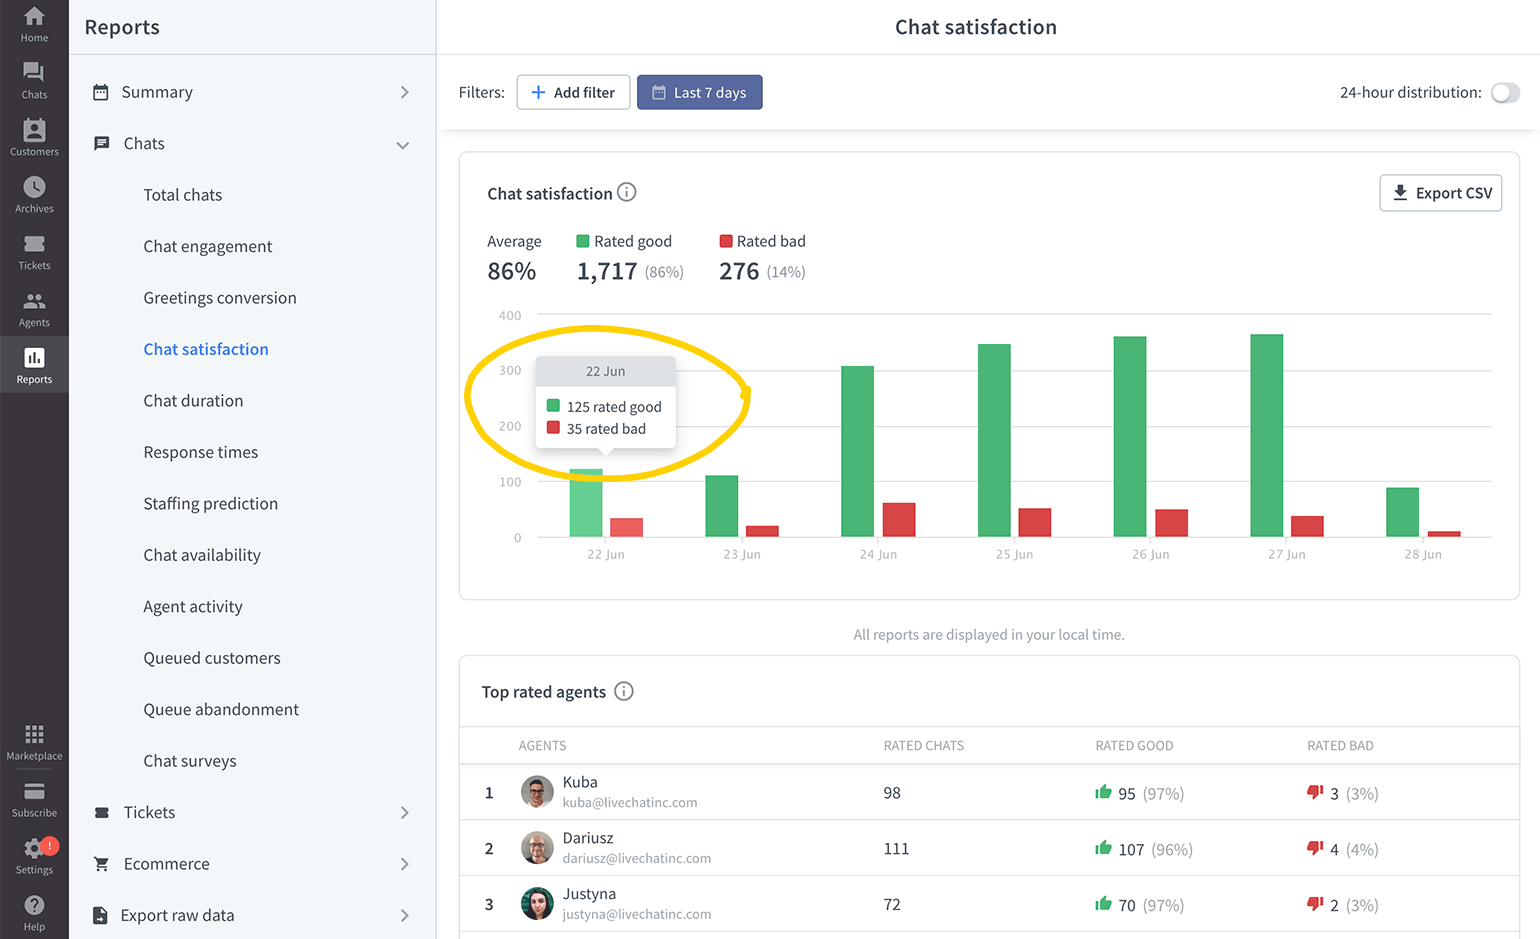
For example, by hovering on the data column in the 'chat satisfaction' report, you can view a specific number of positive and negative ratings. When you click on the negative rating column, you will see all the chats rated 'bad' in Archives.
Export data to create your own reports
You can download each report if you are on the Team plan or higher. Additionally, you can export raw data if you are on the Business and Enterprise plans.
Download reports
To create your own analytics tool, you can download a set of reports and gather them in a spreadsheet. That way, you can easily compare and cross-check them with data coming from other tools you use in your daily work.
To download a report, just go to one, and click on Export CSV.
Export raw data
Exporting raw data allows you to get much more data on your chats, surveys, queues, and goals than just downloading a report. It is extremely useful if you want to create your own complex analytics tool.
Try exporting raw data in the LiveChat app.
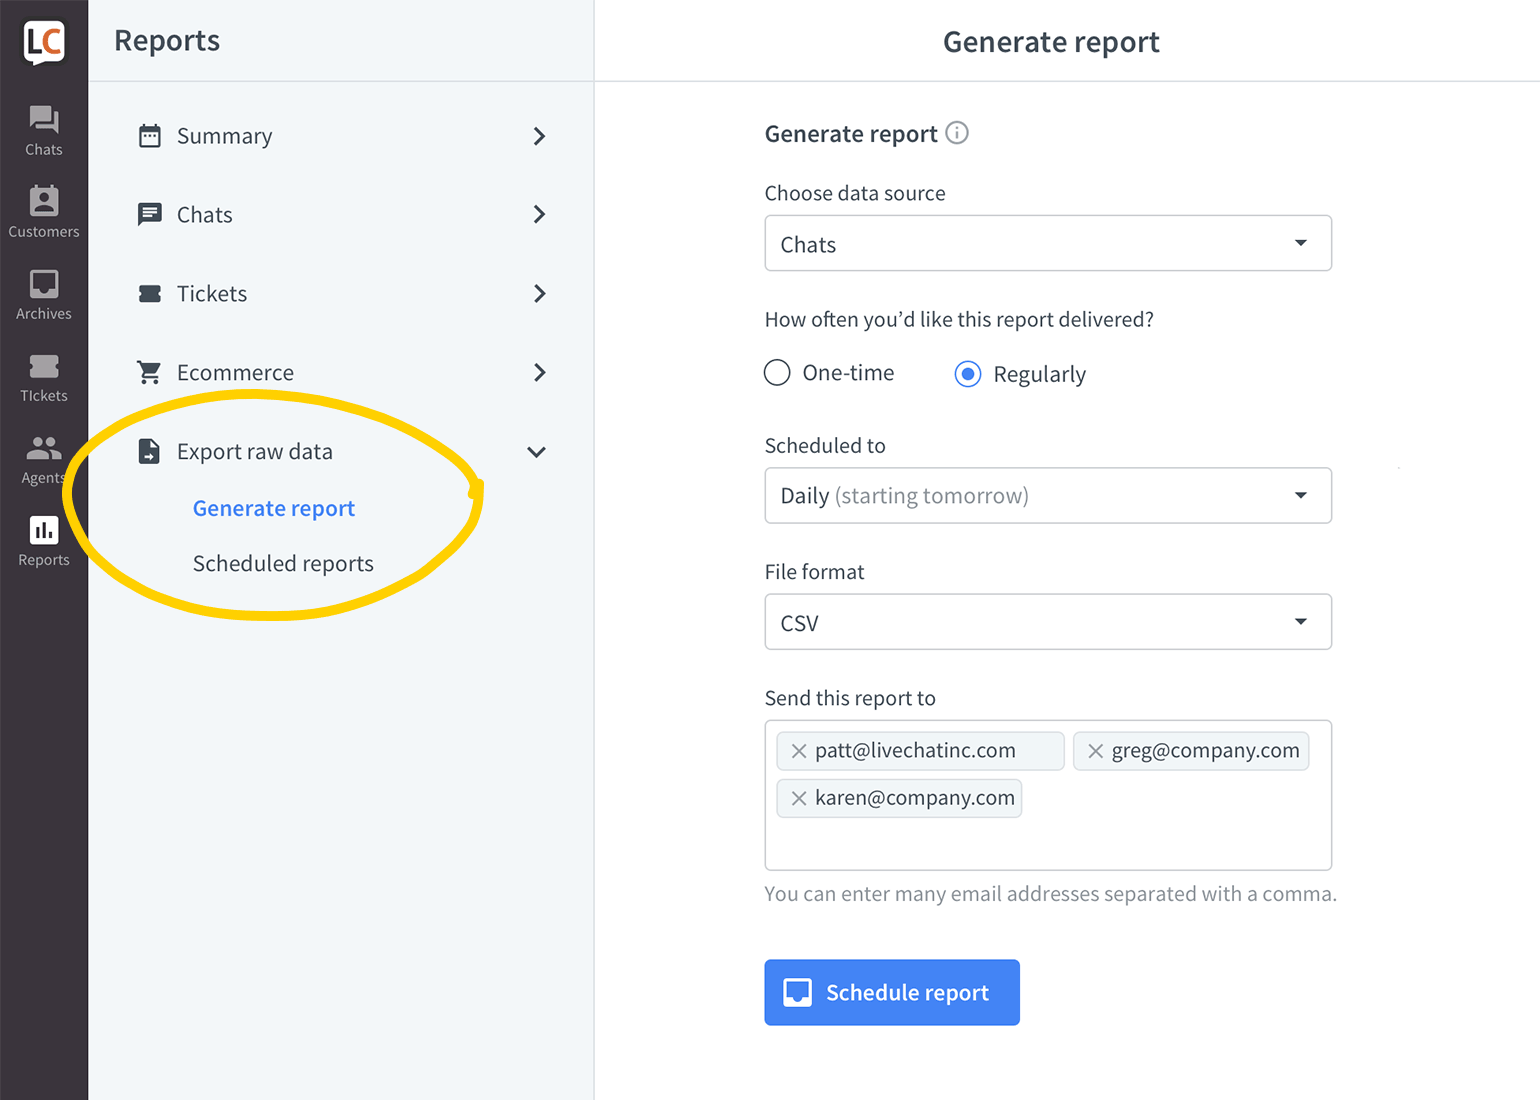
You can set the raw data report to generate automatically every day, week, month, or any other time. Once set, you don't need to think about them anymore, as they will send straight to your email.
Here's a full list of raw data you can export:
The data from Chats report (records for individual chats):
Note that, when exporting your Chats, the report is limited to the latest 100000 records on your LiveChat license. If you have more than 100000 chats on your license and you want to export all of them, you will have to export the Chats report in parts.
To do that, please use the Data range: Custom filter and include the data range that covers the first 100000 chats. Then, export another report with the data range that covers the rest of your chats.
- Conference ID
- Chat creation date (and timezone)
- Chat start date (and timezone)
- Chat start URL (on what page the chat started)
- Referrer
- Chat duration (in seconds)
- Queue duration (in seconds)
- Visitor’s LiveChat ID
- Visitor’s name
- Visitor’s IP
- Last operator’s ID (the agent that chatted with the visitor previously)
- Skill
- Rate
- Agent’s name
- Agent’s ID
- Agent’s timezone
- Pre-chat survey information
- Post-chat survey information
- Greeting URL (on what page the greeting was displayed)
- Greeting action (the condition that triggered the greeting)
- Goal name
- Goal credit
- Goal date
- Tags
- Custom variable name
- Custom variable value
- Integration variable name
- Integration variable value
- First response time (in seconds)
- Average response time (in seconds)
Information from the Queue abandonment report:
- Conference ID
- Queue start time (and timezone)
- Queue duration (in seconds)
- Queue start URL
- Skill
- Visitor’s LiveChat ID
- Visitor’s name
- Visitor’s IP
- Pre-chat survey information
- Custom variable name
- Custom variable value
- Integration variable name
- Integration variable value
Information you can get by exporting the Goals report:
- Goal ID
- Goal name
- Conference ID
- Chat start date (and timezone)
- Goal achievement date (and timezone)
- Agent’s ID
- Skill
- URL (where was the goal triggered)
- Order ID (additional information that can be added to the goal via API)
- Order description (additional information that can be added to the goal via API)
- Order price (additional information that can be added to the goal via API)
- Order currency (additional information that can be added to the goal via API)
- Custom variable name
- Custom variable value
The Tickets report will give you the following information when extracted:
- Ticket ID
- Ticket creation date (and timezone)
- Requester name
- Requester email
- Skill
- Rate
- Assignee’s name
- Assignee’s ID
- Status
- Subject
- Source
- Source URL
- First response date (and timezone)
- Used tags