 Help Center
All of your past conversations are stored in Archives. It really comes in handy when you want to look for patterns and repeating cases, train new agents using old chats as well as simply check conversation history with a certain customer.

Below, you can find a rundown of the most important features and options available in Archives.
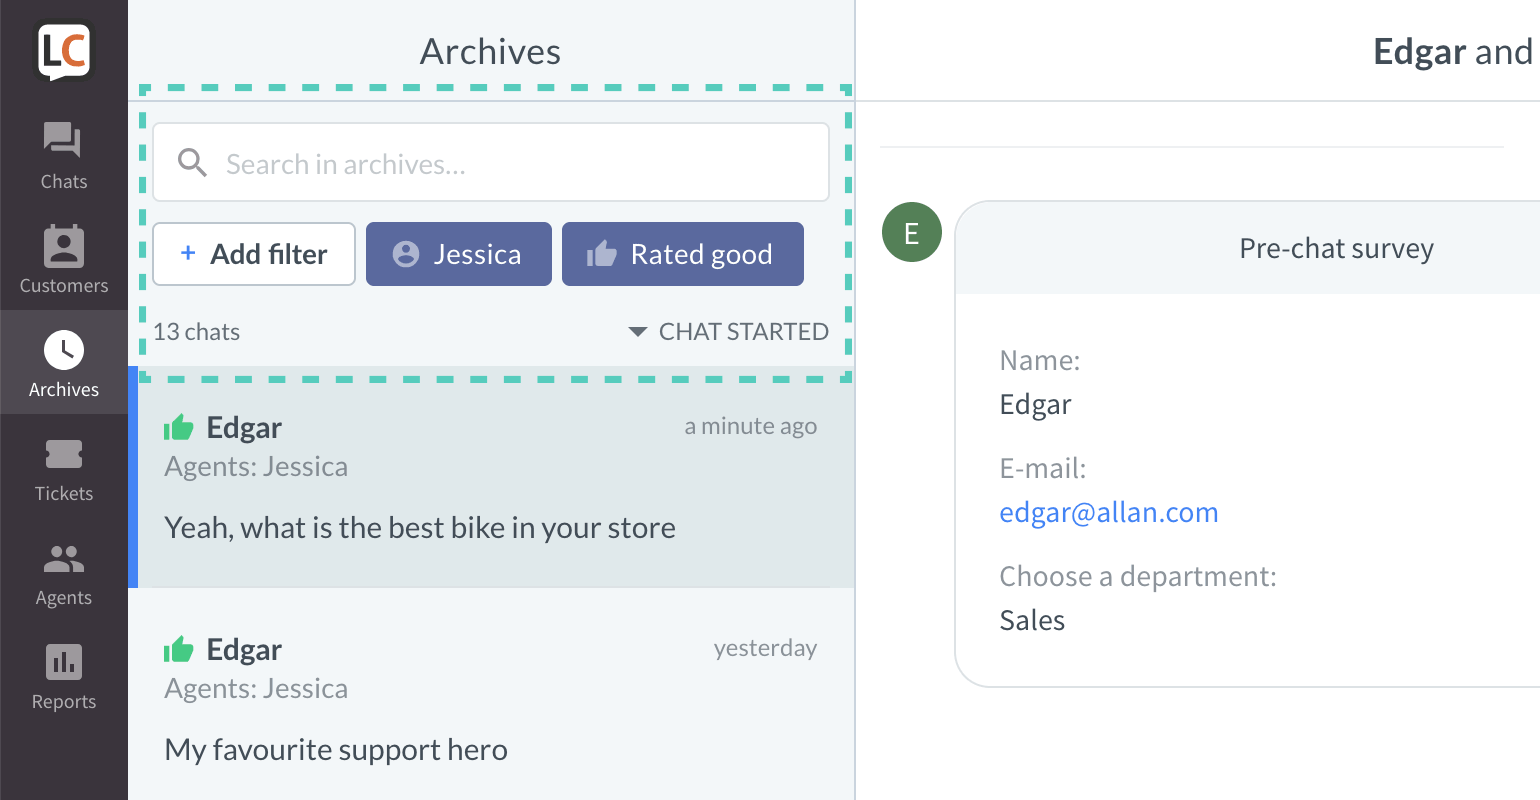
Archived chats list
A list of all your previous conversations. To look for a specific chat or a group of chats use the search bar and/or filters. Additionally, you can sort chats by date.
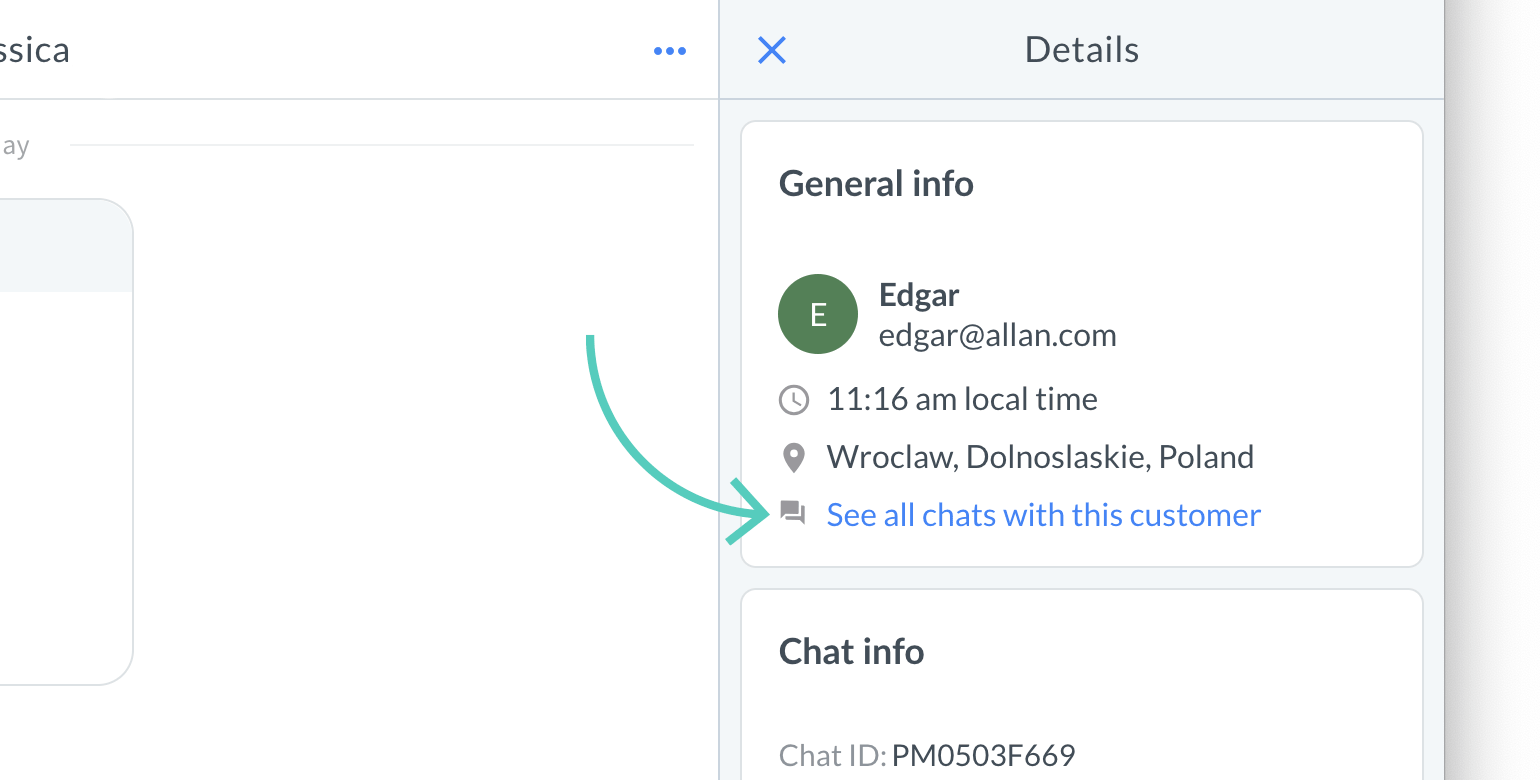
Skip the search and click on See all chats with this customer in Details to immediately find all conversations with a certain customer.
You can choose from seven filters:
- Agent—filters by agent who was handling the chat.
- Group—filters by group that the chat was assigned to.
- Ratings—filter by rating that was given to a particular chat.
- Tags—filters by tag assigned to a chat.
- Date—filters by date of the chat.
- Sales—filters by sales achieved during a chat.
- Goals— filters by goal achieved during a chat.
Within filters, conditions are connected with an OR operator. What does it mean exactly? That if you set two conditions (or more) for one filter, results will show all chats that meet at least one of the conditions.
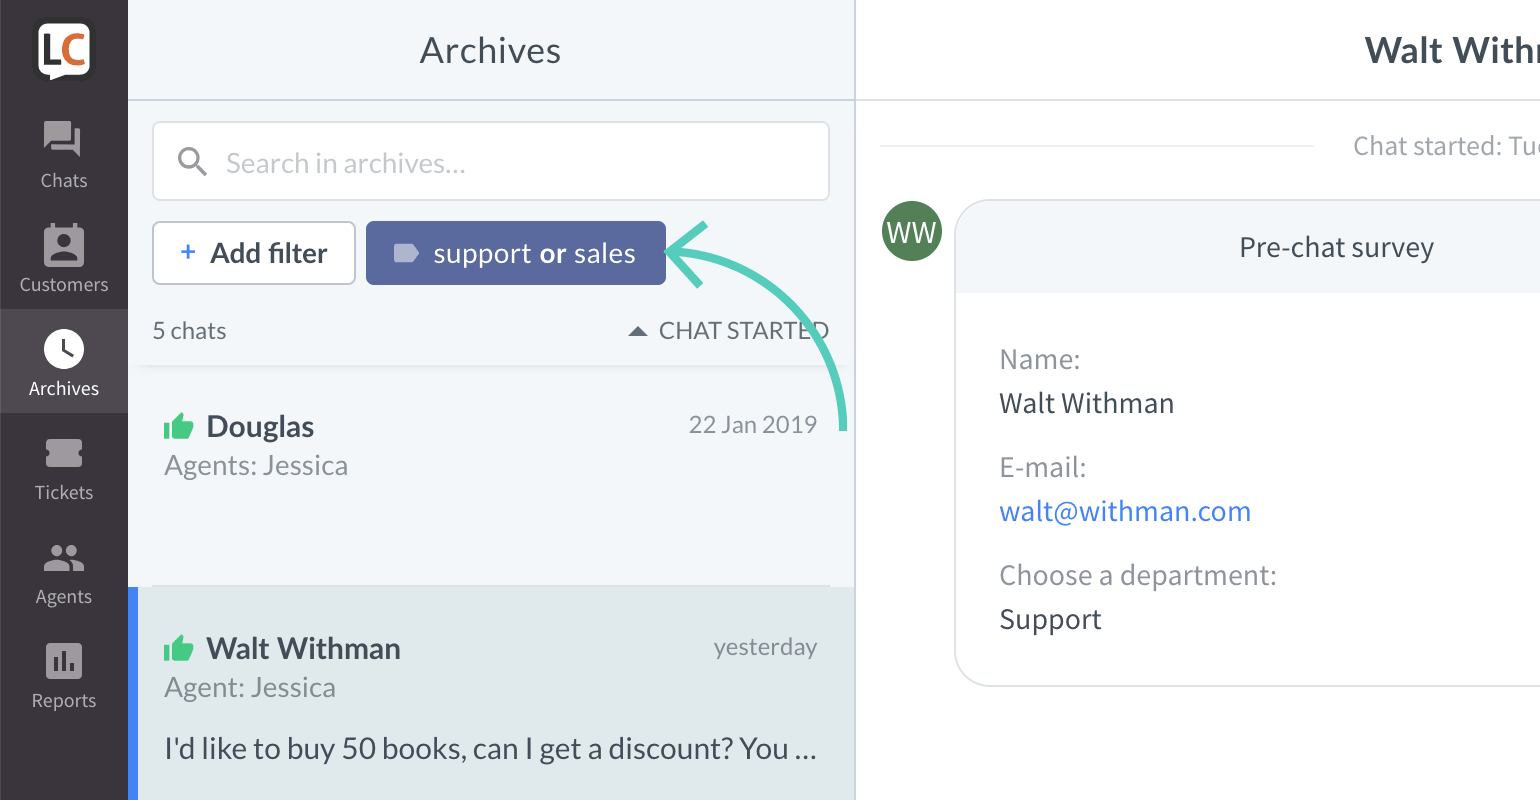
Let’s look at an example.
You set the tag filter to: Support or Sales. On the results list, you will see all chats tagged with at least one of these tags (so either just Support, or just Sales, or both Support and Sales).
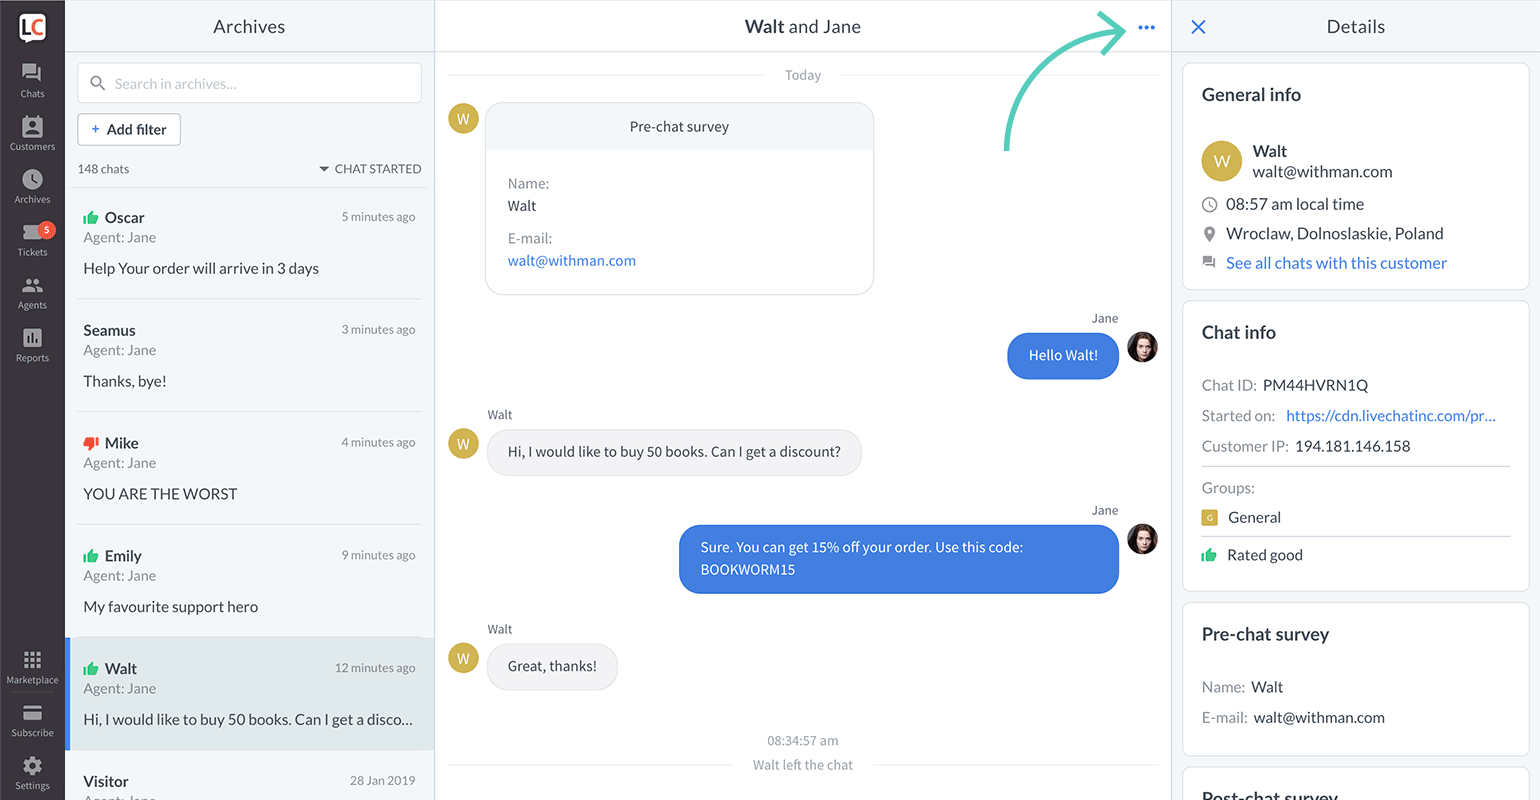
Chat feed
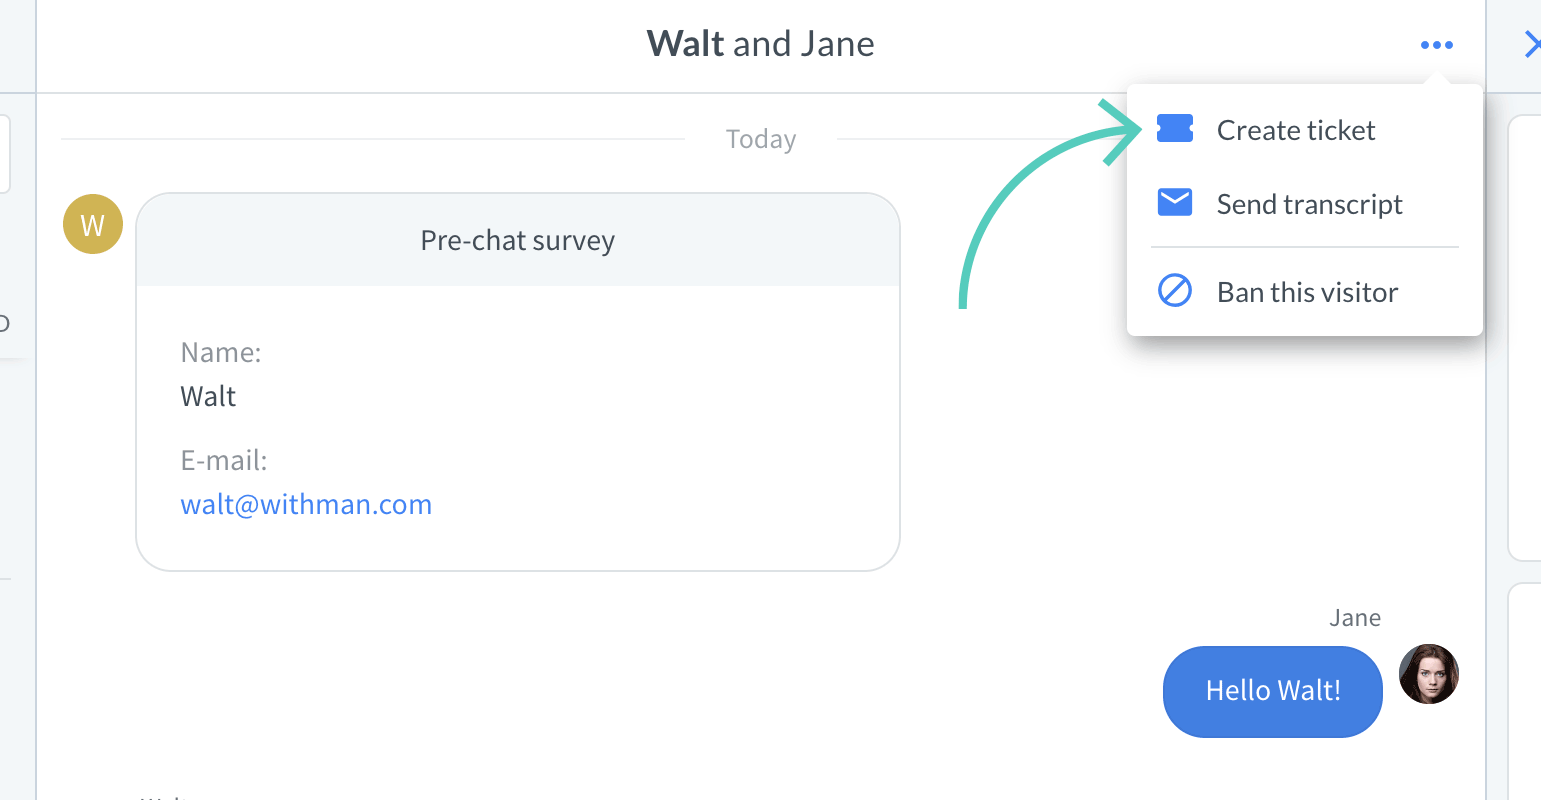
A history of a particular chat. Click on three dots at the top of this panel to open a menu. From there you can: create a ticket, send a transcript and ban a visitor. At the very bottom, you can add and delete tags.
Create a ticket in Archives {#ticket}
First, log in to LiveChat. Then go to Archives and follow these steps:
1) Click on the three dots icon “…” in the top right corner.
2) Click on Create ticket.
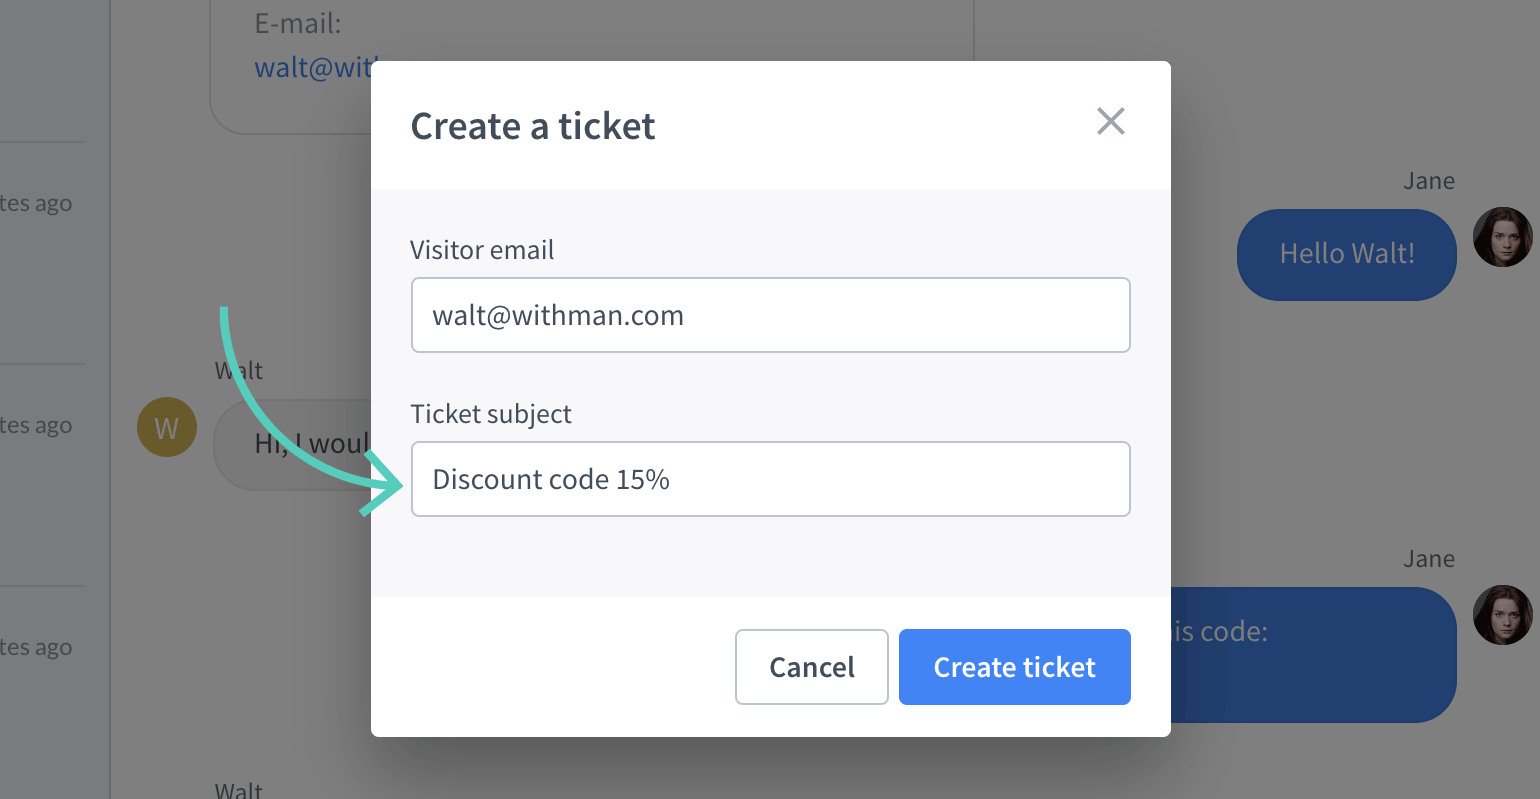
3) Provide a title of the ticket (and customer's e-mail address if they haven't provided it in the pre-chat survey).
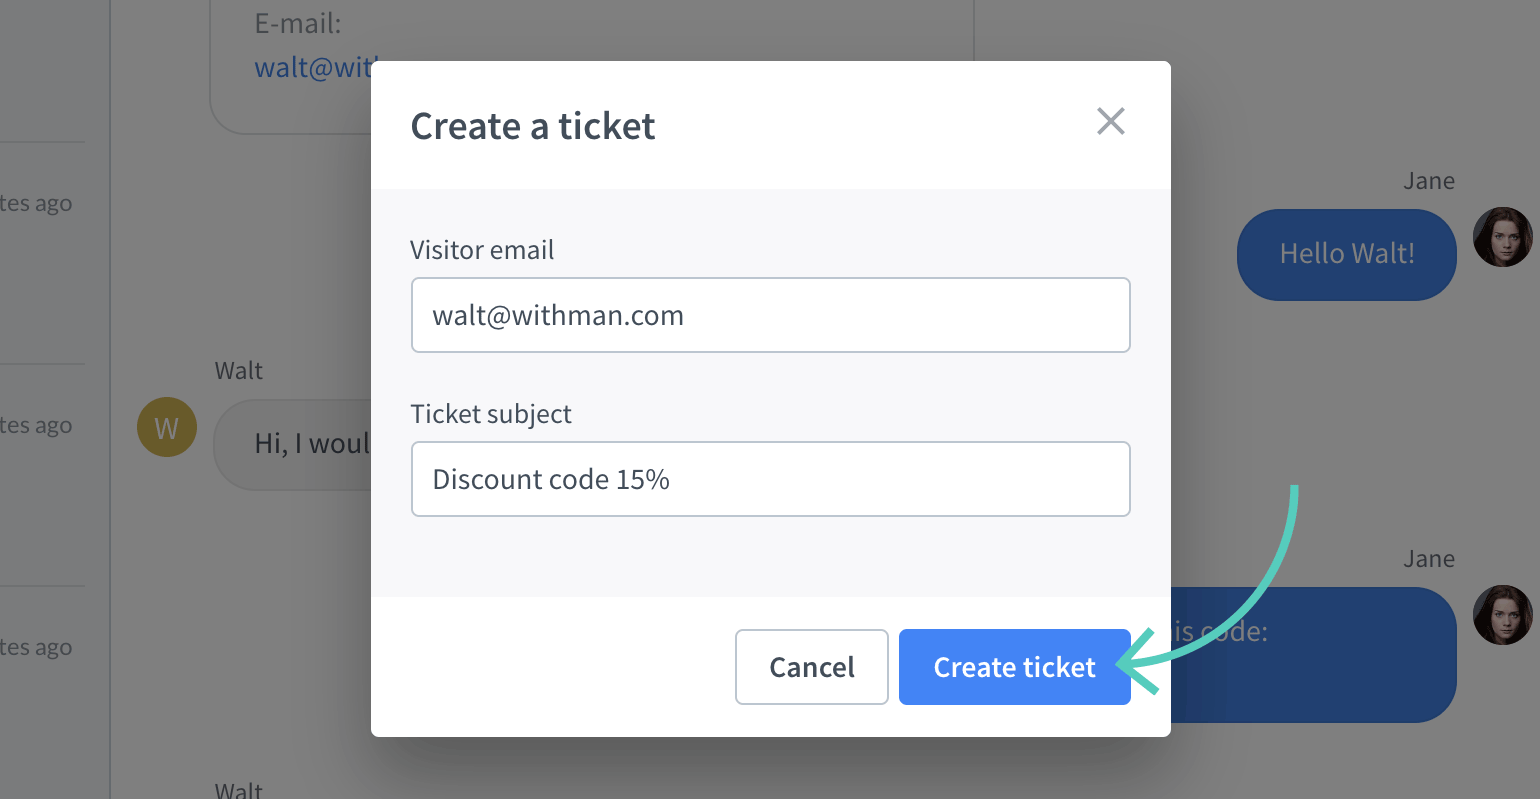
4) Click on Create ticket.
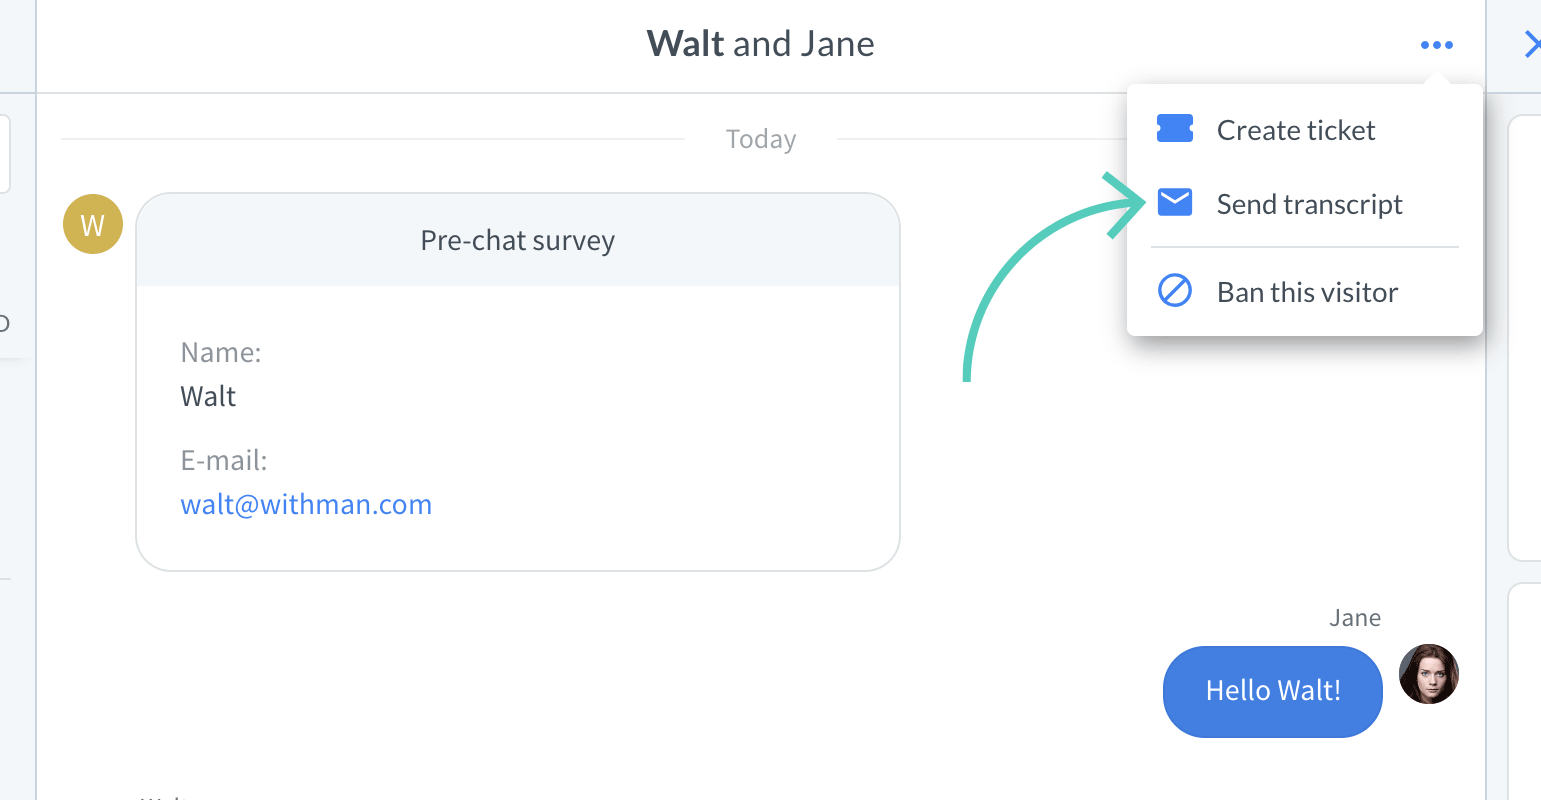
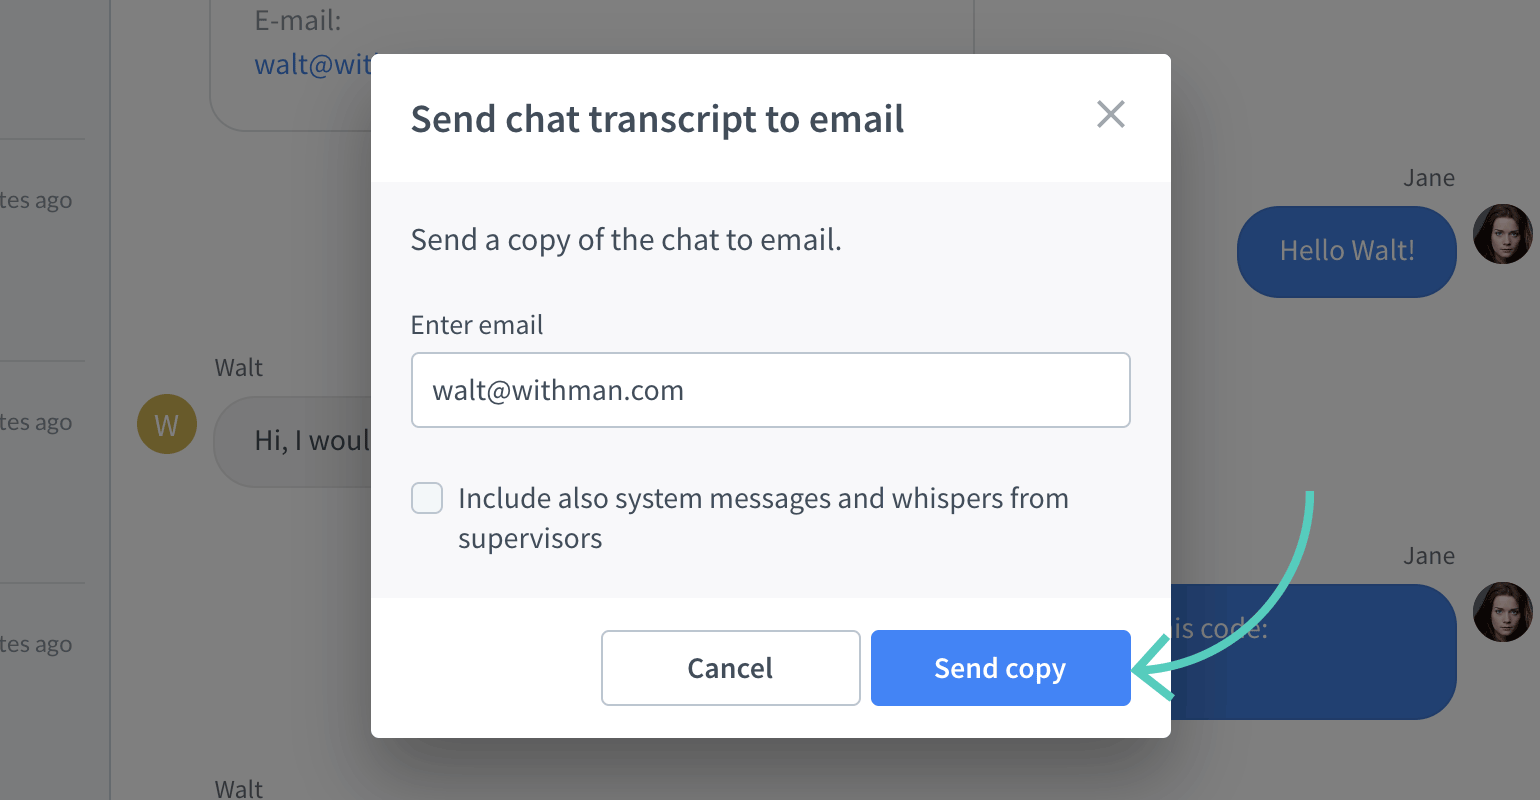
Send a transcript from Archives
First log in to Livechat. Then go to Archives and follow these steps:
1) Click on the three dots icon “…” in the top right corner.
2) Then, click on Send transcript.
3) Click on Send copy (you will have to enter customer's e-mail address if they haven't provided it in the pre-chat survey).
Ban a customer in Archives
First, log in to Livechat. Then go to Archives and follow these steps:
1) Select Ban this customer.
2) Select the number of days the visitor should be banned for.
3) To finalize, select Ban customer.
That's it. You can see the list of all the banned customers in Settings. If you made a mistake, you can always unban a customer.
Add and delete tags in Archives
To assign a tag to a particular chat in Archives, click on add tag in the bottom left corner. Then, choose a tag from a list.
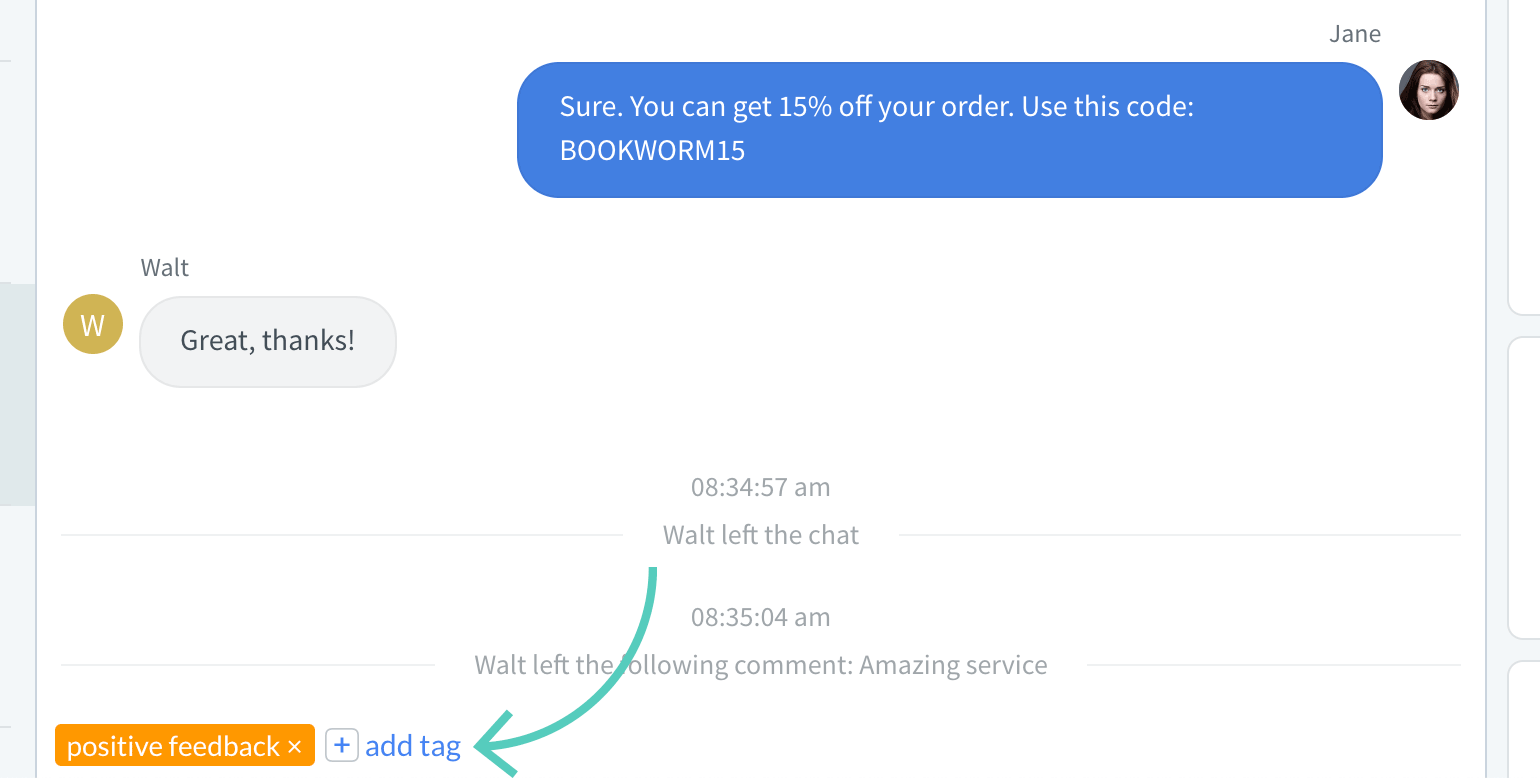
If you want to delete a tag, click on the x icon next to it.
Details
Here you can find a lot of useful information about the archived chat. It’s all stored in one panel so you have all essential data close at hand.
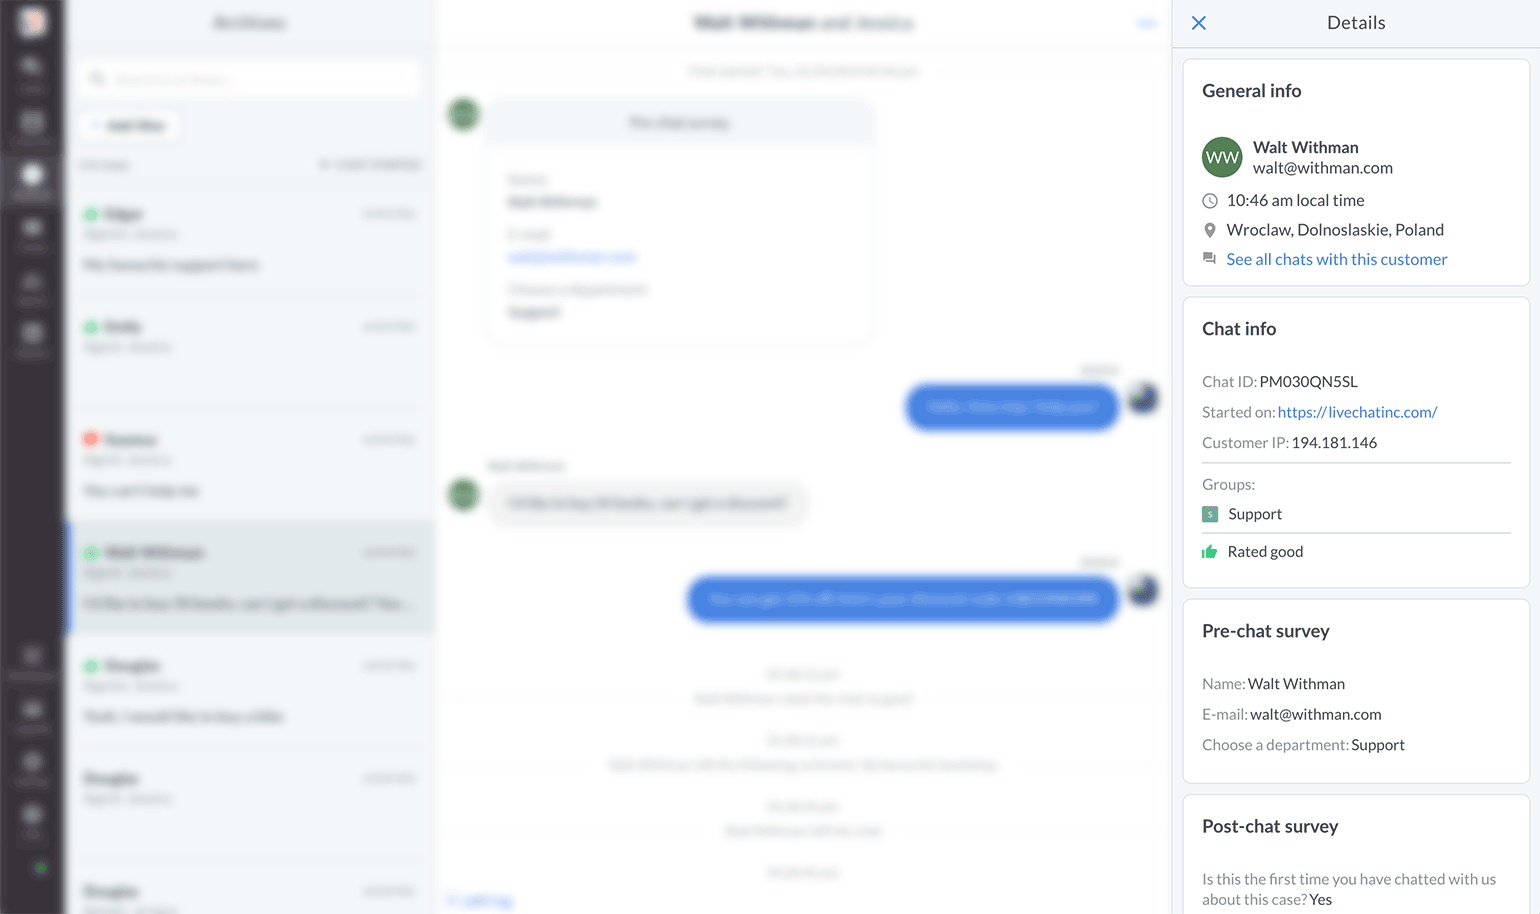
Types of widgets in Details
- General info—shows name, e-mail, and location of a customer.
- Chat info—displays chat ID, queue time, page the chat started on, referring page, customer IP, groups that handled the chat, chat rating and & visitor’s comment, and related tickets.
- Sales and goals—shows sales and goals data for a particular chat.
- Pre-chat survey—provides information entered in the pre-chat survey.
- Post-chat survey—shows information entered in the post-chat survey.
- Custom variables—displays data based on custom parameters.