 Help Center
Follow the instructions to create a Zap adding a LiveChat contact as lead in Close.io after the chat is finished.

Creating the Close.io - LiveChat Zap
Creating a Zap consist of three main parts:
You can use a ready-made Zap template to set up this integration. Check it out in LiveChat Zapbook.
Setting up LiveChat trigger
1) Log in to Zapier and click on Make a Zap in the upper menu.

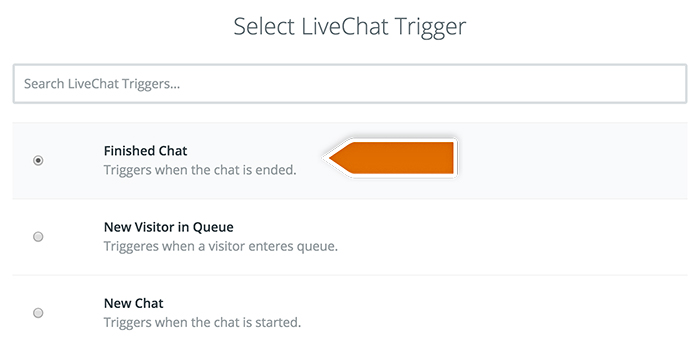
2) Choose LiveChat as the Trigger App.
3) Select Finished Chat as the Trigger.
4) Click on Save + Continue to proceed.{
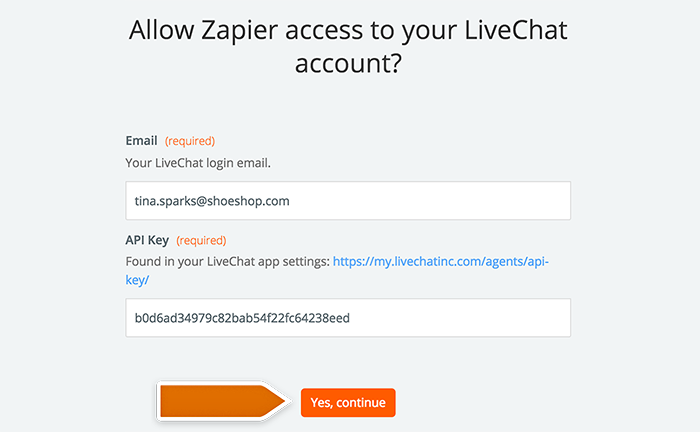
5) Click on Connect a New Account and then provide your LiveChat login email and the API key. Next, click on the Yes, continue to accept.
6) You can rename the account and then click on Save + Continue.
7) Select Fetch & Continue to test this step and make sure it is working properly.
Configuring the action in Close.io
8) Choose Close.io as Action App.
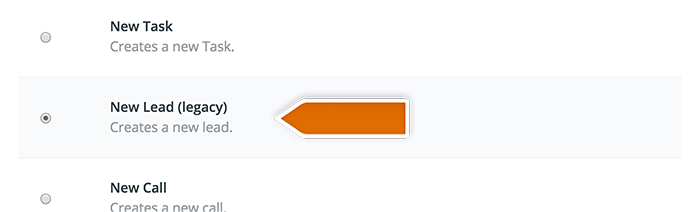
9) Then choose New lead (legacy) as the action and confirm by clicking on Continue.
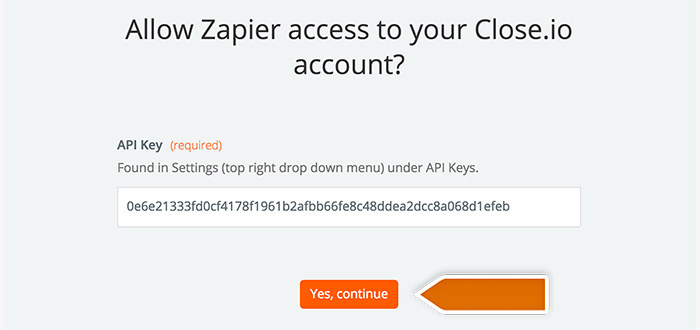
10) Grant Zapier permissions to access the Close.io providing your API key in the pop-up window.
11) Select your Close.io account and confirm the choice by clicking on Continue.
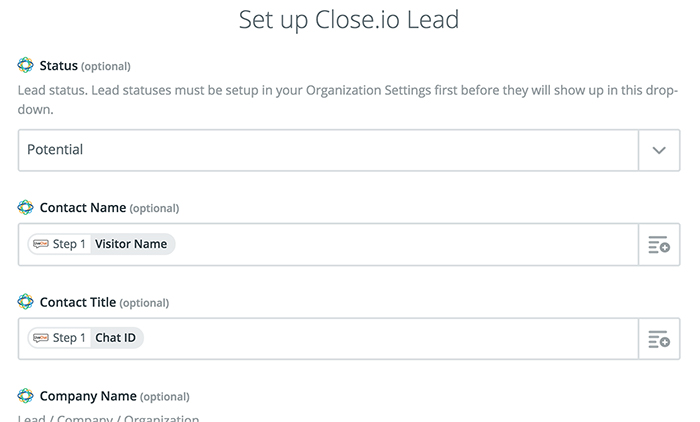
12) Next, set up which data will be passed to Close.io account.
13) After you finish, click on Continue button down the page to proceed.
14) Zapier will ask you to test the Zap. Follow the instructions to make sure your Zap is working correctly.
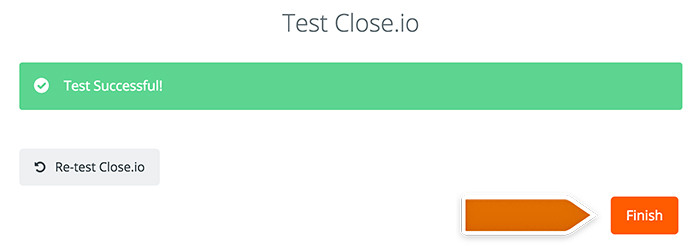
15) Next, click on the Finish button.
Launching the Zap
16) Turn the Zap on by clicking on the grey switch and start passing information from LiveChat to Benchmark.

Well done! You have just linked your LiveChat with Close.io through Zapier. At the end of each chat, it will save the info about your visitor and add it as a new lead in Close.io.