 Help Center
Joomla!: add LiveChat to your website and make sure that no visitor will stay unattended!
Our plugin works with Joomla! 2.X and above. If you are using an older version, click here to download the plugin for Joomla! 1.5
- Installation - learn how to install LiveChat plugin in Joomla!;
- Configuration - learn how to configure plugin and link your LiveChat account with Joomla!
Installation
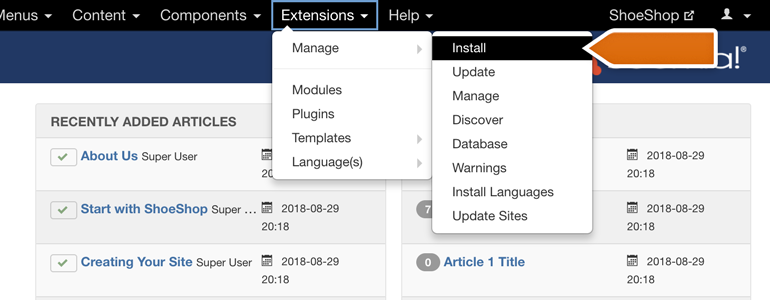
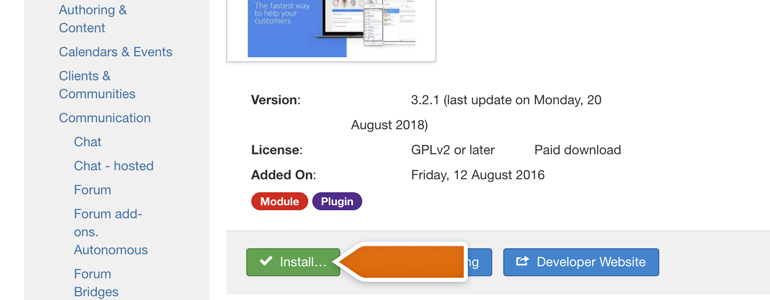
1) First, log into your Joomla's administration panel and click on Extensions, available on the top right section. From there, pick Manage > Install.
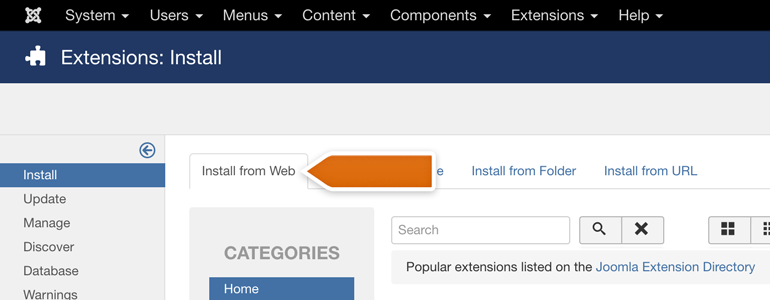
2) On the Install section, go to the Install from Web category.
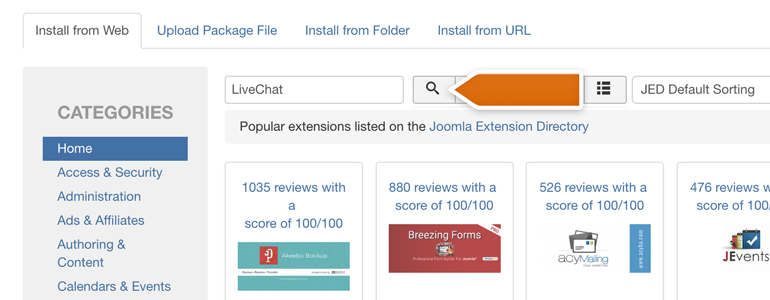
3) From the list of available plugins, look for LiveChat. To make things easier, type LiveChat in the search tool and click on the Search button.
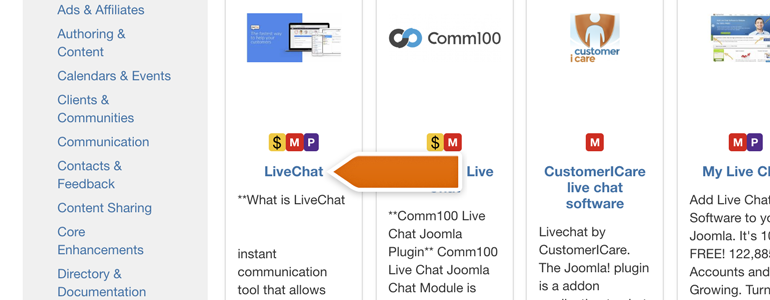
4) All you have to do now is to click on the LiveChat card, available in the search results below.
5) You will see a LiveChat installation page. To proceed with the installation, click on the Install button.
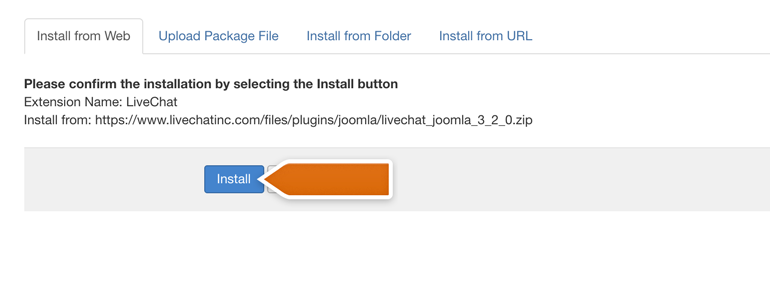
6) Joomla will now redirect you to a page where you have to confirm your installation. To do that, as odd as it may sound, you have to once again click on the Install button.
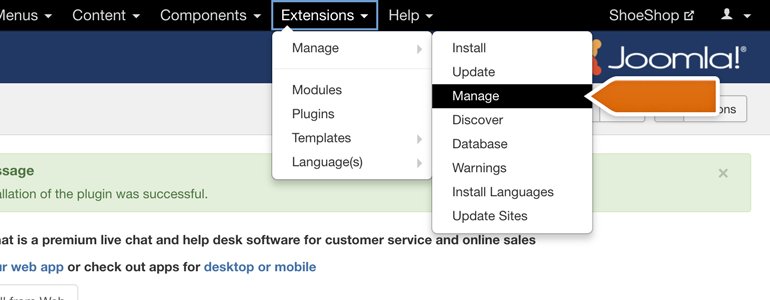
And that's it! Your LiveChat plugin is now installed, and it is time link it with your LiveChat account. To learn how, check out the chapter below.
Configuration
1) To configure the LiveChat plugin, go to Manage section, available under the Extensions menu.
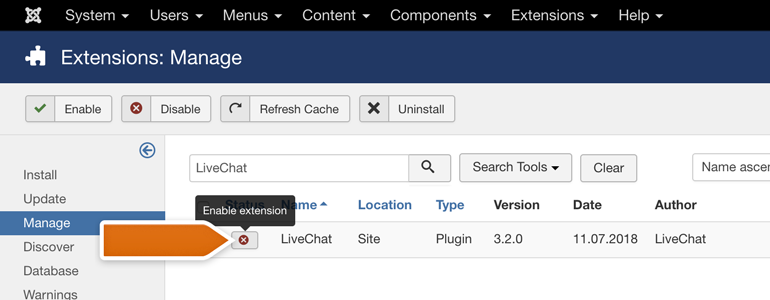
2) From the list of available modules, look for LiveChat and click on the Enable extension icon to enable the extension.
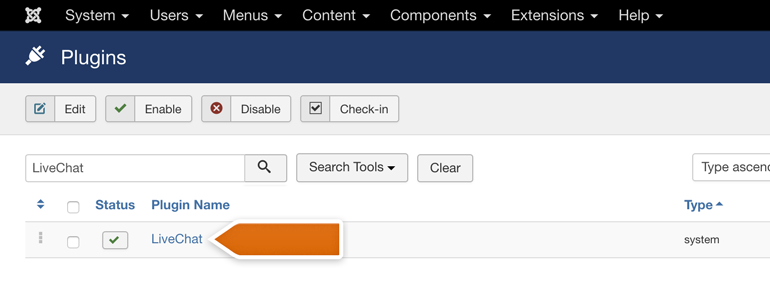
3) Now, go to the Plugins section, available under the Extensions menu in your Joomla administration panel.
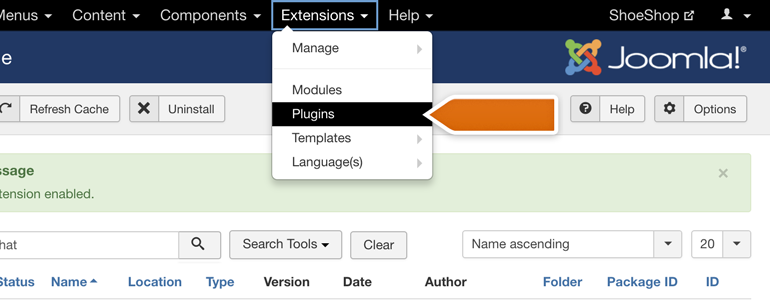
4) While in Plugins section, look for LiveChat and click on the plugin to proceed with the configuration.
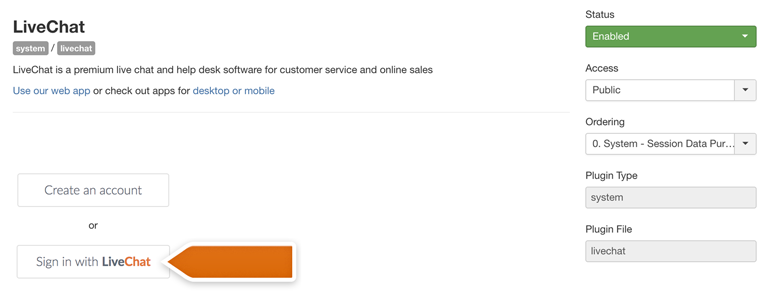
5) We're almost there! To link your LiveChat account with Joomla, click on Sign in with LiveChat button.
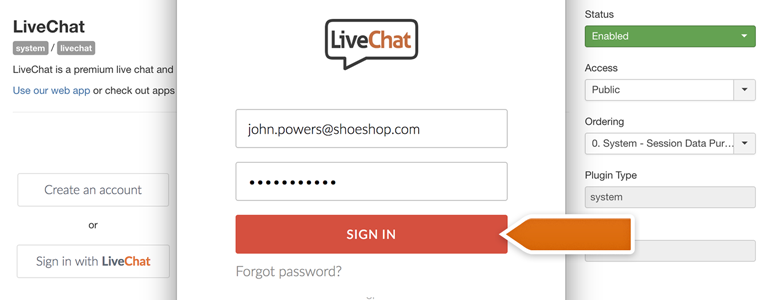
6) You will be prompted with a new window, asking you to log into LiveChat. To proceed, provide your LiveChat credentials and click on Sign in.
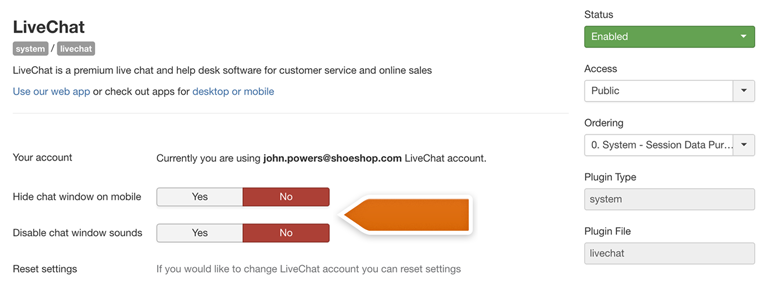
7) Now is the time to decide if you'd like to enable additional options offered by LiveChat plugin. With additional options, you can:
- Hide chat window for visitors browsing through your website on mobile;
- Disable the sound notifications played by a chat window on your website.
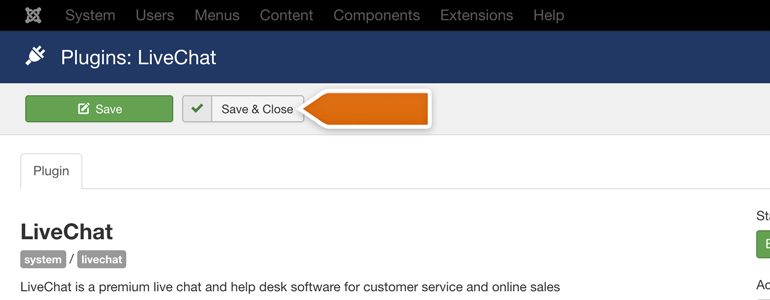
8) Now that your LiveChat account is linked with Joomla and the advanced options are all in place, there is just one more thing to do. Simply click on the Save & Close button available at the top of the plugin.
And that's it! Now LiveChat is added to your Joomla, and you can start providing your customer with the excellent support! Hopefully, you have found this article helpful but if you have any additional questions, feel free to start a chat with us - we are available 24/7/365!