 Help Center
Add LiveChat to as many sites as you wish without any extra charges. Keep the chat widget look consistent through all pages and sites. Or customize it on a page-to-page basis. Use groups to route chats from specific URLs to responsible teams (requires Team plan or higher). All that so you handle all chats using one LiveChat license.
Add LiveChat to multiple sites
Setting up LiveChat for multiple websites consists of a few quick steps. First, you need to add LiveChat code to your websites. Then, create groups and configure URL rules. Finally, change how the chat widget looks and behaves on specific pages.
Add LiveChat code snippet to your websites
1) Go to Settings > Channels > Website and click on Copy code.
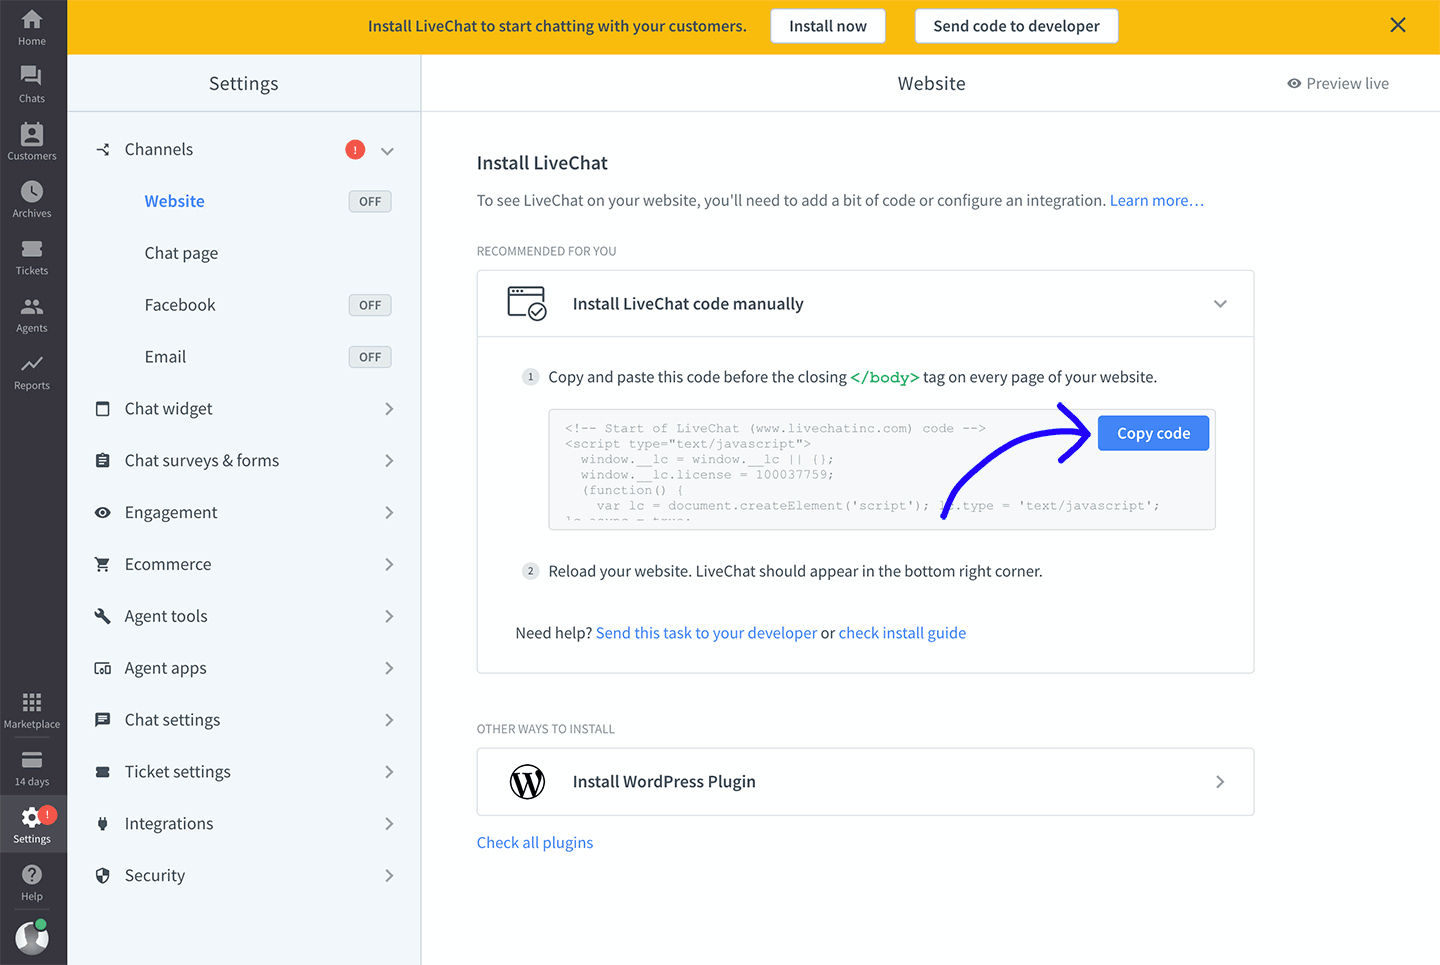
2) Paste the code snippet to your site's source code before the </body> tag.
Remember to add the code snippet to all websites you want to install LiveChat on.
If you are using a LiveChat plugin for a CMS or an e-commerce platform, there is no need to add the code manually to your website. It is automatically added when you install the plugin.
Create groups
1) Go to Agents > Groups and click on Add new group.
2) Choose a name for the group (like the website's name), add members and hit Save changes.
Repeat the steps above to create groups for each of your websites. Learn more about groups in LiveChat from this article.
Configure URL rules
If you are using the Routing rules configurator, click here for the instructions.
Once you've created a group for each website, you might want to route chats coming from certain sites (or pages) to a specific group. This way your agents will immediately know where the chat is coming from. Here's how to do it:
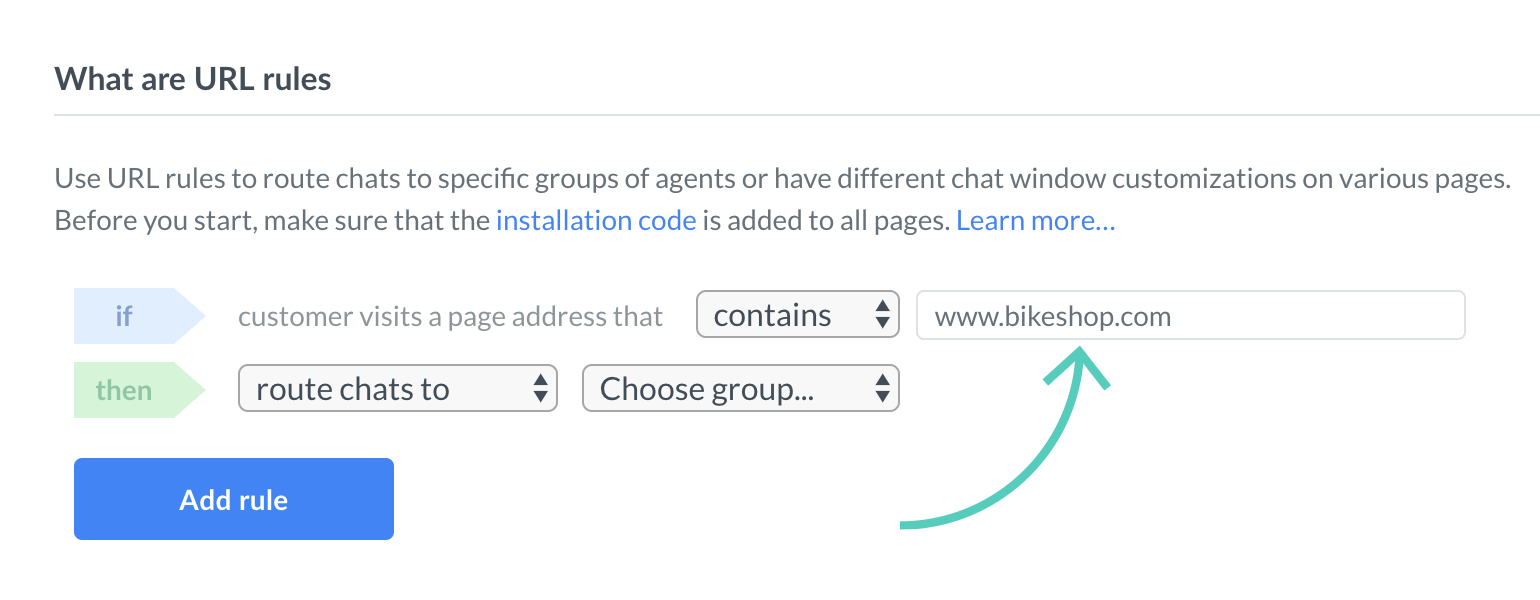
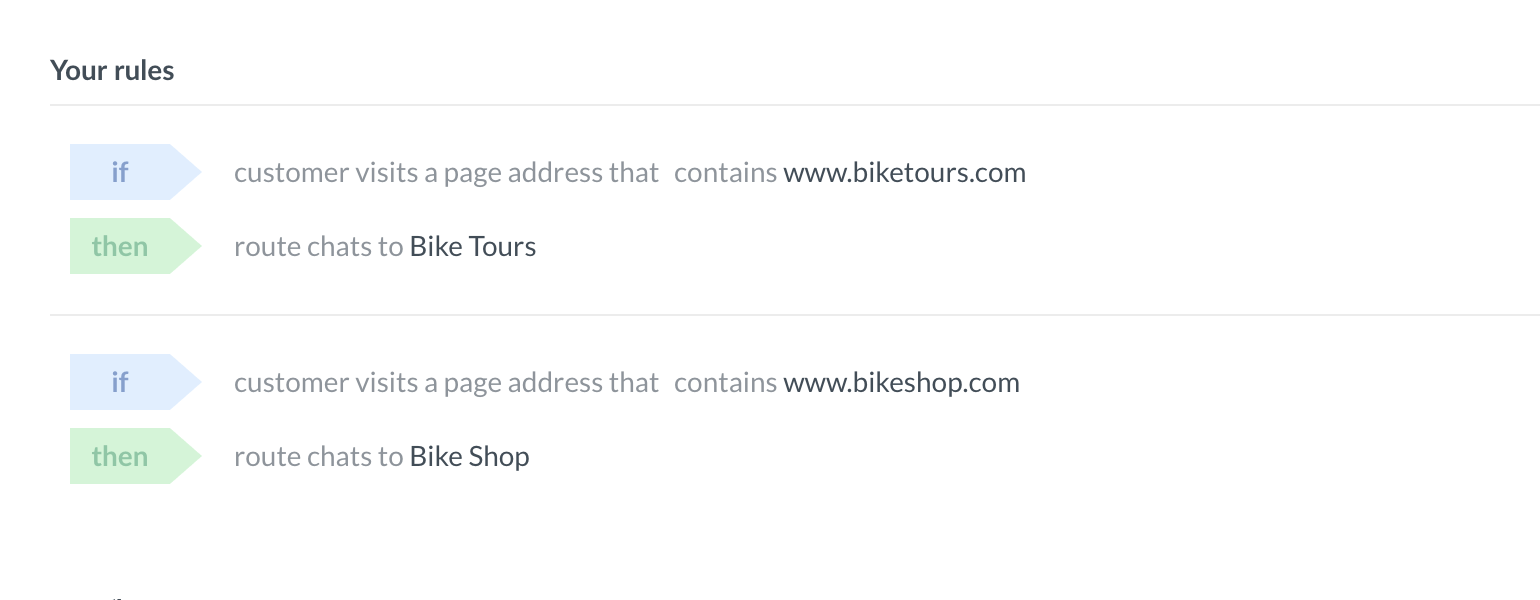
1) Go to Settings > Chat settings > URL rules and click on Add your first rule.
2) Enter the URL of the website you want to assign to a particular group. This can be a partial (contains) or an exact match (is exactly). Choosing the partial match will let you cover the whole website with just one rule.
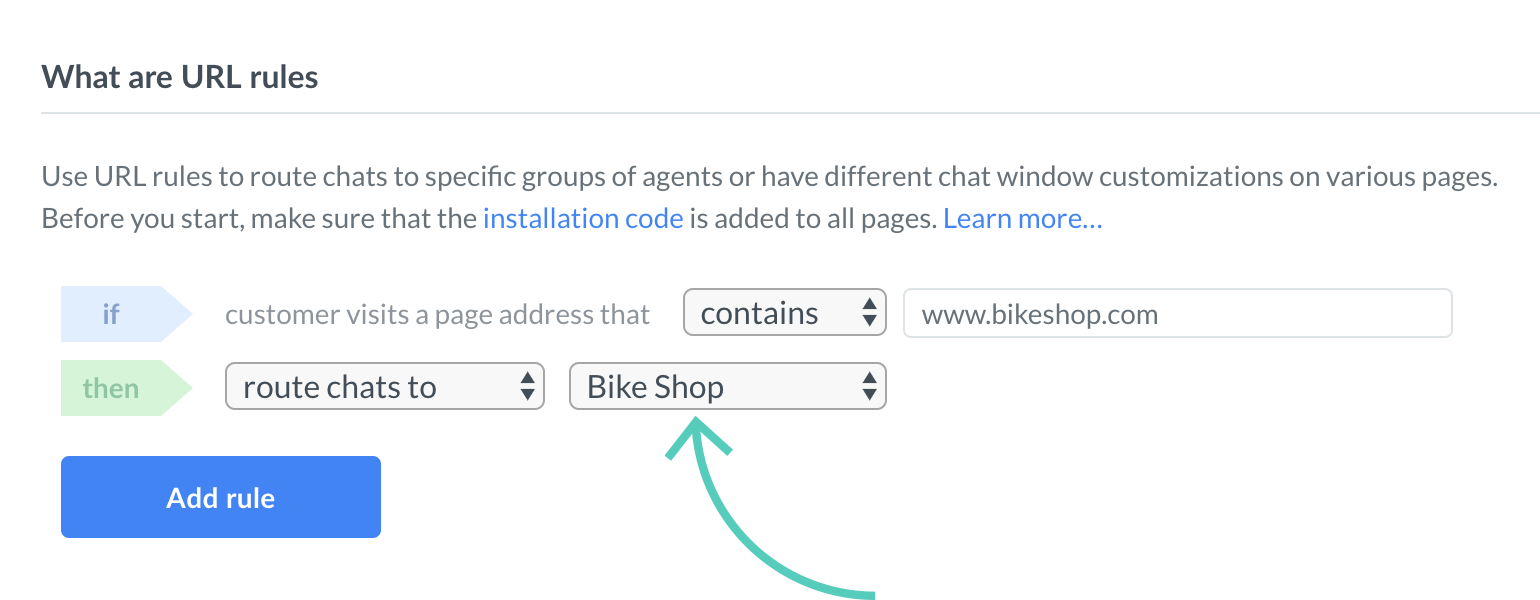
3) Next, select which group will be responsible for the website.
4) To finalize, click on Add rule.
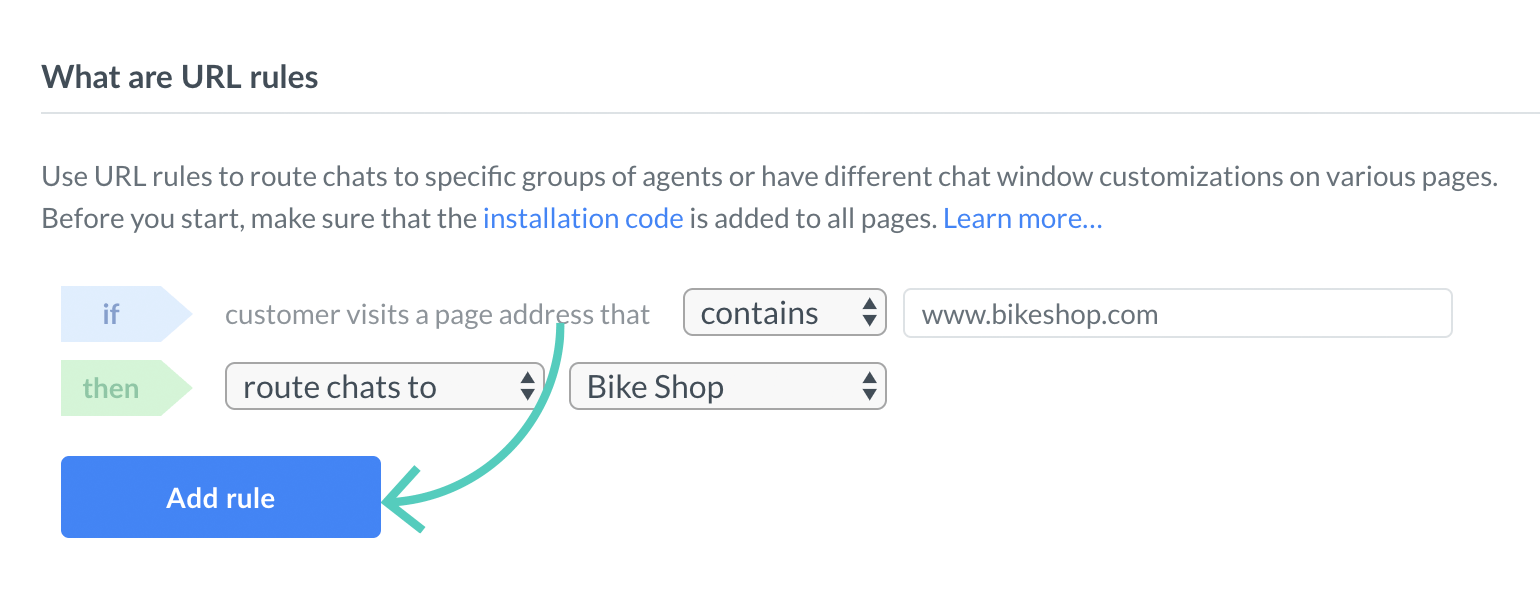
Add URL rules for all your sites. Chats started on those websites will be routed to the corresponding groups.
To learn more about URL rules, take a look at this article.
Edit settings for a particular group {#editing-particular-group}
After you've created groups and assigned them to sites via URL rules, you can edit settings for each group. So that the chat widget looks and behaves in a way that matches your website’s design.
The following settings can be edited for a group:
- Customization—change the look and feel of the chat widget on both desktop and mobile versions of your site.
- Language—set the language and personalize chat widget messages.
- Pre-chat survey—edit pre-chat survey settings.
- Post-chat survey—change post-chat survey settings.
- Queued visitor—personalize queued visitor message.
- Ticket form—edit ticket form settings.
- Greetings—set and edit greetings.
- Eye-catcher—choose from a gallery or add your own eye-catcher.
- Chat buttons—add a chat button to your site.
- Canned responses—add and edit canned responses.
- Tags—add and edit tags.
- Email—forward your support e-mail to LiveChat.
- Email notifications—set automated emails to visitors.
Let's look at an example of how to change Customization settings for a group:
1) First, go to Settings > Chat widget > Customization.
2) Click on the Setup for group dropdown and pick a group.
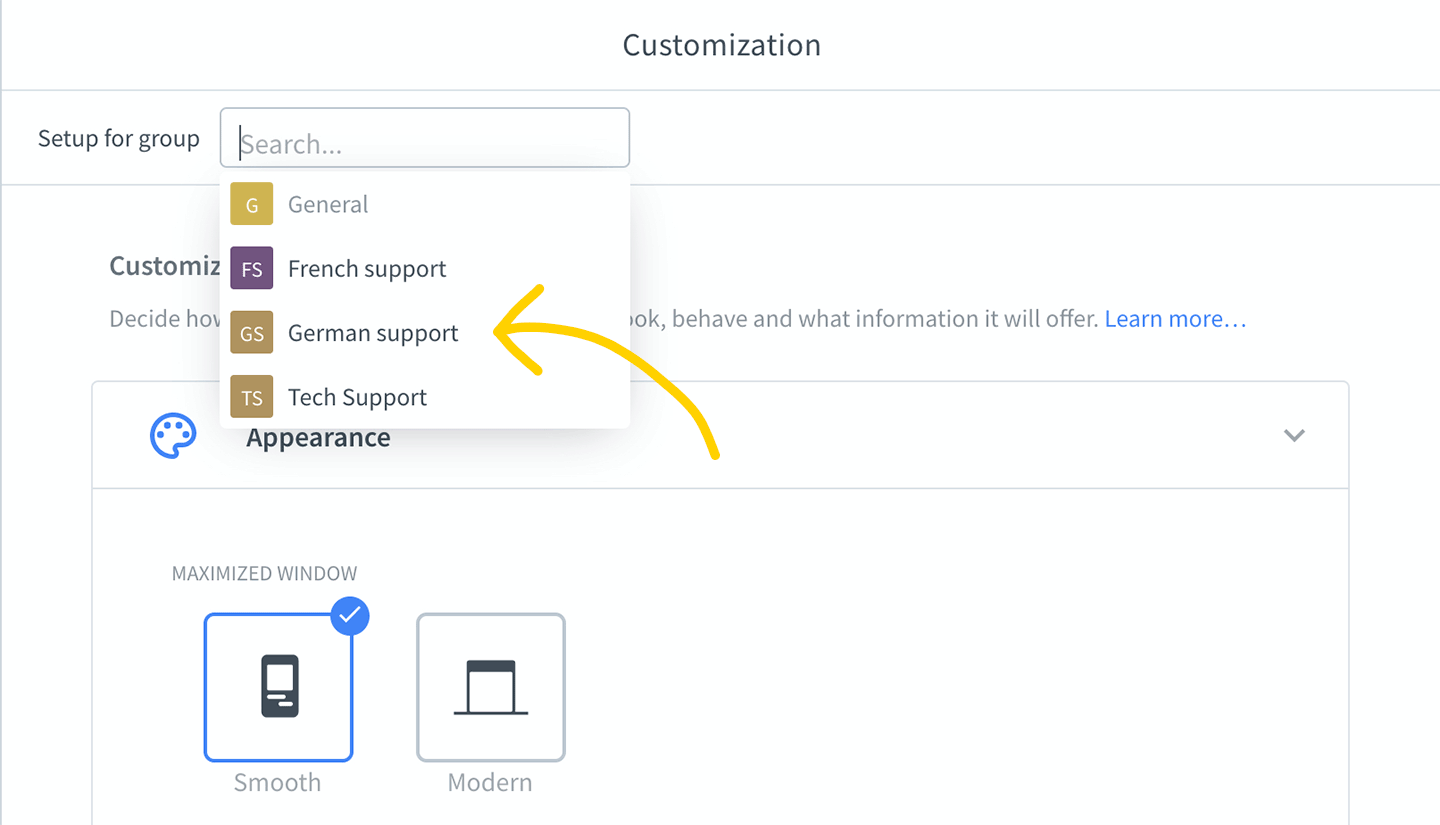
3) Start customizing the appearance of the chat widget - changes will be applied only to the group that you have chosen.
4) When you are finished, click on the Save changes button, and they will be reflected on a website to which you have assigned this group (based on URL rules).
If the changes are not reflected on your website immediately, this is due to the previous chat session cached on your web browser. Clear the cache of your web browser or visit your website in Incognito/Private mode to see the changes right away.
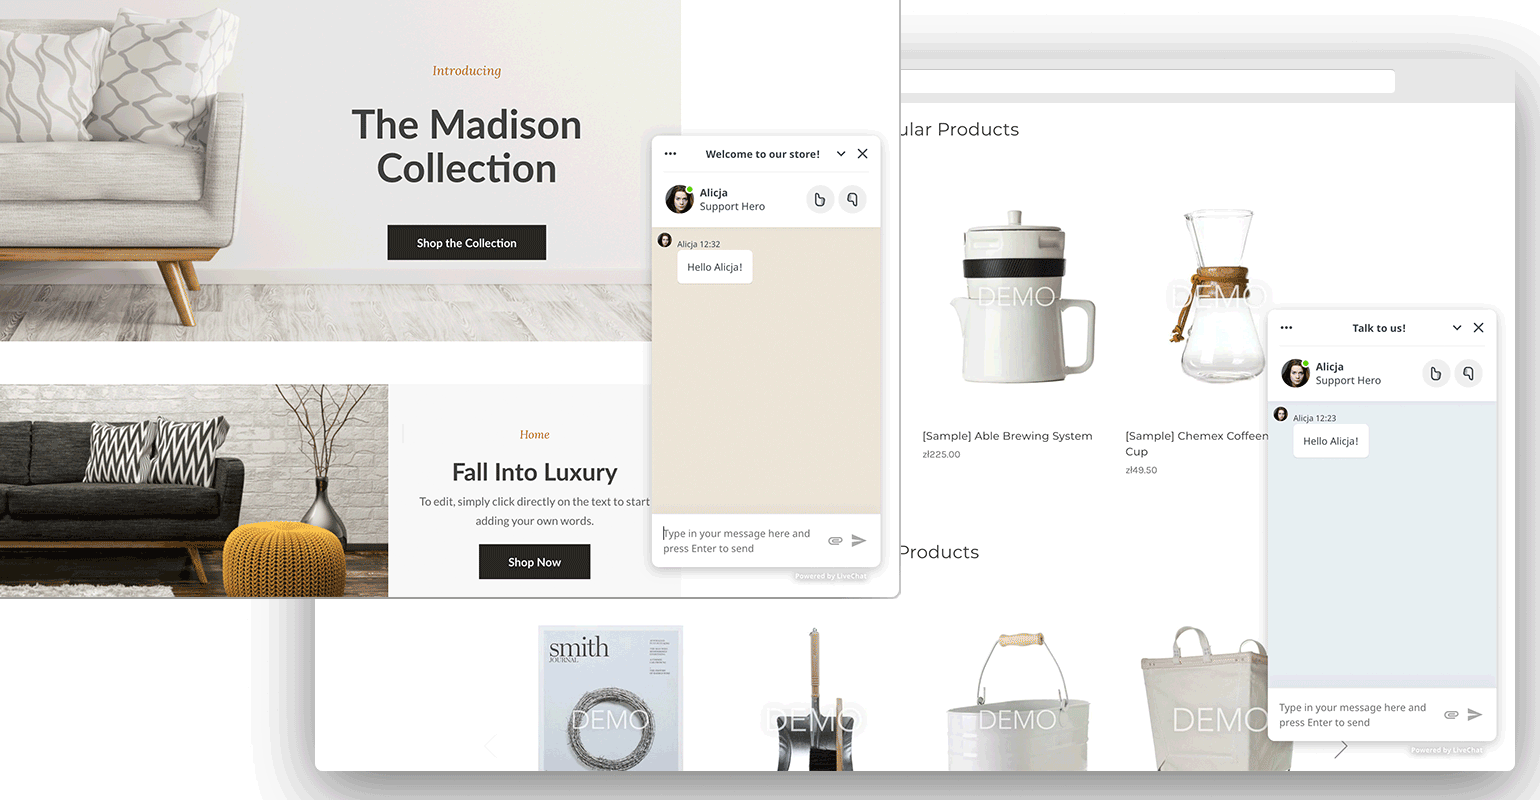
Separate chat sessions for different websites
Using LiveChat on multiple websites, you may want to offer a separate chat option for each of those websites. For example, if you run several e-commerce sites selling different products, you'd want to offer a different chatting experience on each of those sites.
By default, when a customer starts a chat on one of your sites and opens your other site, the same chat session will be loaded. The chat session is not restarted to offer the customers a seamless experience as they navigate through your site.
Set separate chat sessions
To change that behavior and separate chat sessions between different sites or pages, add the following line of code to your LiveChat tracking code:
window.__lc.chat_between_groups = false;
After you add this piece of code, a customer who visits several of your websites will be able to start several separate chats instead of getting the same chat window on each site.
Here's what an example LiveChat tracking code looks like when you add the above line of code:
<script type="text/javascript"> window.__lc = window.__lc || {}; window.__lc.license = 1946330; window.__lc.chat_between_groups = false; (function() { var lc = document.createElement('script'); lc.type = 'text/javascript'; lc.async = true; lc.src = ('https:' == document.location.protocol ? 'https://' : 'http://') + 'cdn.livechatinc.com/tracking.js'; var s = document.getElementsByTagName('script')[0]; s.parentNode.insertBefore(lc, s); })(); </script>
To ensure correct functioning, please make sure to add the line of code to all sites with LiveChat code installed.