 Help Center
With Magentrix integration, you can add tickets to your Magentrix dashboard directly from the chat - this is possible with a simple integration through Zapier.
In this tutorial you'll find instructions on how to create the Magentrix Integration by creating a Zap it will allow you to add a Ticket from chat to your Magentrix dashboard.
Creating the LiveChat - Magentrix Integration
Creating this Zap consists of three main parts:
- Setting up the trigger - choosing an event that will start data passing
- Configuring the action - setting up what will happen in the target app
- Launching the Zap - turning the integration on
Setting up the trigger
First, set up a rule on which the information will be passed from LiveChat.
1) Log in to Zapier and click on Make a Zap in the upper menu.
2) Choose LiveChat as the Trigger App.
3) Select New Ticket as the Trigger.
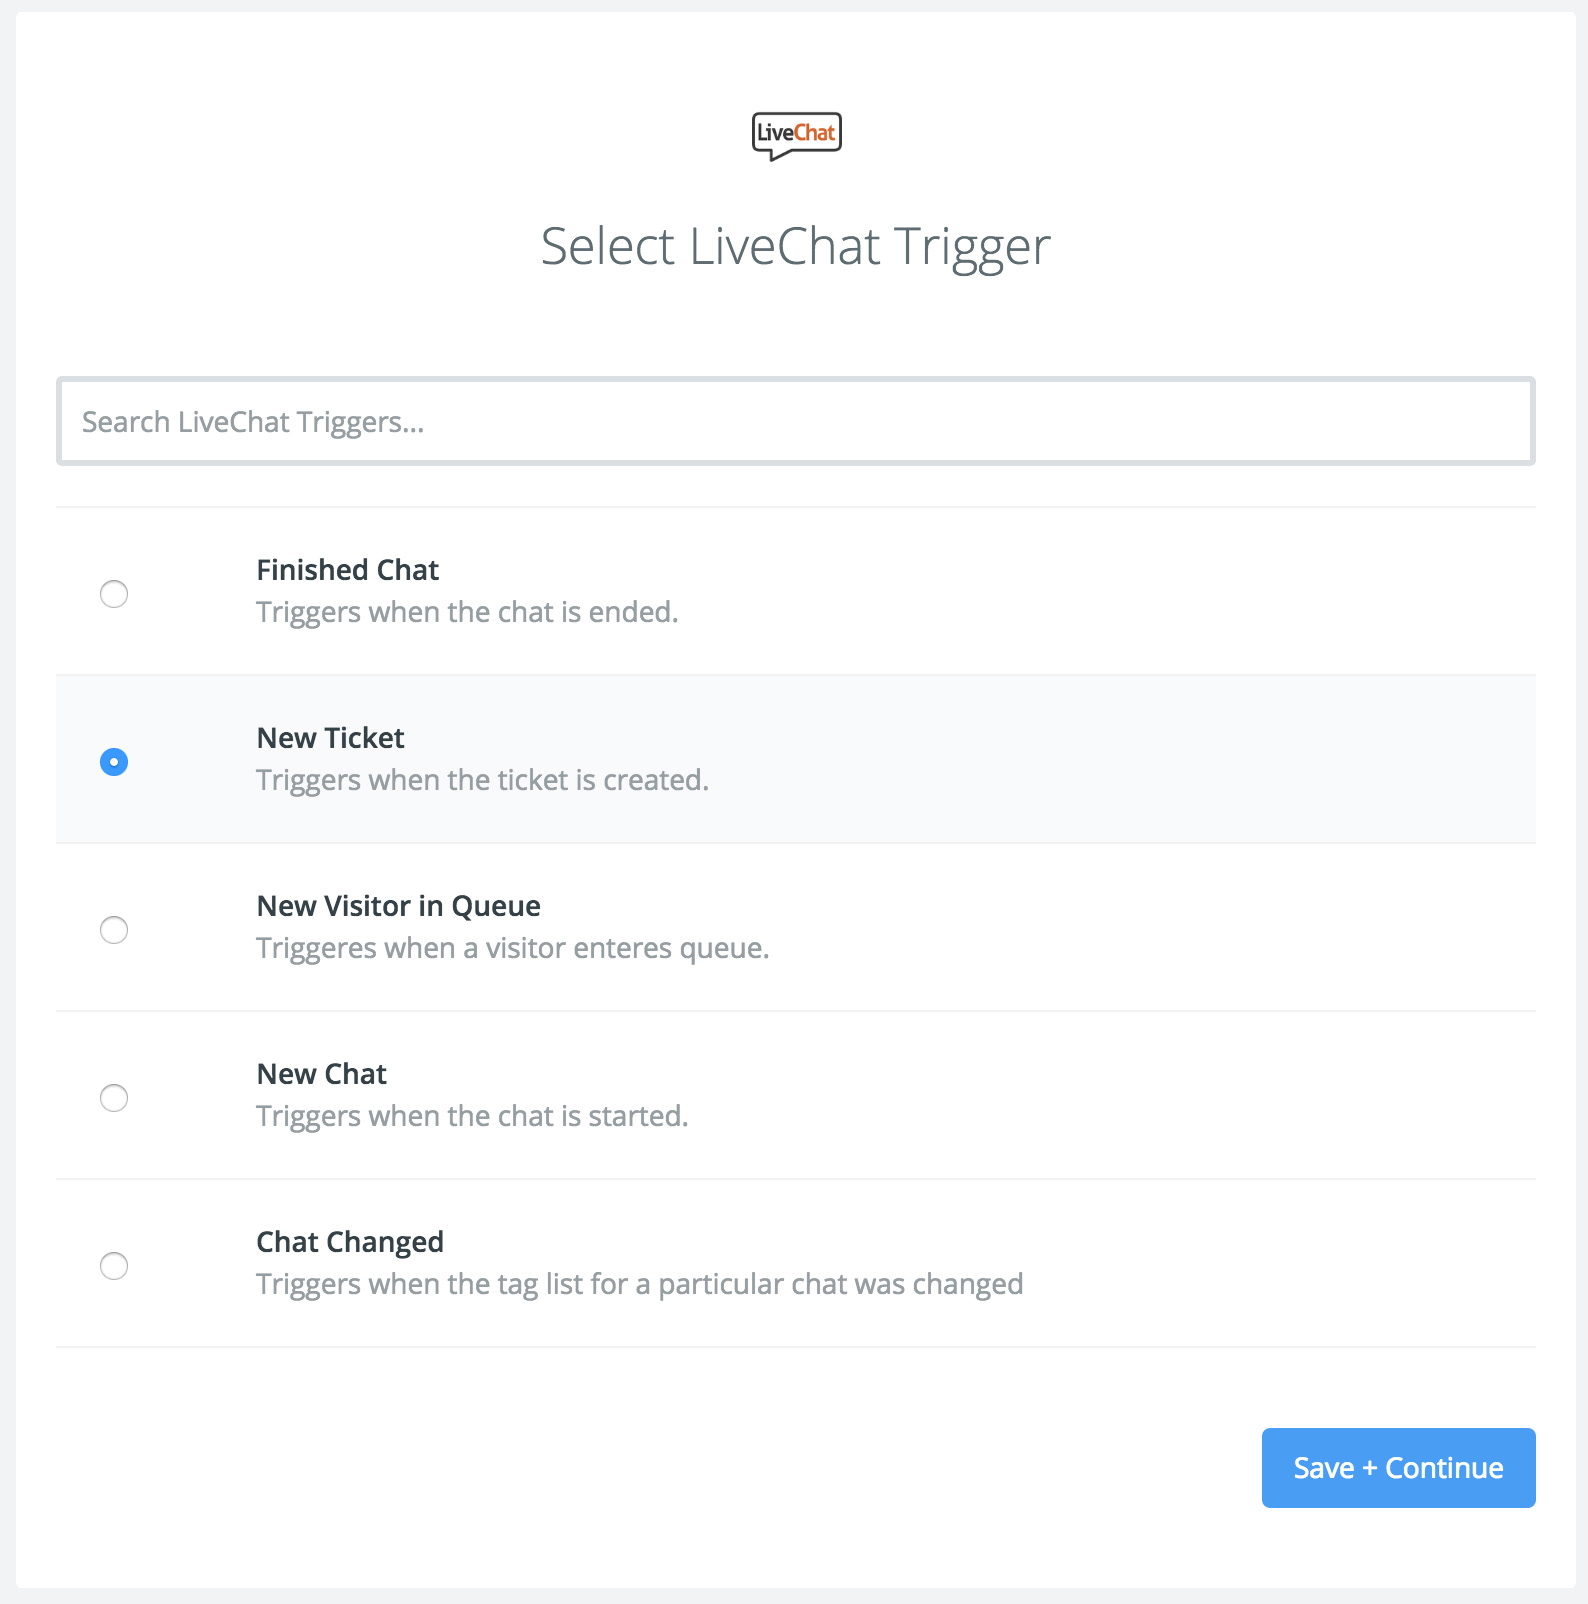
4) Click on Save + Continue to proceed.
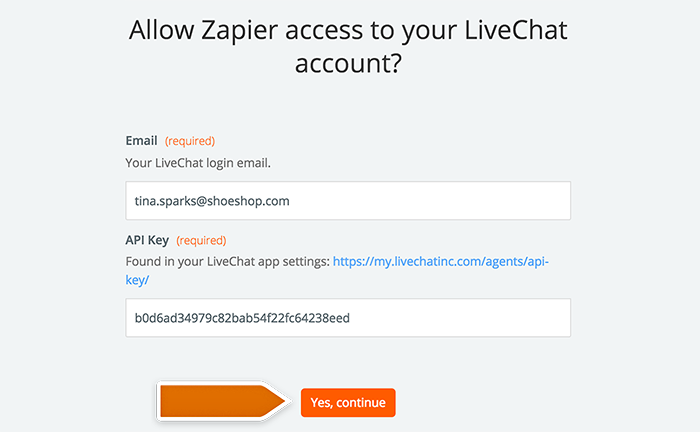
5) Click on Connect a New Account and then provide your LiveChat login email and the API key. Next, click on the Yes, confirm to accept.
6) You can rename the account and then click on Save + Continue.
7) Select Fetch & Continue to test this step and make sure it is working properly.
Configuring the action
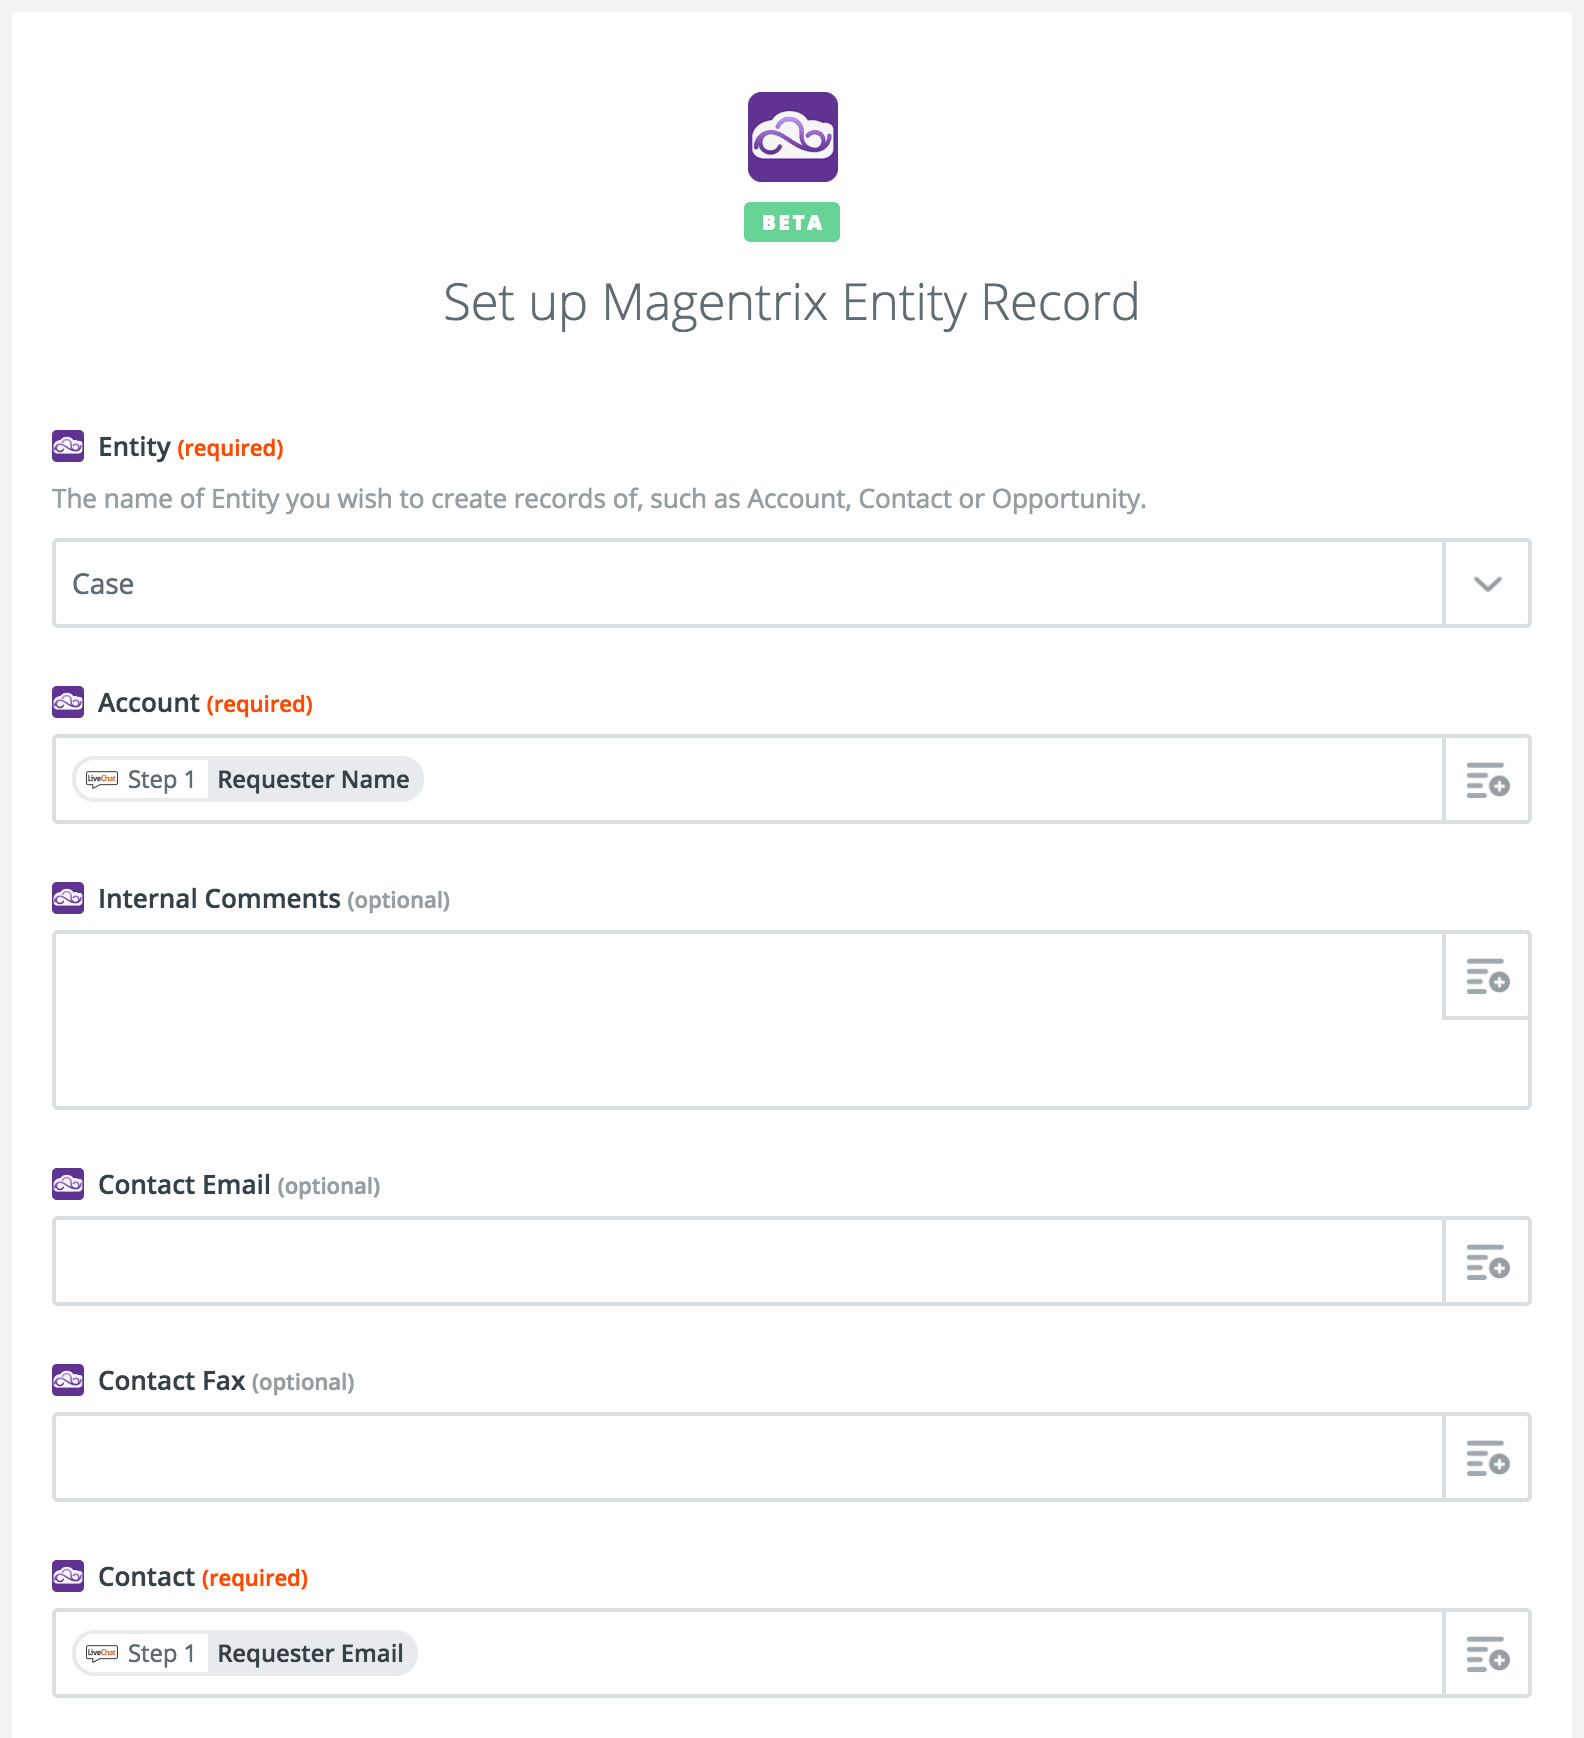
Now it is time to create Entity Record that will be passed from LiveChat to Magentrix
8) Choose Magentrix as Action App.
9) Then choose Create Entity Record as the action and confirm by clicking on Continue.
10) Click on Connect to a New Account button to add your Magentrix. In the new pop-up, provide your Magentrix Instance URL, your Username and Password. Confirm by clicking on Yes, continue button.
11) Select your Magentrix account and confirm the choice by clicking on Save + Continue.
12) Next, choose Case as the Entity that you would like to pass and map required and other available fields.
13) After choosing data, click on the Continue button at the bottom of the page.
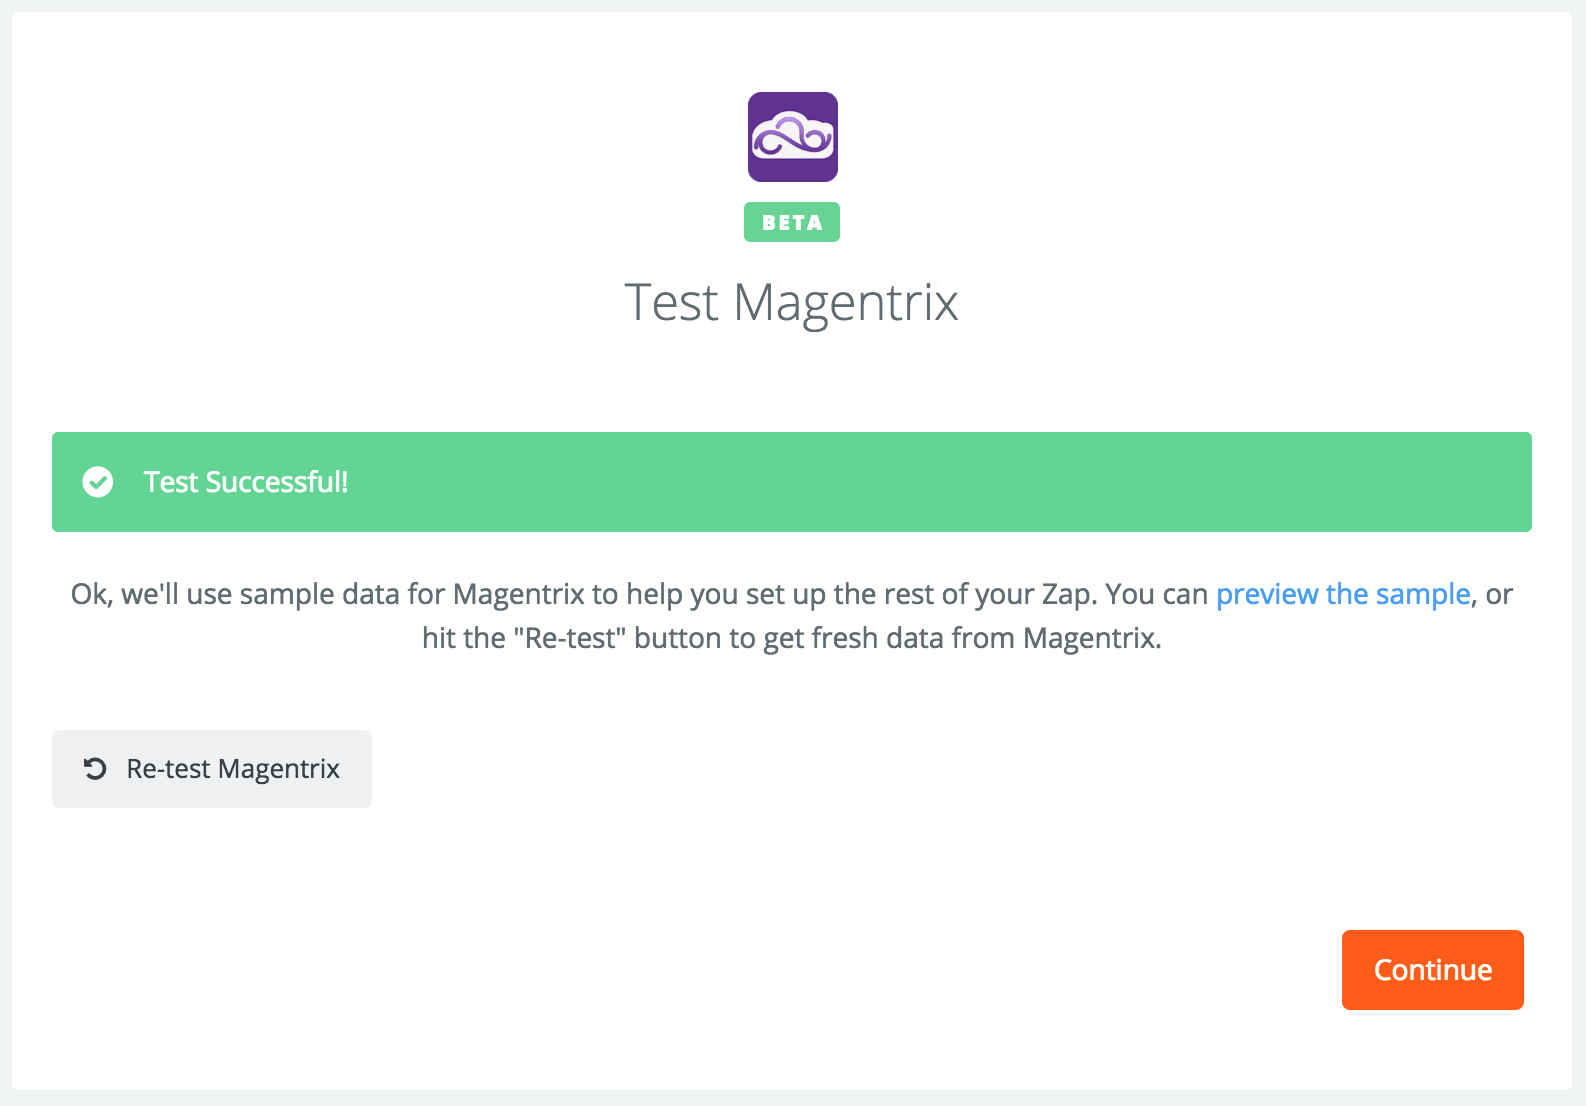
14) Zapier will ask you to test the Zap. Follow the instructions to make sure your Zap is working correctly...
15) Next click on the Continue button.
Launching the Zap
If all tests went green, it is time to enable your new Zap.
16) Name your Zap and enable it by clicking on the grey switch - that will start passing the information from LiveChat to Magentrix dashboard.
Done! Now, each time you will create a new ticket, a new Case will be created in your Magentrix dashboard.