 Help Center
If you are planning on using your LiveChat in a team, you will need to invite your teammates. You can do it either manually or through an invitation link. Creating a profile for each teammate not only lets you track individual statistics but also group agents based on their skills and tasks.
Add agents
Note that, agent’s email address cannot be changed. If an agent needs to change the login email, owner or administrator will need to add a new agent account in the Agents section. Then the account set up for the old email can be deleted.
All admins and the account owner can invite other teammates to join their LiveChat account. You can do it by:
Sending e-mail invitations
To send e-mail invitations you need to add your teammates' e-mail addresses manually. Here's how to do it:
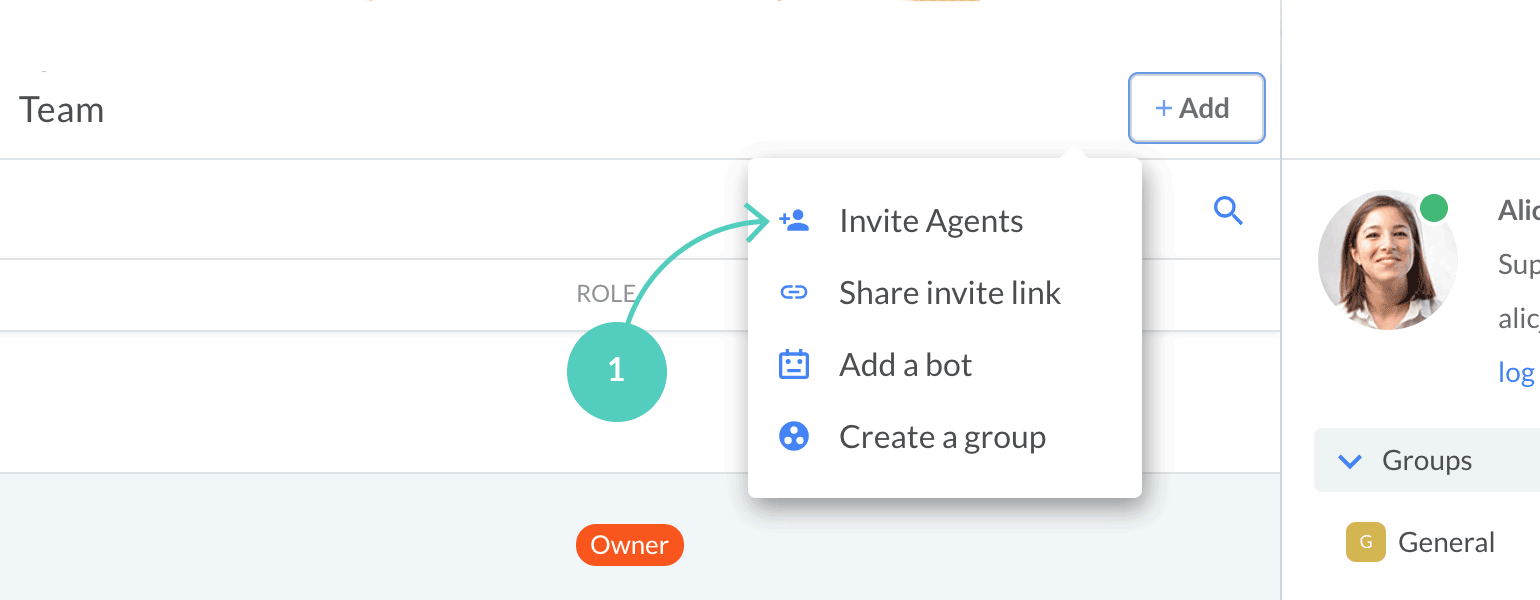
1) Go to the Agents section, click +Add in the top right corner, and select Invite Agents.
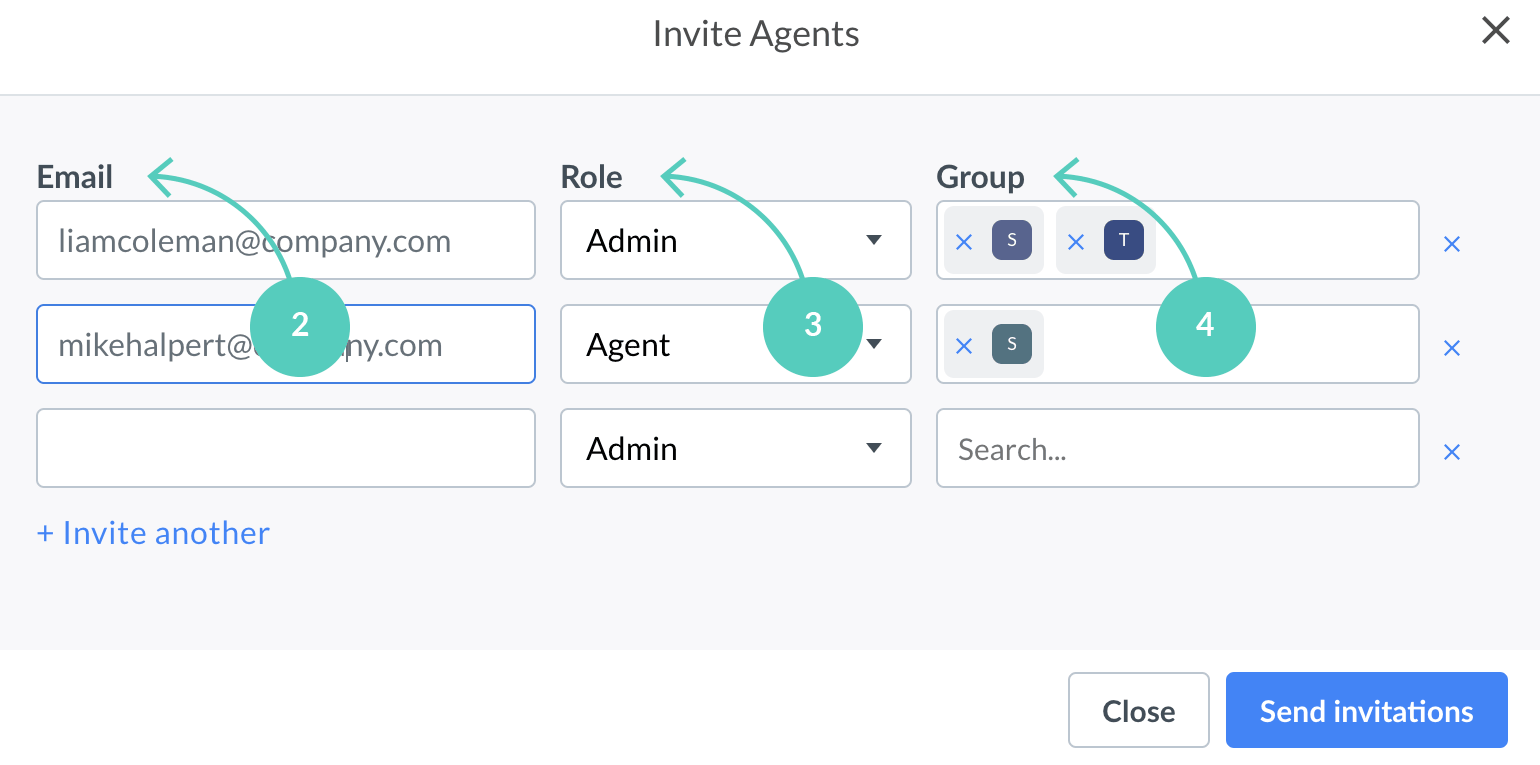
2) Provide your teammate's e-mail (an invitation will be sent to this e-mail address).
3) Select their role.
4) You can assign them to a group as well (optionally).
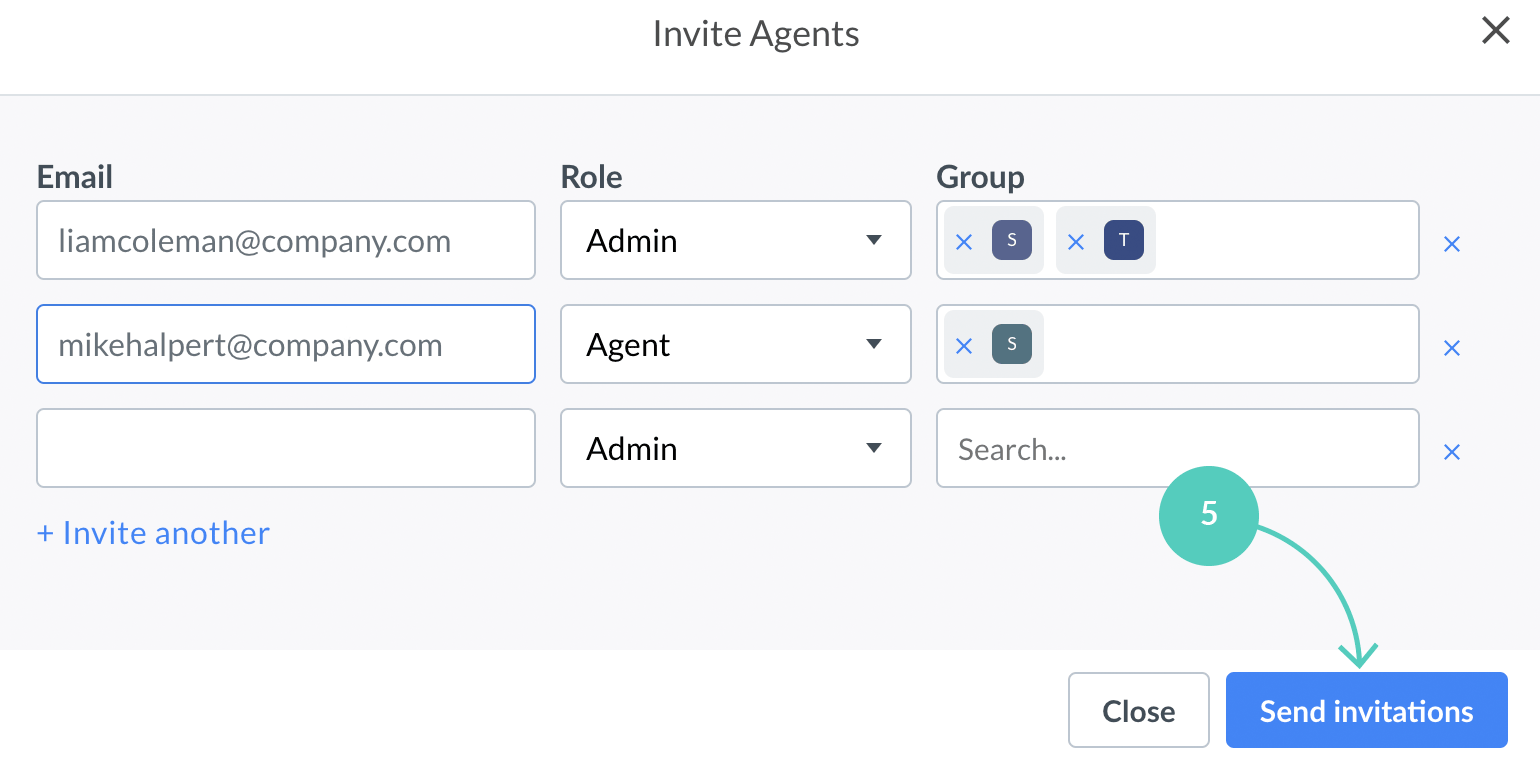
5) Once you've added all teammates you wanted to invite, hit Send invitations.
6) Your teammates will receive an invitation email with a verification link. This link redirects to a login page where the agent can choose a password and sign in.
Resending the invitation e-mail
In the Agents section, you can see which teammates have already set up their account through your invitation, and which have not. If it is necessary, you can resend the invitation easily.
If you want to find out who hasn’t set up an account yet go to the Agents section and click on Logged On. The column will sort agents by their current status. Look for the ones with the status: Pending.
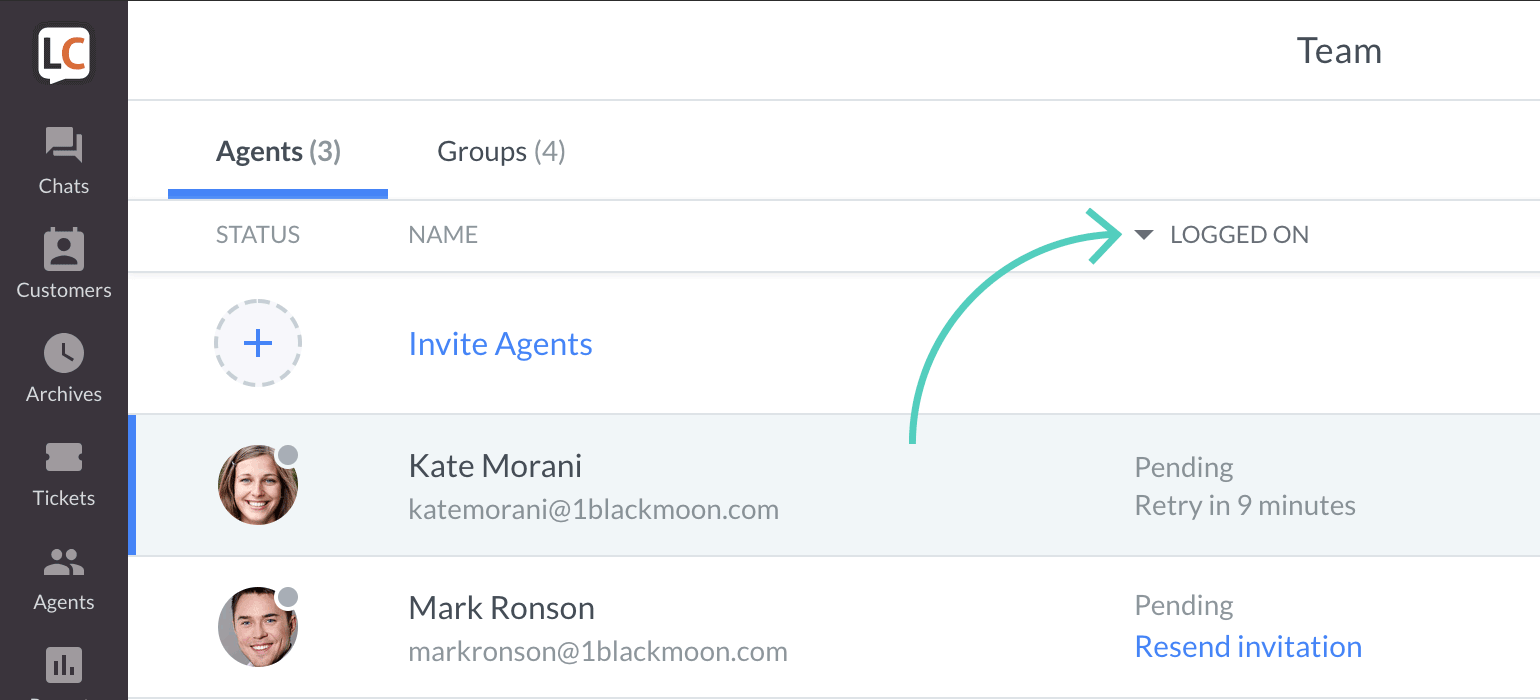
If you want to send the invite again, click on Resend invitation (you will need to wait 10 minutes to resend it again).

Sharing an invite link
If you have an entire team waiting to join you in LiveChat, it might make more sense to send them an invitation link instead of adding them one by one.
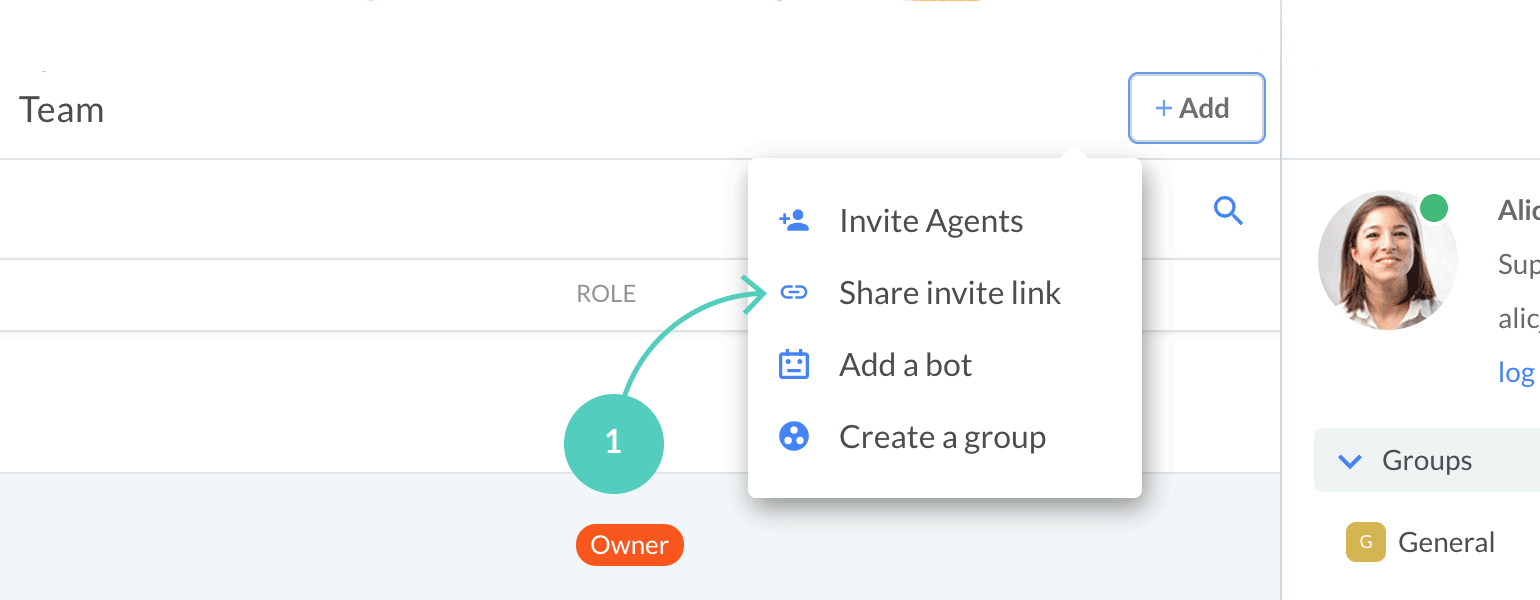
1) First, go to the Agents section in the LiveChat app. Click on +Add in the top right corner and select the Share invite link option.
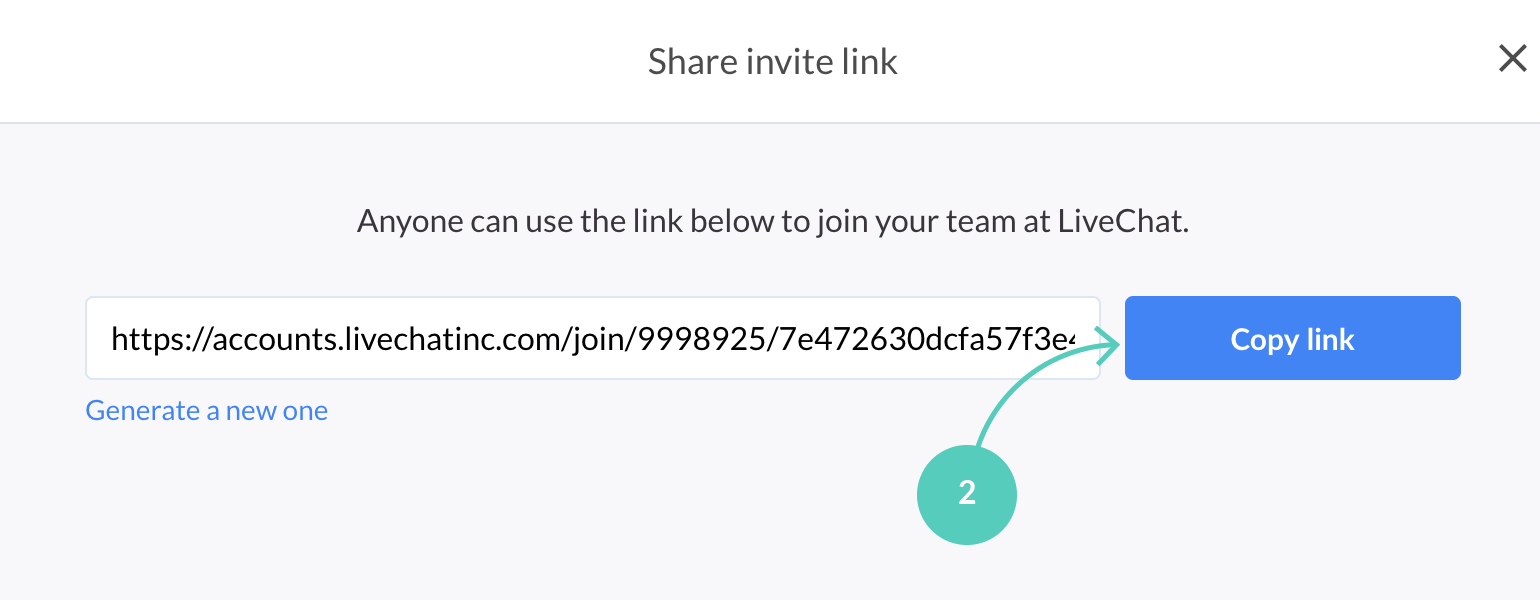
2) You will see a window with your invitation link. Hit the Copy link button and share the link with your teammates.
3) When your teammate follows the invite link, they will see a sign-up form. They need to provide their e-mail, full name, and a password.
4) After submitting all the information and clicking on the Join your team button, they will be redirected to their LiveChat account.
And that’s it! You’ve just invited your teammates via the invitation link.
How can I deactivate my invitation link?
The link by default doesn’t have an expiration date, although there’s an option to deactivate it by generating a new one. This might come in handy when all your teammates have already joined LiveChat and you want to make sure that the link will not get into the wrong hands.
1) To deactivate your current link, head to the Agents section and select the Share invite link option from the +Add dropdown.
2) You’ll see a window with your current invitation link. Click on Generate a new one below it. Your old invitation link will get automatically deactivated.

Edit agent’s account
Learn how to configure your agents' profiles with our webinar.
All settings are specific for every single agent and should be set individually. They can be edited by Administrators and Owner at any time.
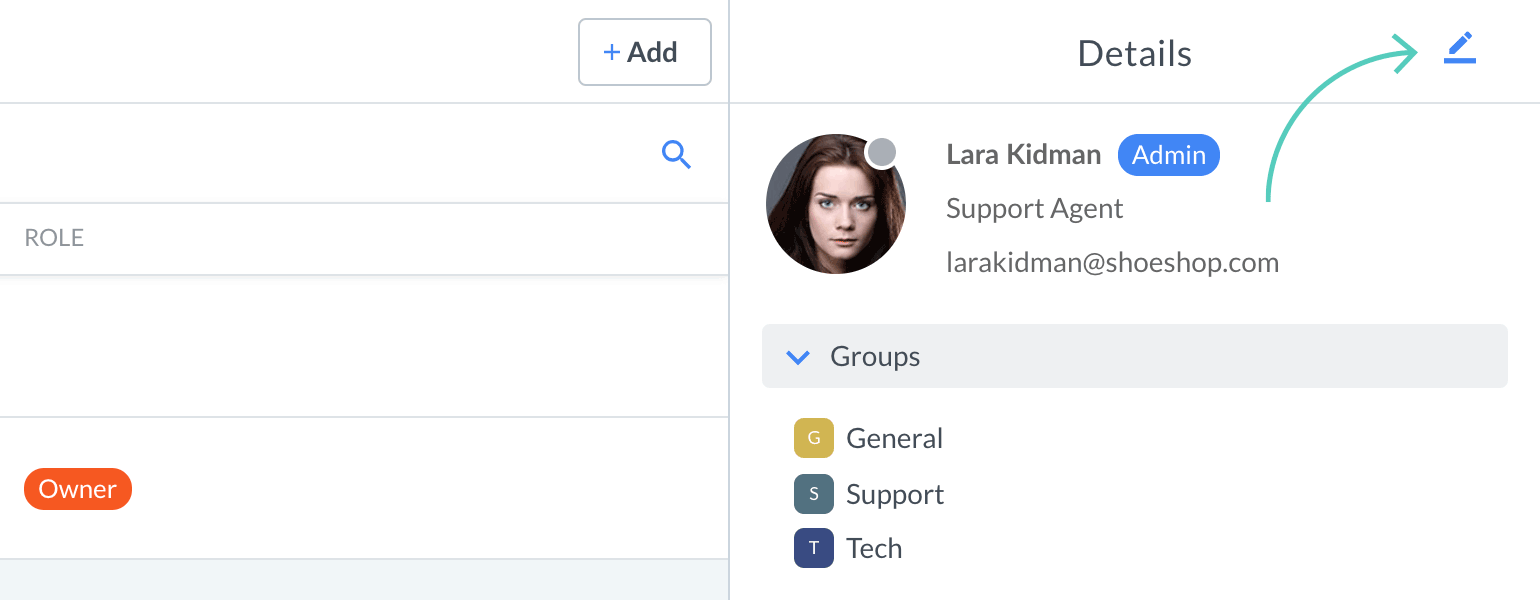
To edit agent's profile go to the Agents section in the LiveChat app. Then, select the agent from the list and click on the edit icon in the top right corner.
You can change the following settings:
- Profile picture - you can either choose a picture from the gallery or make the profile more personal by uploading an actual photo of the agent.
- Password - make sure that the agent has finished all their chats before changing the password as it will automatically log them out.
- Job title - you can set the job title individually for all agents.
- Mailing - subscribe the agent for email notifications (Daily Summary with an overview of the previous day’s performance and/or an email about a New Ticket).
- Groups - assign the agent to groups.
- Permissions - decide on the agent’s role (Agent/Admin); check out this article for details about different roles.
- Chats limit - the concurrent chat limit sets a cap on the number of chats your agent will receive at once (the number can range from 1 to 99).
- Status after logging in - decide if the agent will accept chats right after login or not, learn more about the statuses form this article.* Working hours** - use the work scheduler to configure the working hours for the agents.
- Delete agent - delete the agent’s account.