 Help Center
You can adjust the Salesforce configuration to your needs, whether you want to see only specific information or pass transcripts to a custom Object in your Salesforce. The configuration is easy and here are the ways in which you can configure your Salesforce integration:
- Set up Lead and Contact fields visibility;
- Configure Chat transcripts option;
- Configure Salesforce Permission Set;
- Disable your integration.
Note that Salesforce configuration can be performed only by your Salesforce administrator - the regular agents do not have the access to the Configuration section.
How to configure Lead and Contact fields visibility?
The fields visibility option lets you decide which information about Leads and Contacts will be shown to agents during a chat.
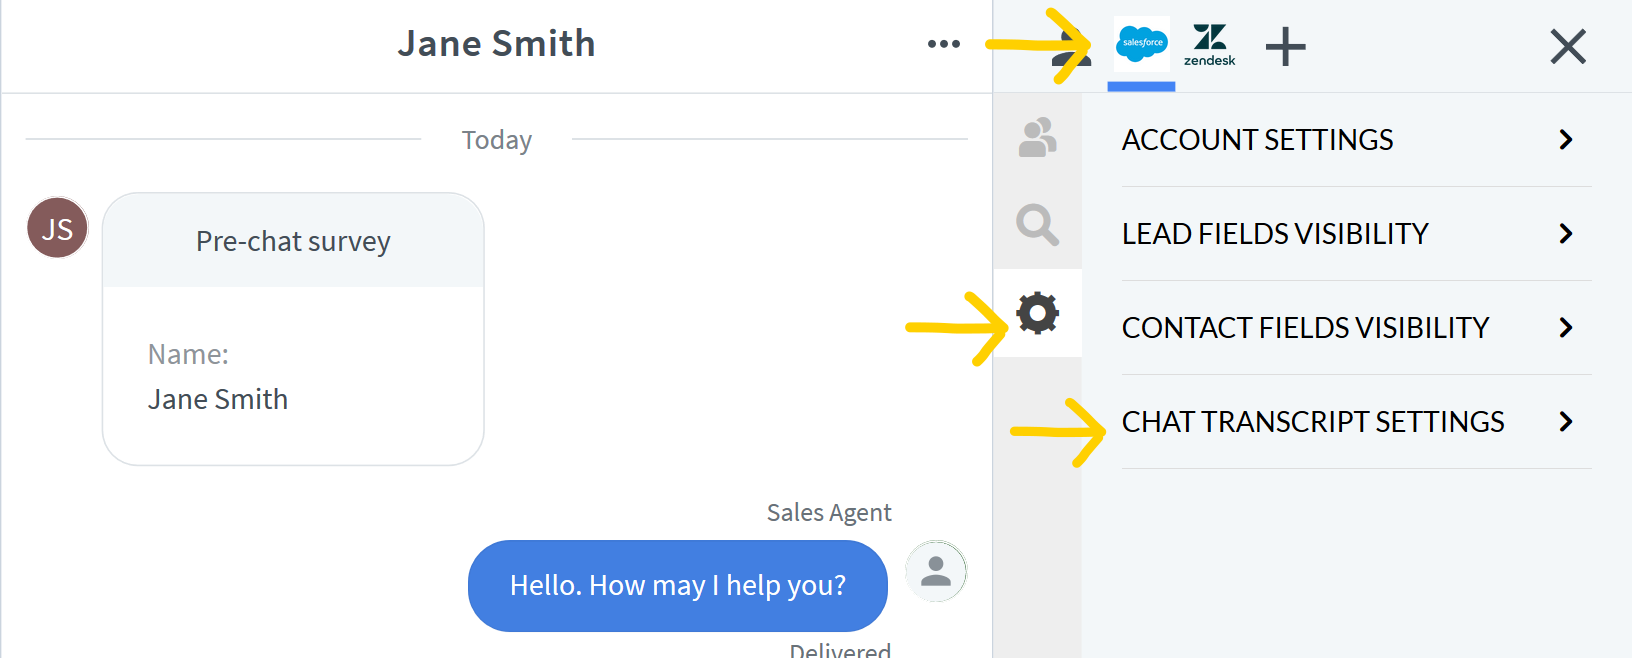
1) To configure fields visibility, please click on the Settings button and choose the Lead fields visibility or Contact fields visibility option.
The configuration looks the same for Lead and Contact fields visibility.

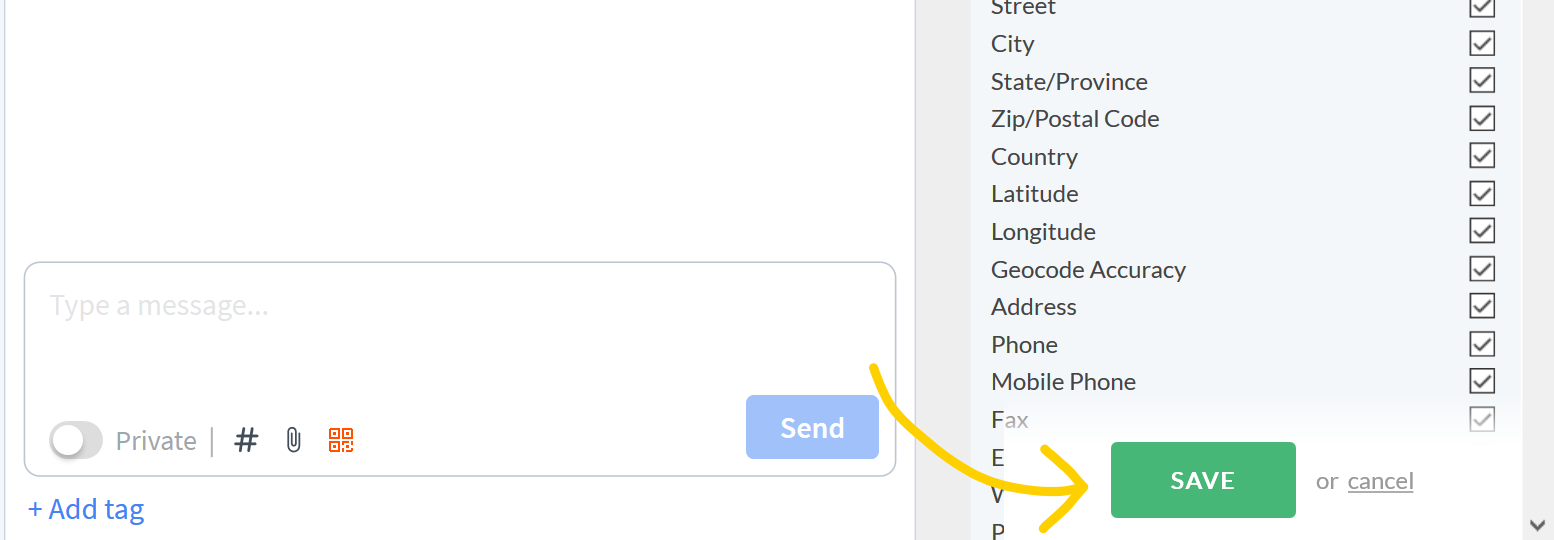
2) Now, choose which fields should be visible during a chat in your Salesforce plugin.
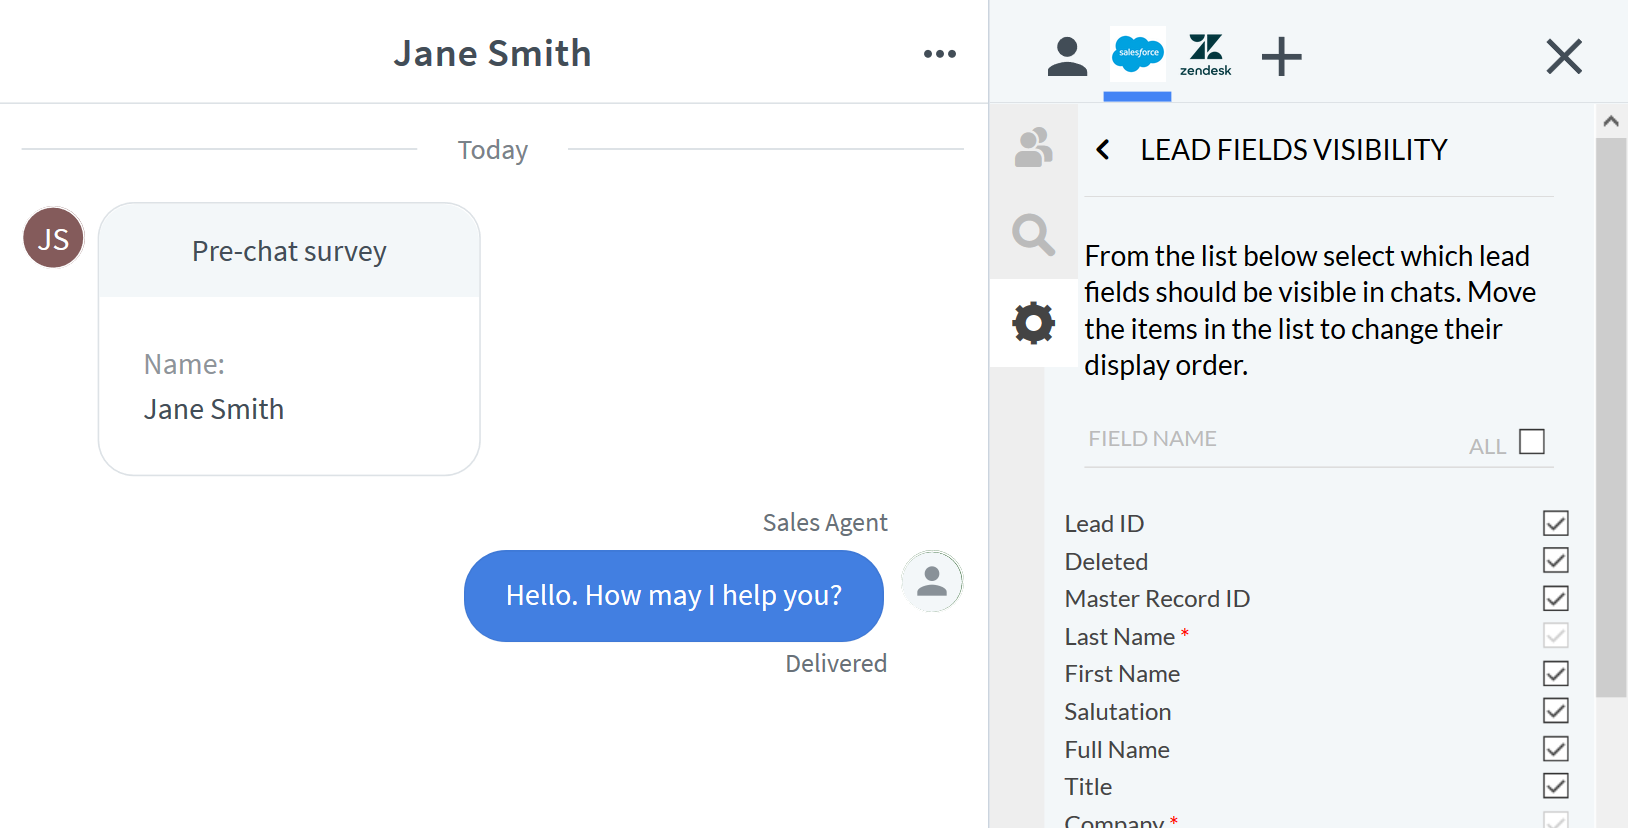
3) Confirm changes by clicking on Save button.
Note that you can also change the position of those fields by simply dragging them up and down.
How to configure Chat transcript settings?
By default, transcripts are being attached as Cases to your Salesforce account, but you can choose any other Salesforce Object and attach transcripts there. For example, as an Object you can use Case or Task.
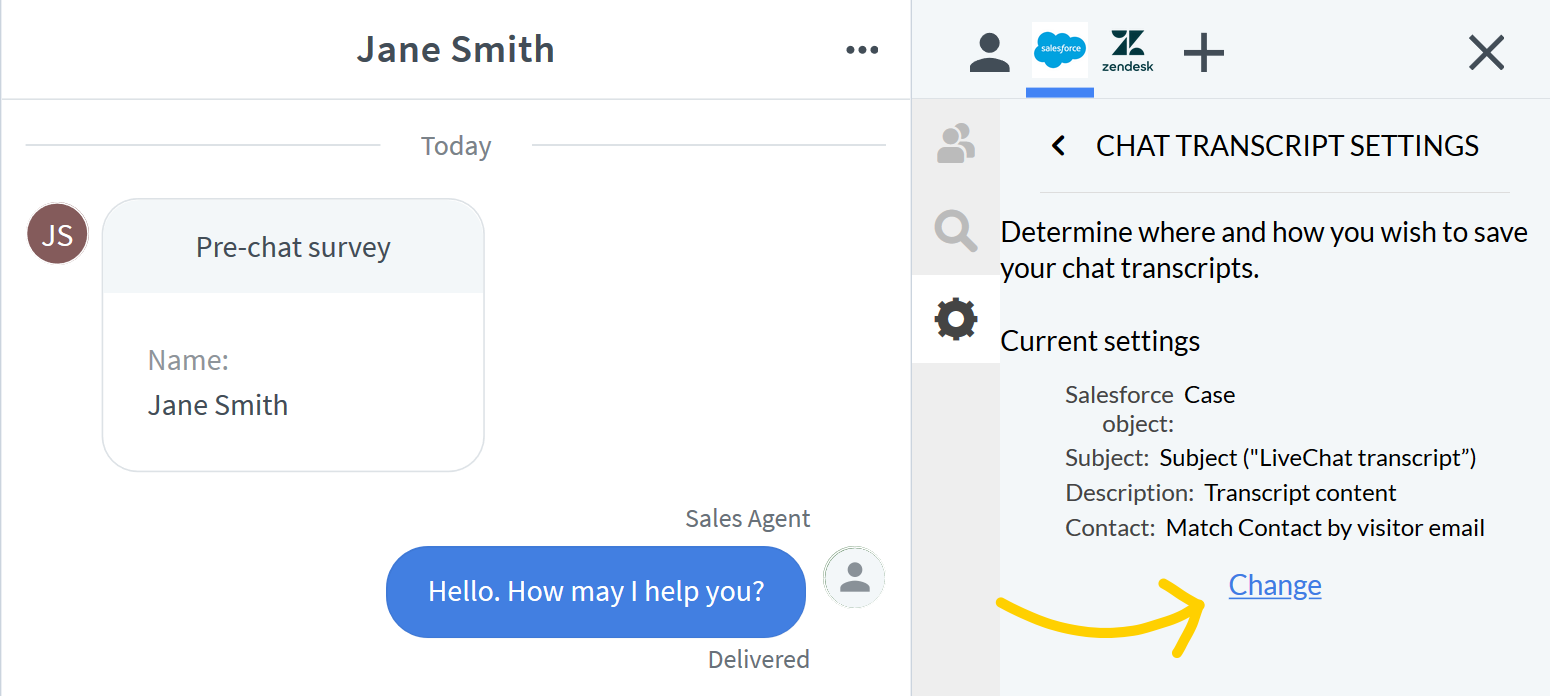
1) To do that, open the Salesforce plugin and click on the Chat transcript settings button.
2) Click on the Change button and enter the name of the Object to which you would like to pass transcripts.
3) Then, select the Transcript fields that you would like to map to each Salesforce field and confirm changes by clicking on Save button.
Field mapping is useful if you want to keep everything in check - you can create an Object dedicated to transcripts, so that you will always know where to find them.
Done! From now, all chat transcripts will be attached to the custom Object in your Salesforce.
How to attach the transcript directly to a Lead or Contact?
Salesforce does have a possibility to attach Lead or Contact to which you are saving Transcripts directly to your Case or Task. By following these steps, you will be able to attach Transcript directly to an existing record in your Salesforce.
Note that you can connect Lead or Contact with any Object in your Salesforce account to which you are attaching Chat transcripts.
1) Go to your Salesforce account and click on Setup in the top right section of your Salesforce dashboard - note that you will need the Administrator's privileges to customize those options.

The screenshots in this article show the Salesforce Classic interface. The integration is also available with Salesforce Lightning.
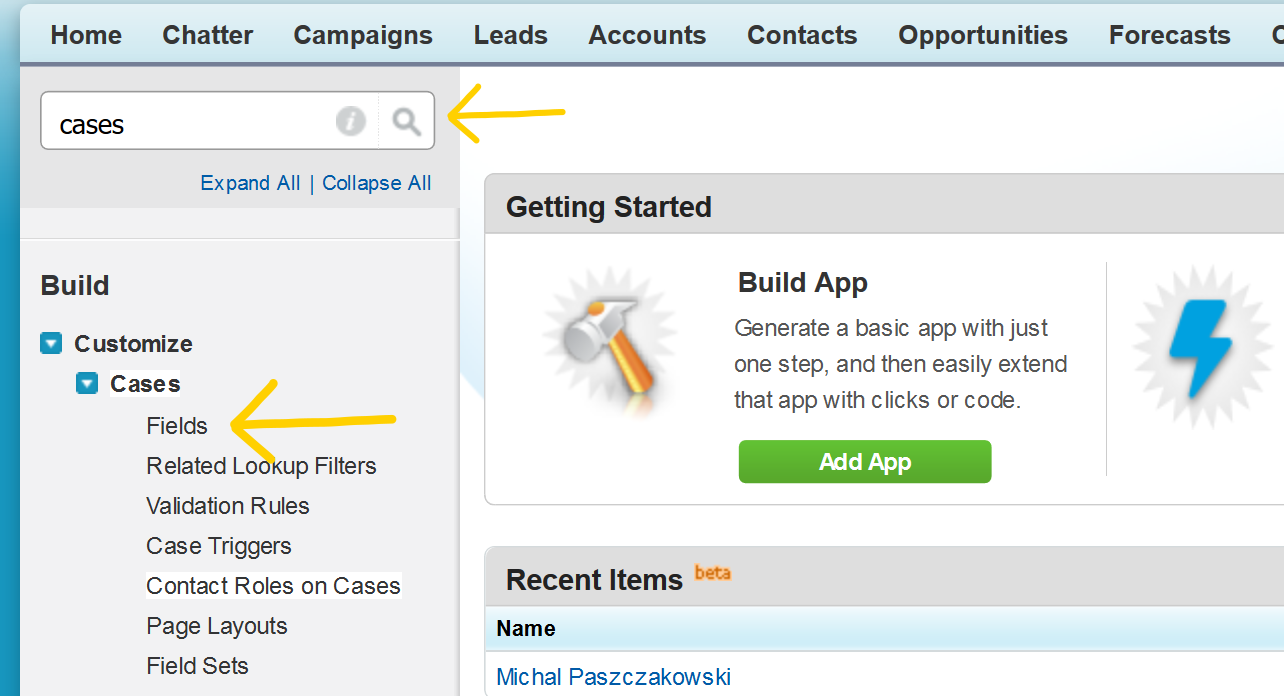
2) Type Cases in the Search tool and click on Fields button.
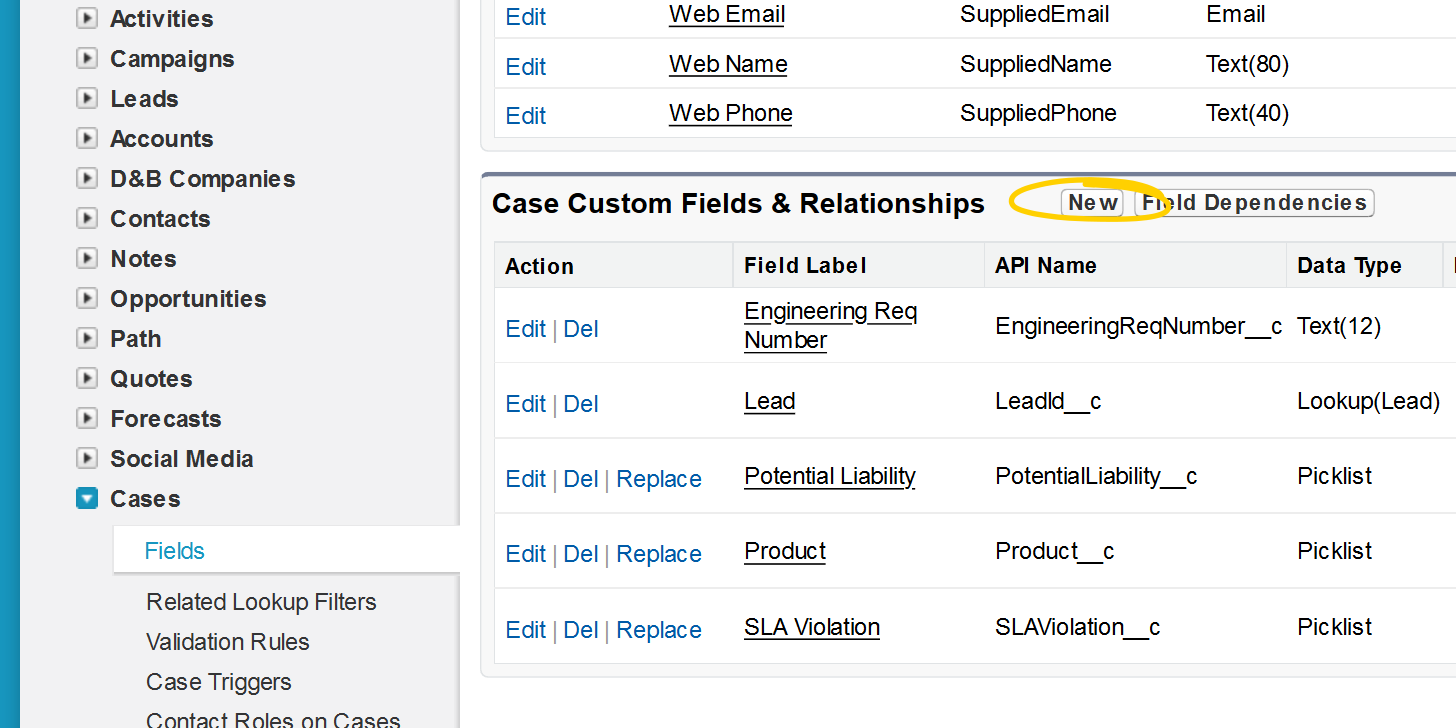
3) Scroll down to the Case Custom Fields & Relationships section and click on the New button.
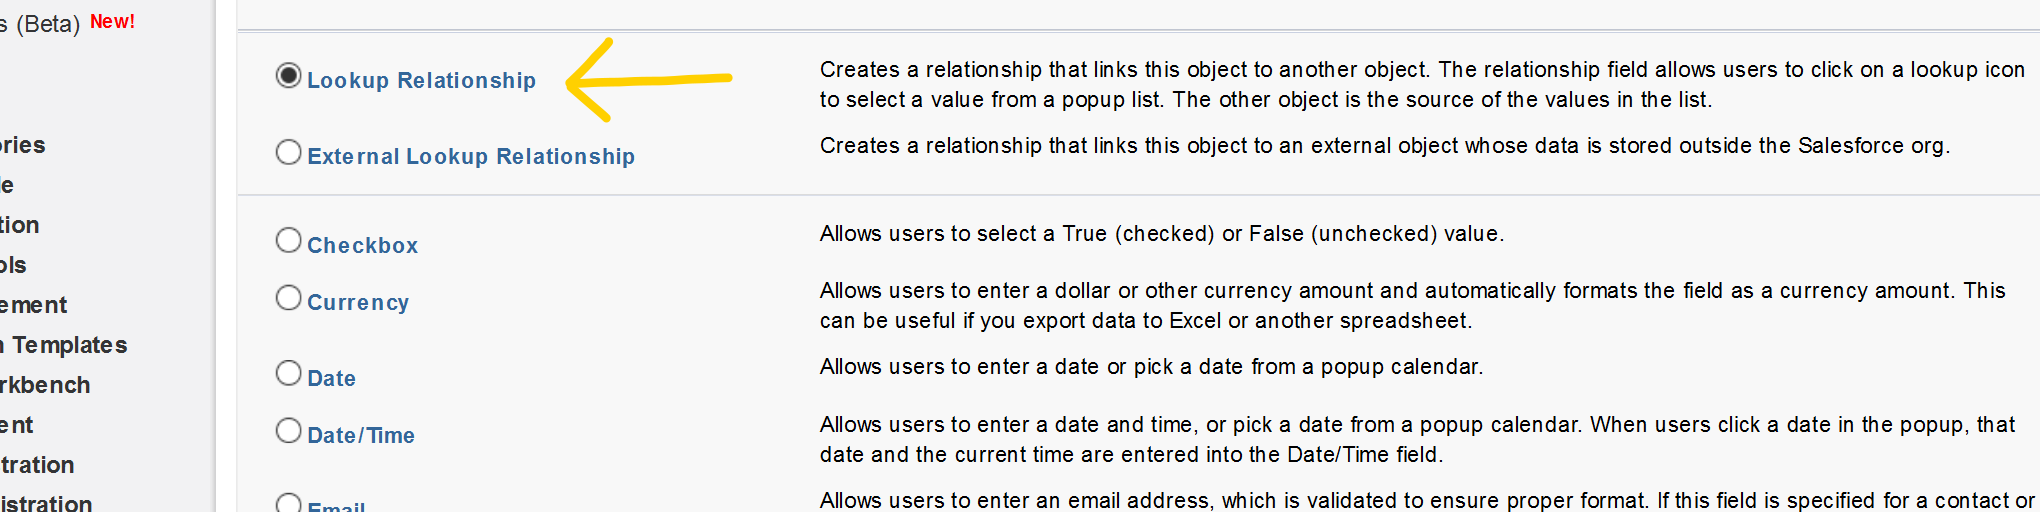
4) Select Lookup Relationships option from the list and click Next.
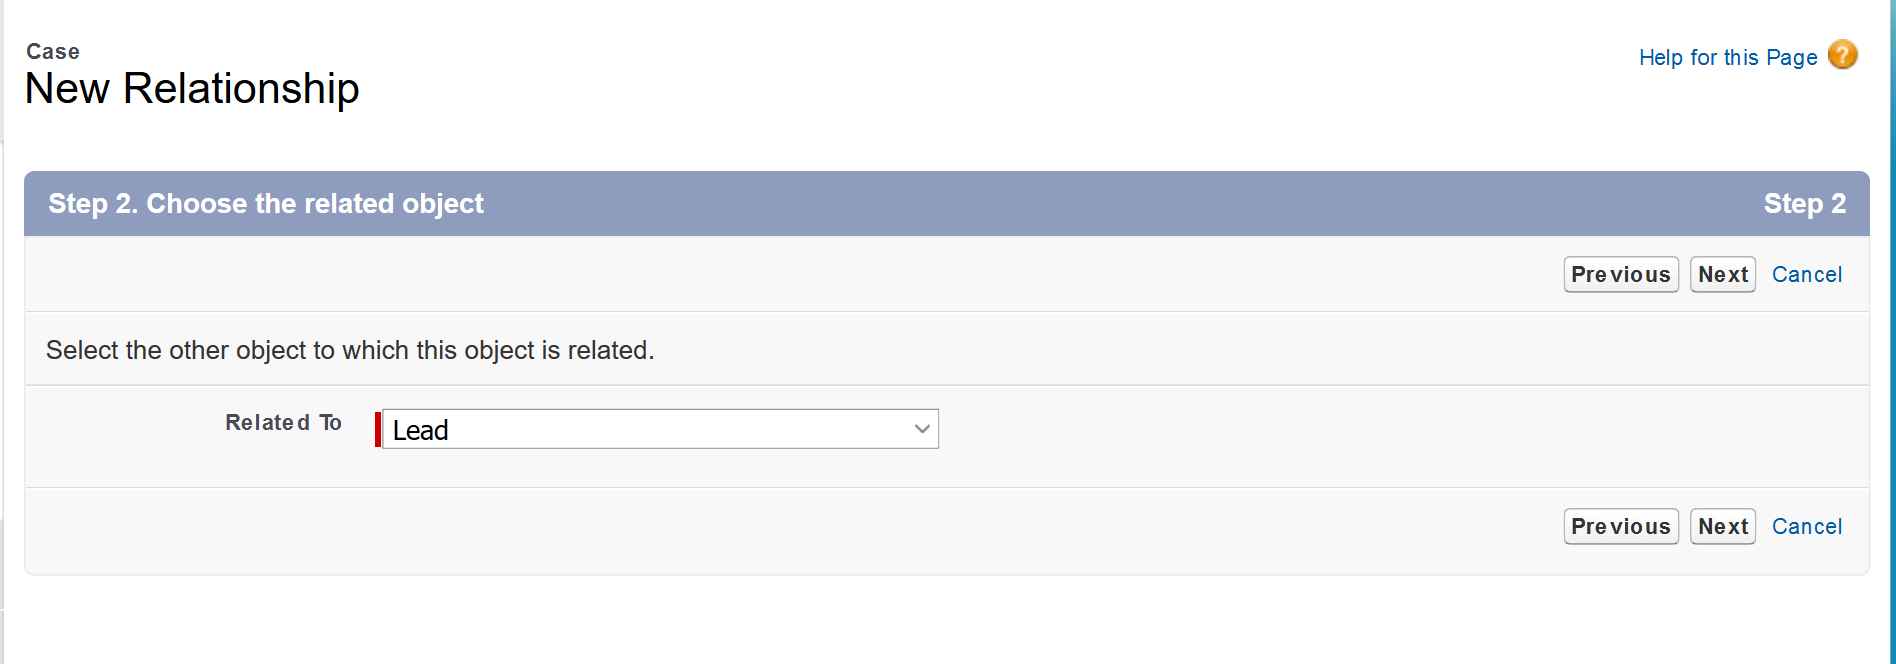
5) If you would like to connect a transcript to a Lead, select Lead in the Related To dropdown menu. Confirm the action by clicking on Next.
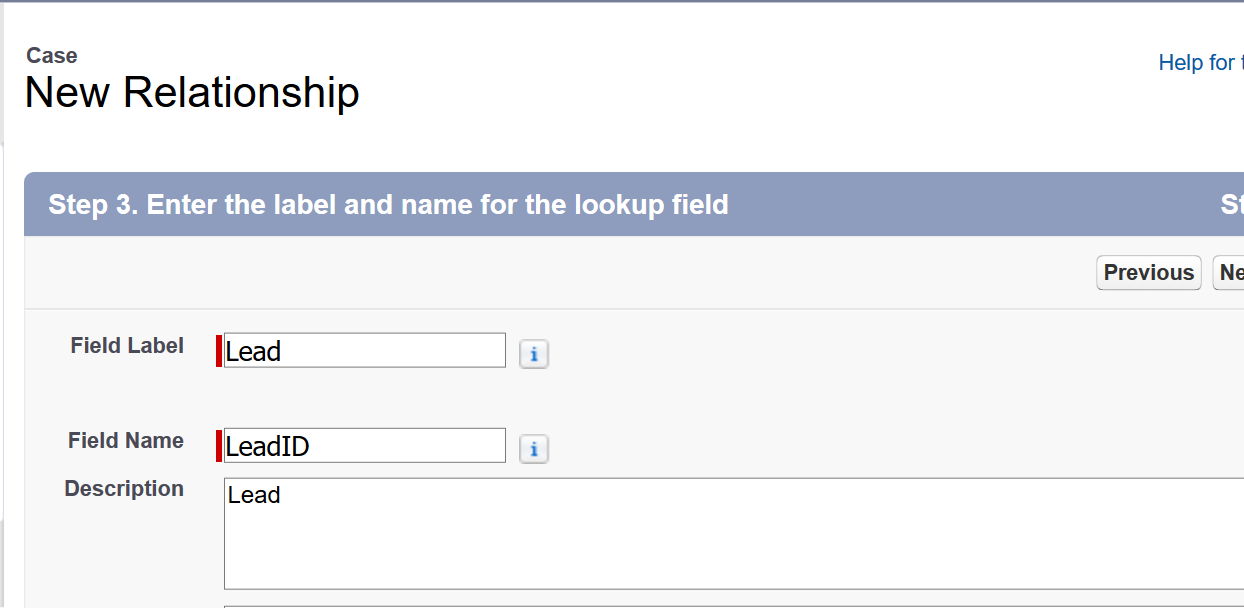
6) In the next section, please type LeadId in the Field Name section and Lead in the Description field. After that, click on Next.
7) Click through the Step 4 and 5 by clicking on the Next button.
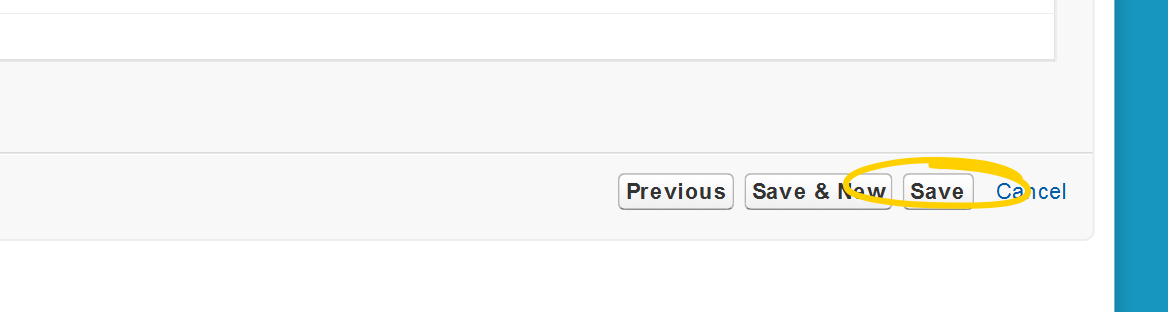
8) Finally, apply changes by clicking on the Save button.
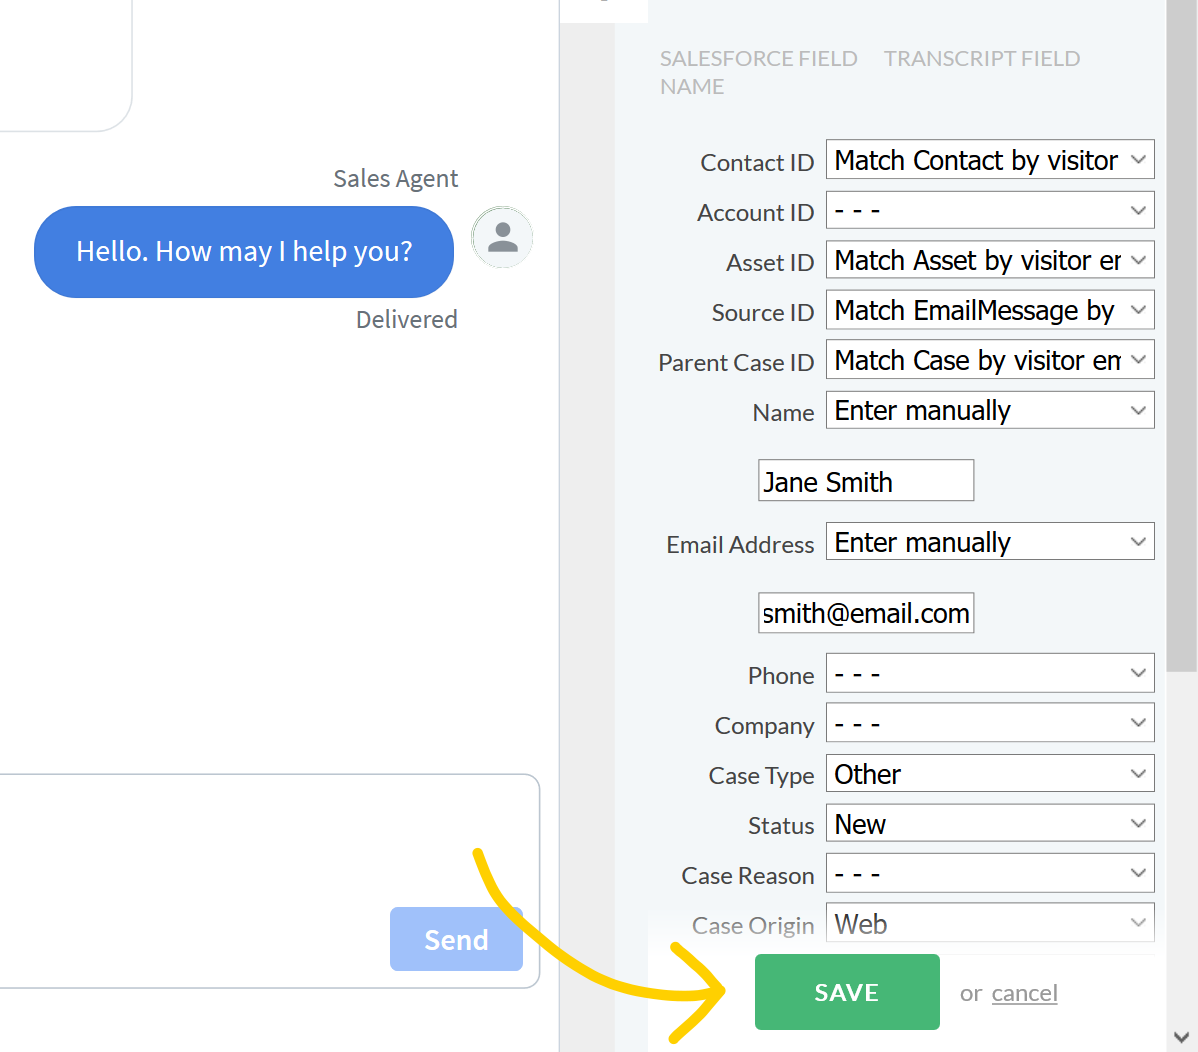
9) All you need to do now is go to the Chat transcript settings in your LiveChat Salesforce Plugin and use the following settings:
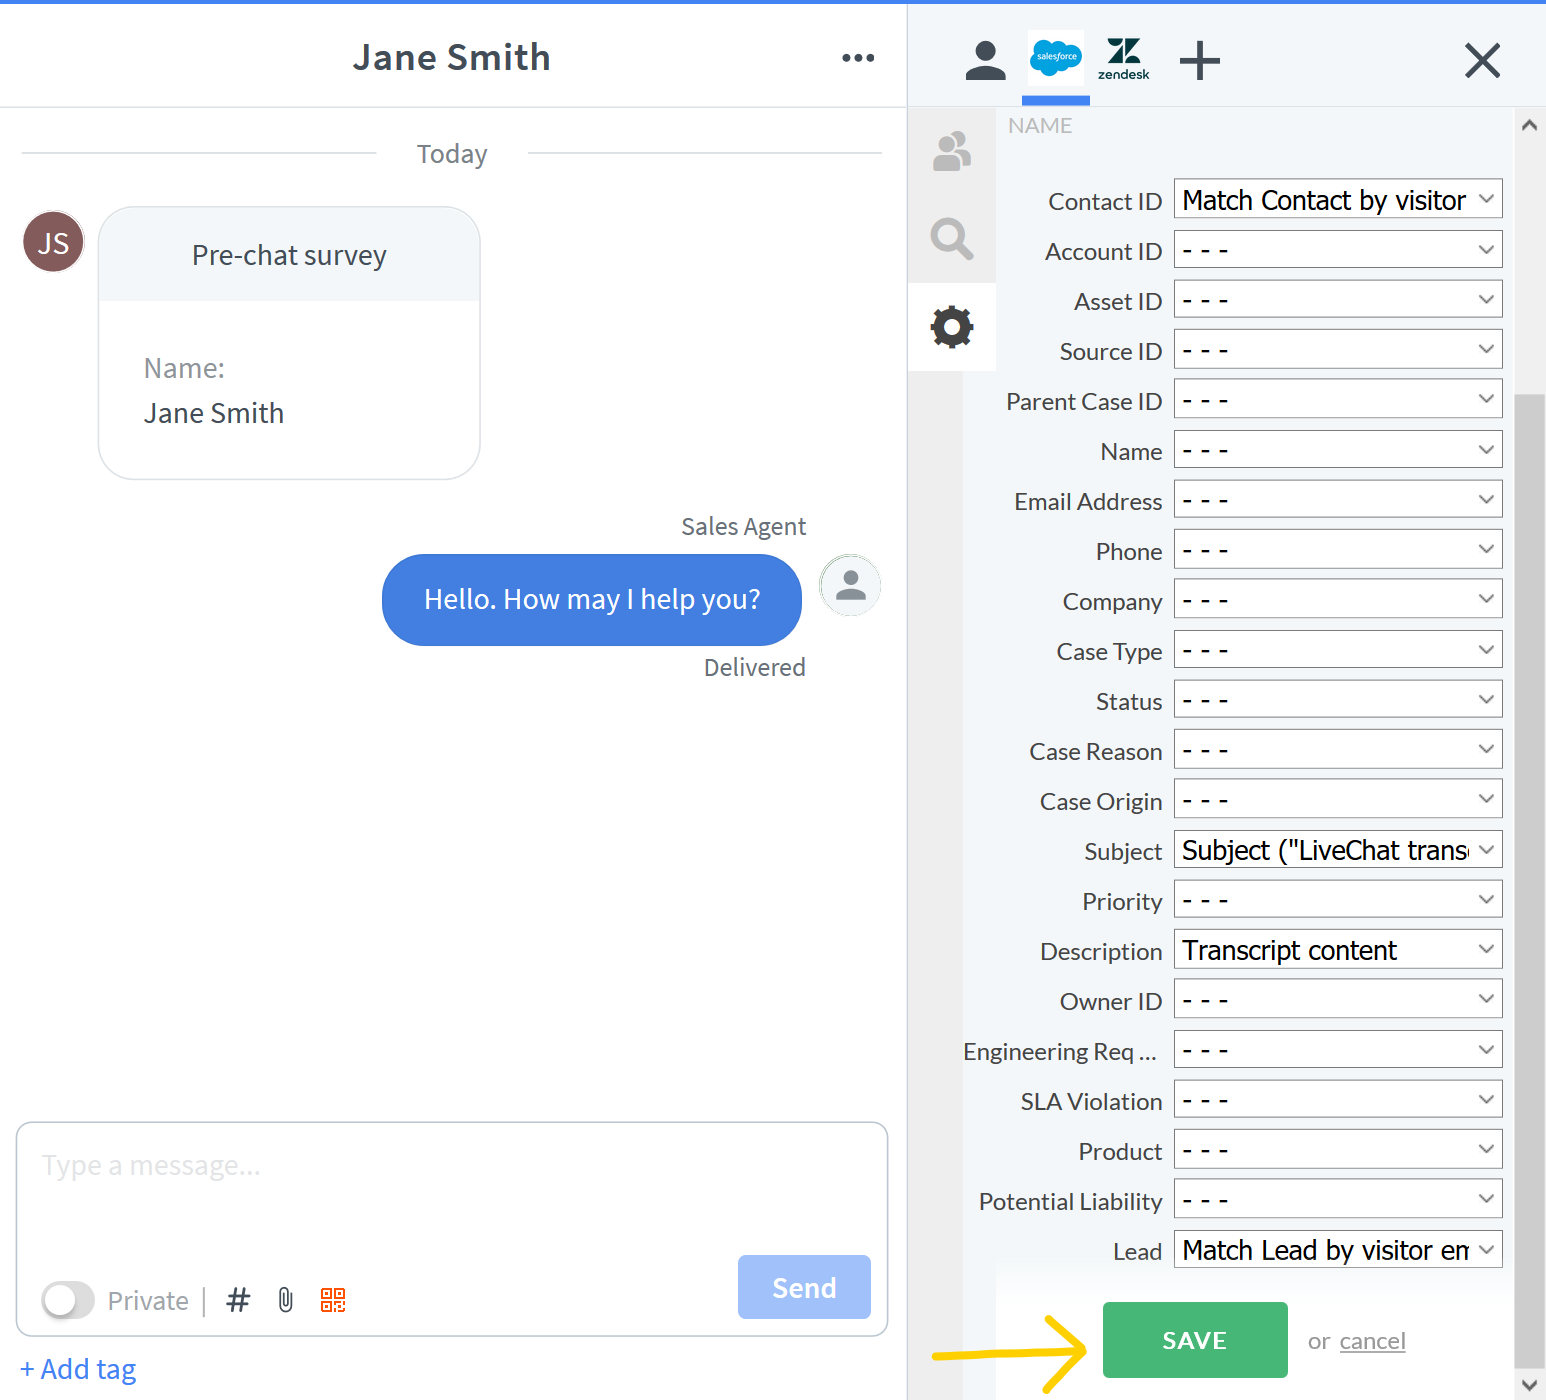
10) After entering the correct settings, confirm by clicking on Save button.
Done! Now, when attaching a chat transcript to a Lead, it will be automatically related to it.
Please note that this configuration can be done for Contacts as well. All that you have to do is, in Step 5, choose a Contact instead of a Lead.
Why I cannot add new Leads or Contacts?
If you are using custom security settings for your Salesforce, it's possible that LiveChat integration may not work properly. For example, you will not be able to add new Leads or new Contacts to your Salesforce account. In order to workaround this issue, you may set up custom permission set for agents using your LiveChat and Salesforce account.
As the process may be tricky, we have prepared a short training video, guiding you through the entire process of creating the custom Permission Set. We hope that you will enjoy it!
How to disconnect your Salesforce account from LiveChat? {#disconnect-account}
If you are no longer using Salesforce or if you would like to simply stop using the integration, you can disconnect it directly in LiveChat plugin.
1) To do that, open the Salesforce plugin and click on the Account settings.

2) To disable the integration, click on the Disconnect button and confirm.

Done! Now you know what you can achieve with the proper Salesforce configuration. Hopefully, you have found this article helpful but if you have any additional questions, feel free to start a chat with us - we are available 24/7/365!
Also, don't forget to check out other articles regarding Salesforce: