Help Center
Each agent can set their status to either accept chats or don't accept chats:
- Accept chats—you receive new chats from customers and can use all the other LiveChat features.
- Don't accept chats—you don't receive new chats from customers. However, ongoing chats can be continued. Additionally, you are able to use all the other features. For example, change settings, view archives and reports when not accepting chats.
Each agent who is logged in to the LiveChat app takes a seat, regardless of the status.
Make sure you always use the correct status for your tasks. You can get accidental chats if you switch to Accept chats when you should only track customers and supervise teammates.
Change agent status
Changing your status is really simple. Here's how to do it:
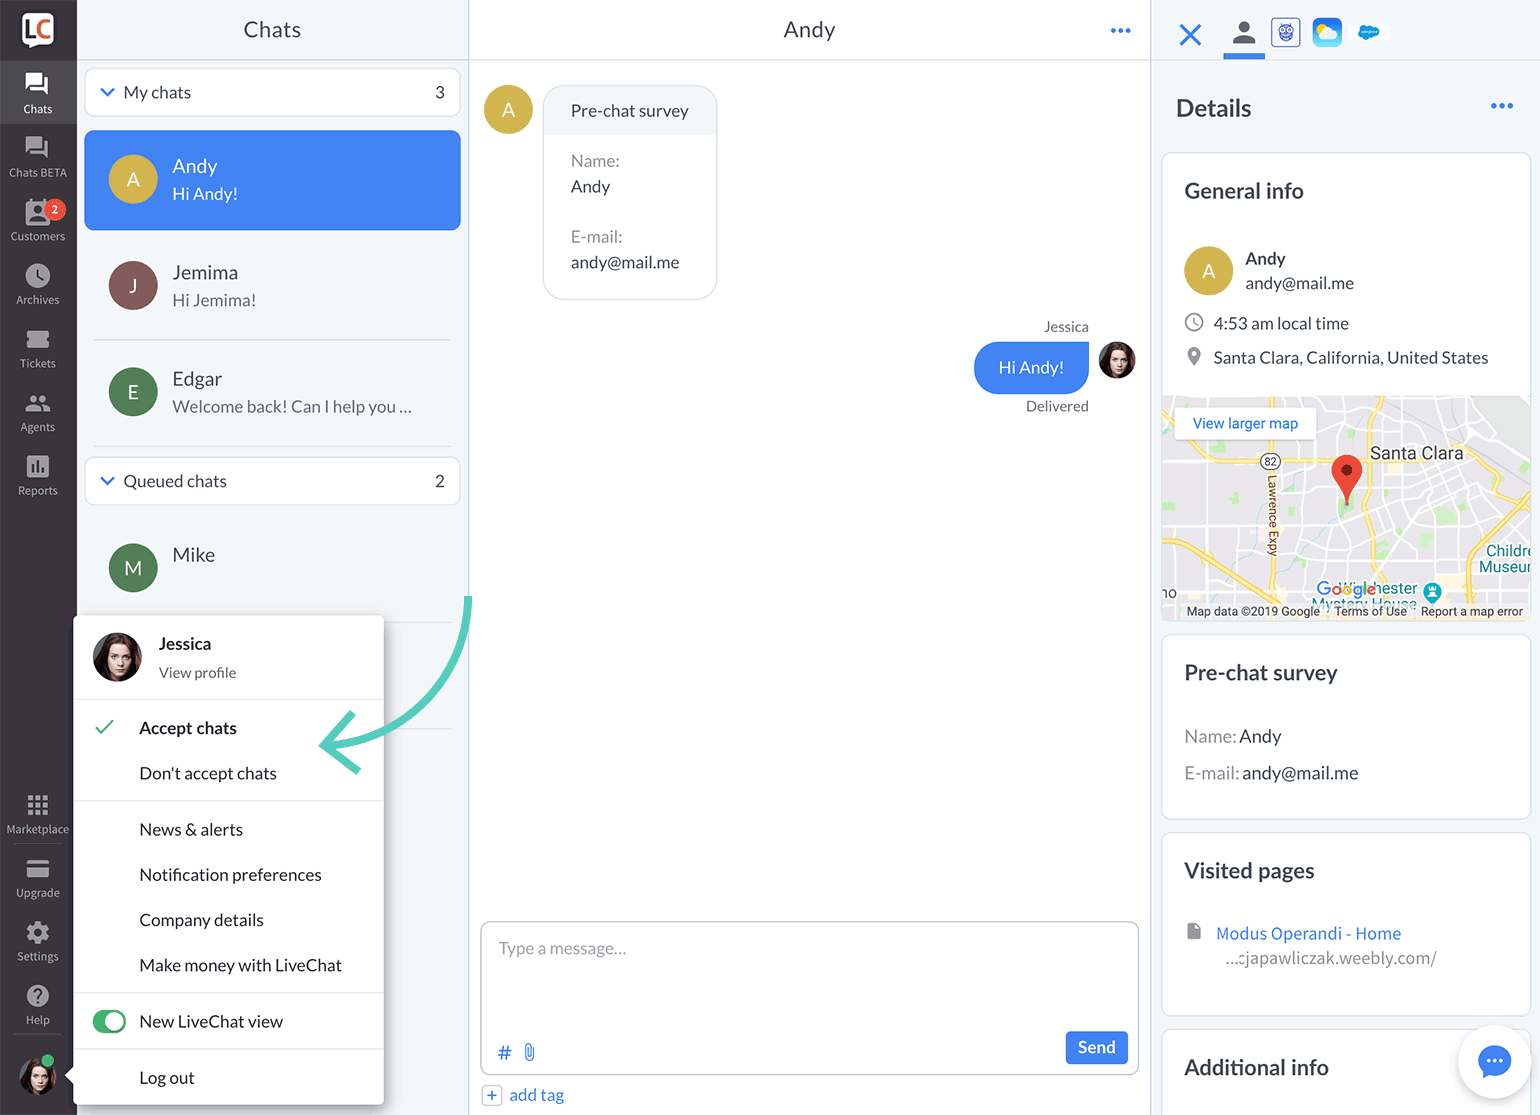
1) Log in to LiveChat and click on your profile picture in the bottom left corner.

2) Select a new status by clicking on it.
Set up auto-away
You can configure your desktop application to switch to Don't accept chats after a certain period of inactivity. This way, you won't get any accidental chats.
On both Mac and Windows, go to LiveChat Preferences and set the Auto-away time there.
Check out our article on setting up auto-away for more information.
Set initial status
You can set which status an agent will have after logging in. Here's how to do it:
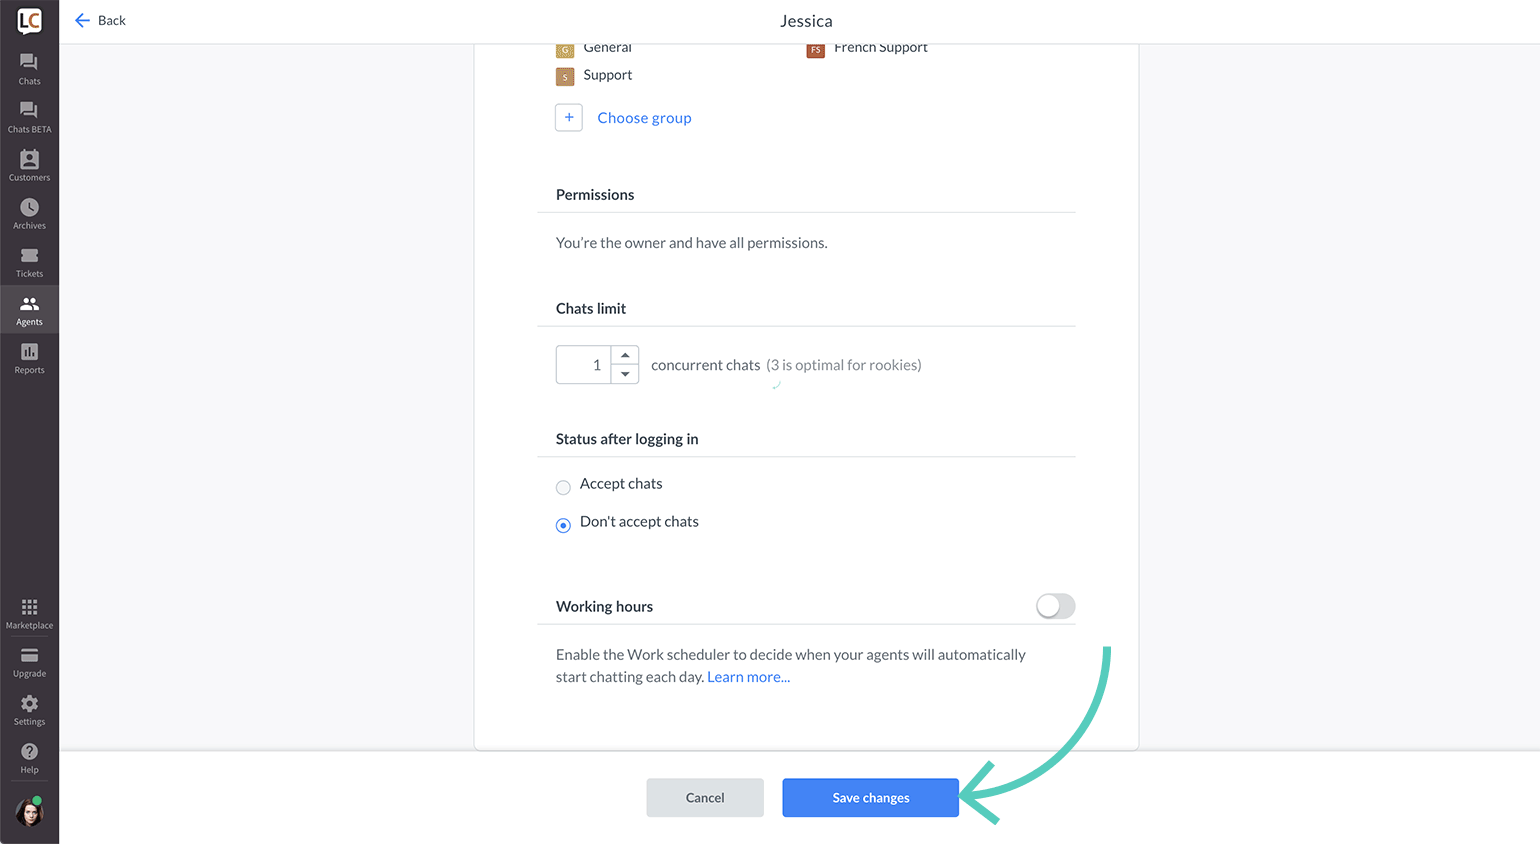
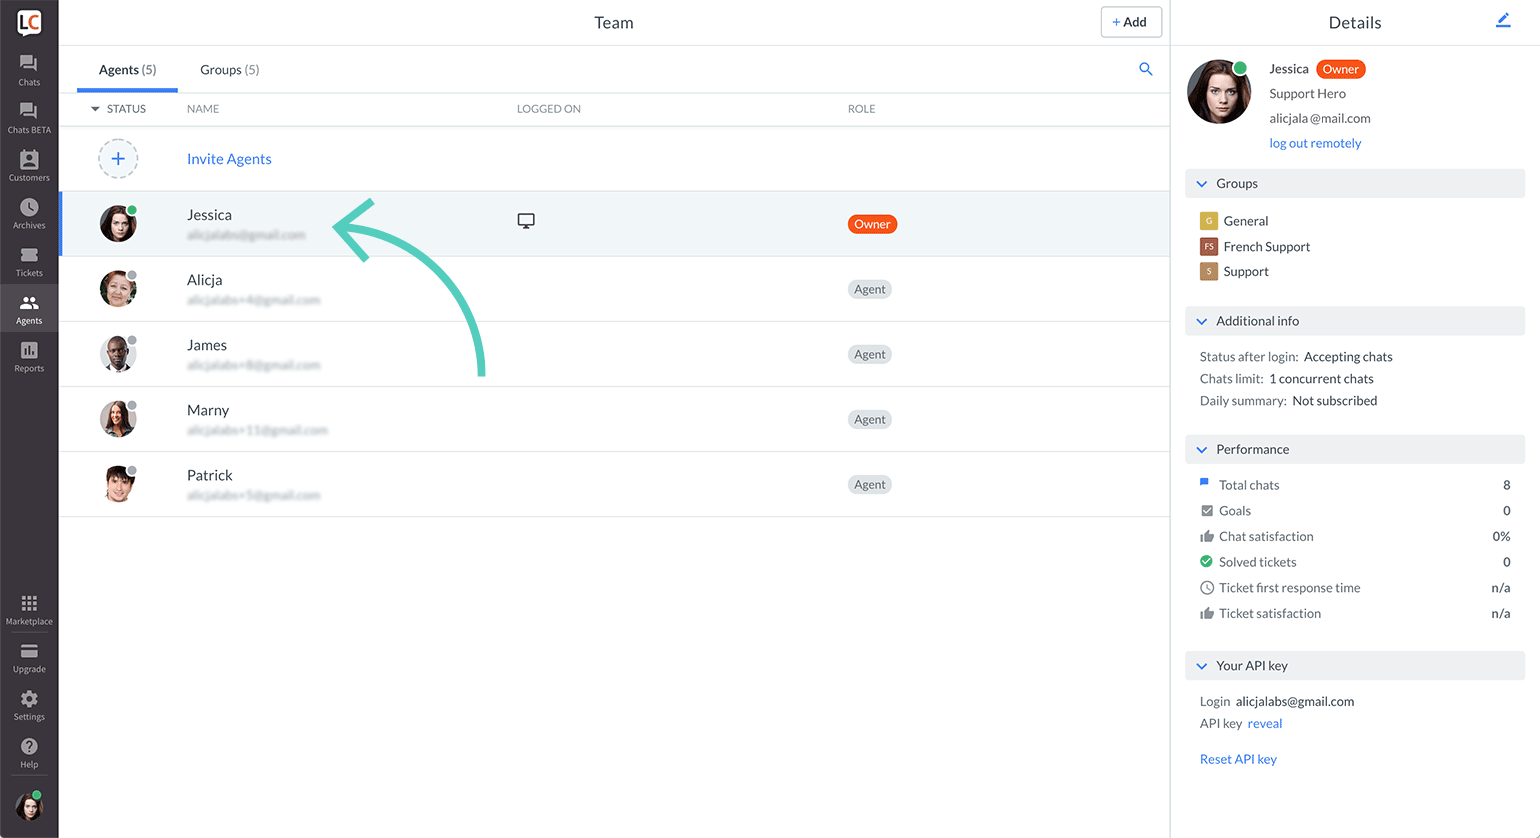
1) Go to the Agents section, and choose an agent you want to edit.
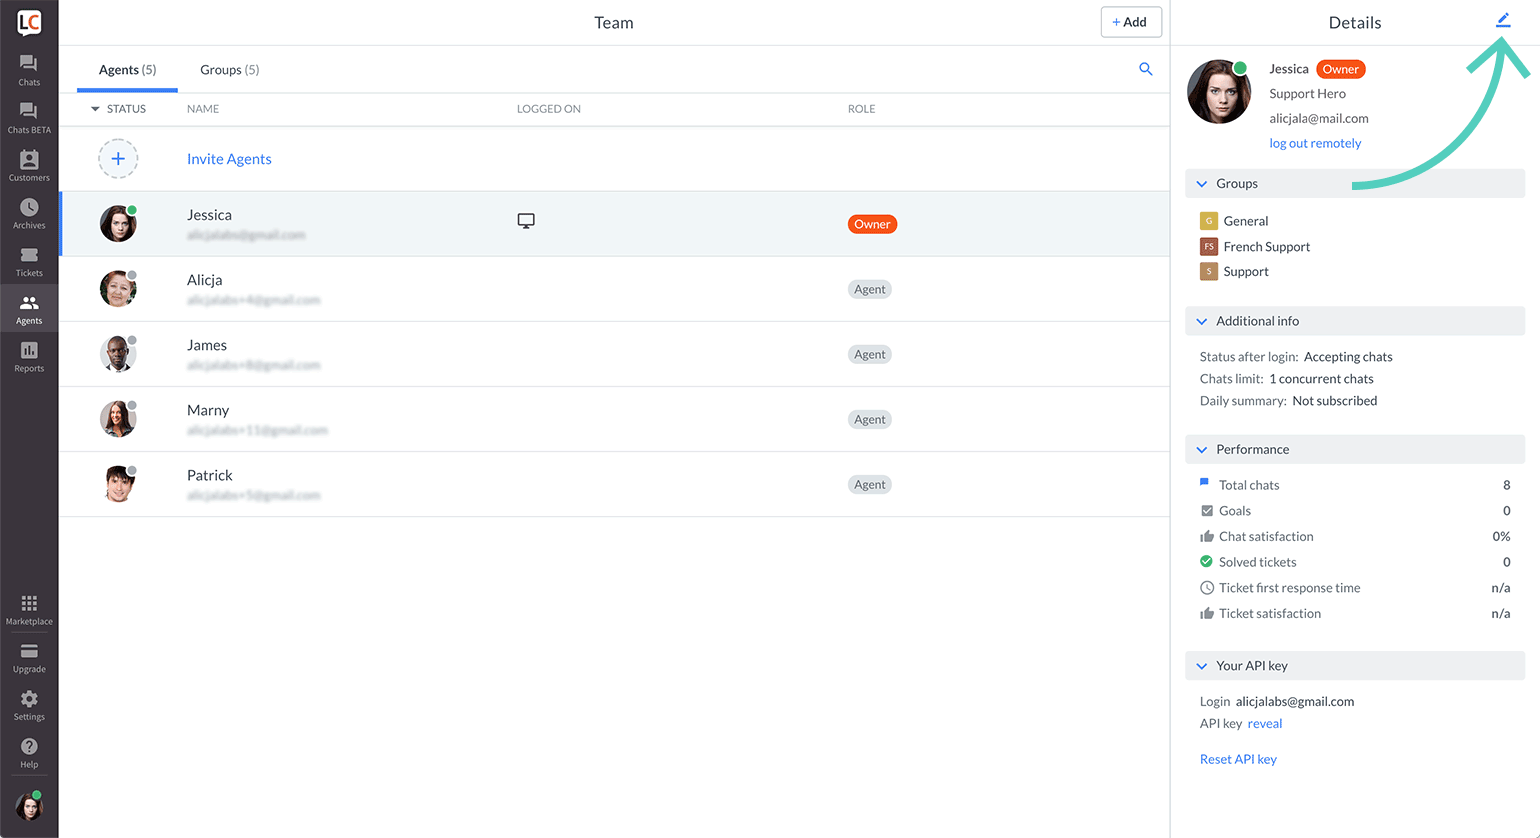
2) Click on the pencil icon in the top right corner.
3) Scroll down and choose one of the options under Status after logging in.
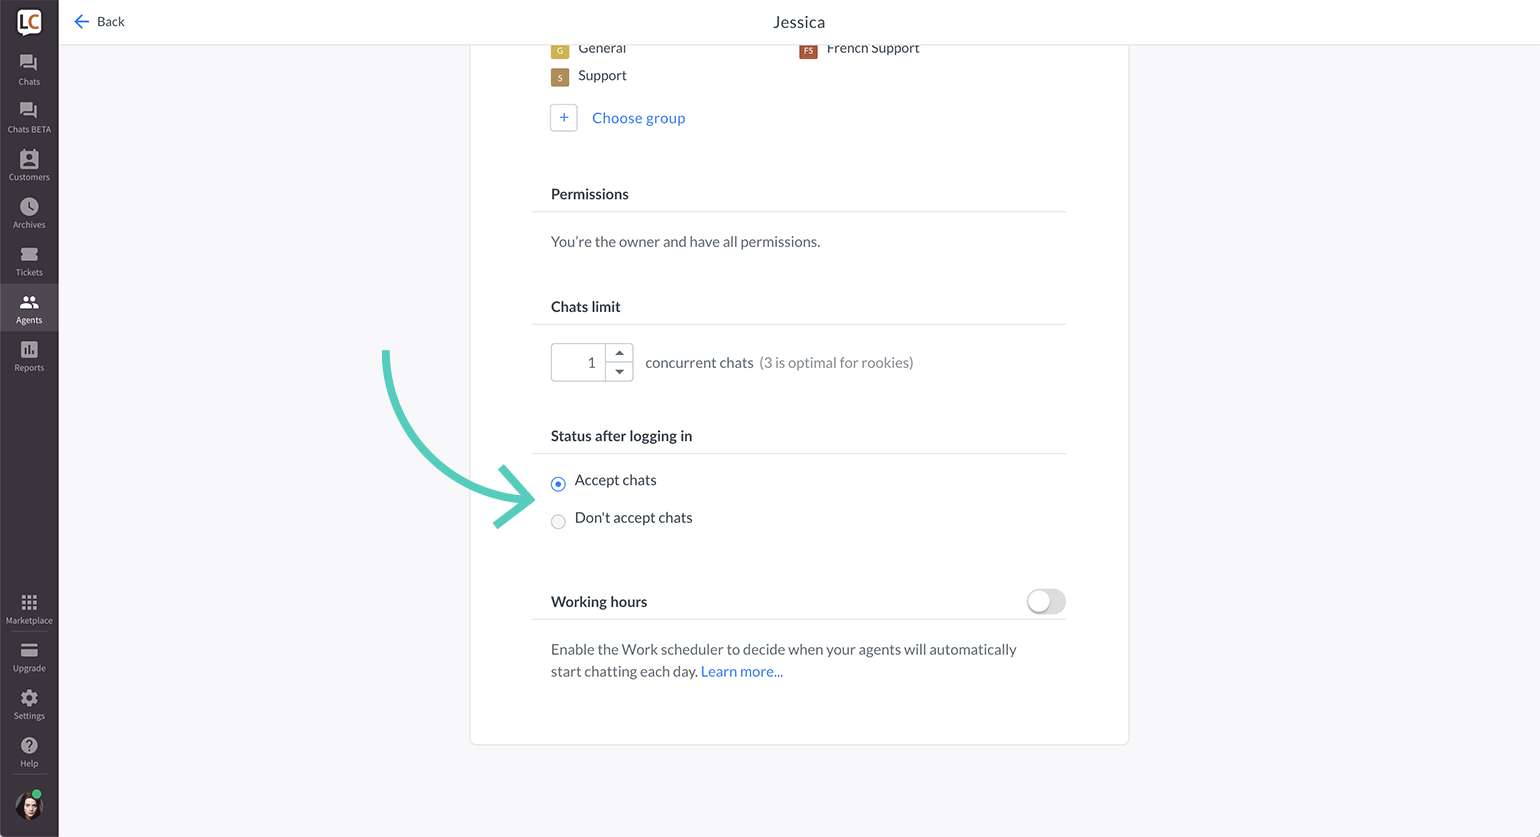
4) Click on Save changes.