Welcome to LiveChat! We’re happy you're here.
This guide will help you add LiveChat to your website and create a workflow that is effective both for your team and your business. It doesn’t matter if you use live chat for sales, support, or lead generation.
Before I get to the actual process of implementation, I want to introduce you to two things LiveChat can’t go without. So it feels a little bit more familiar when you use the app for the first time.
Meet the chat widget which is placed on your website and where your customers can talk to you.
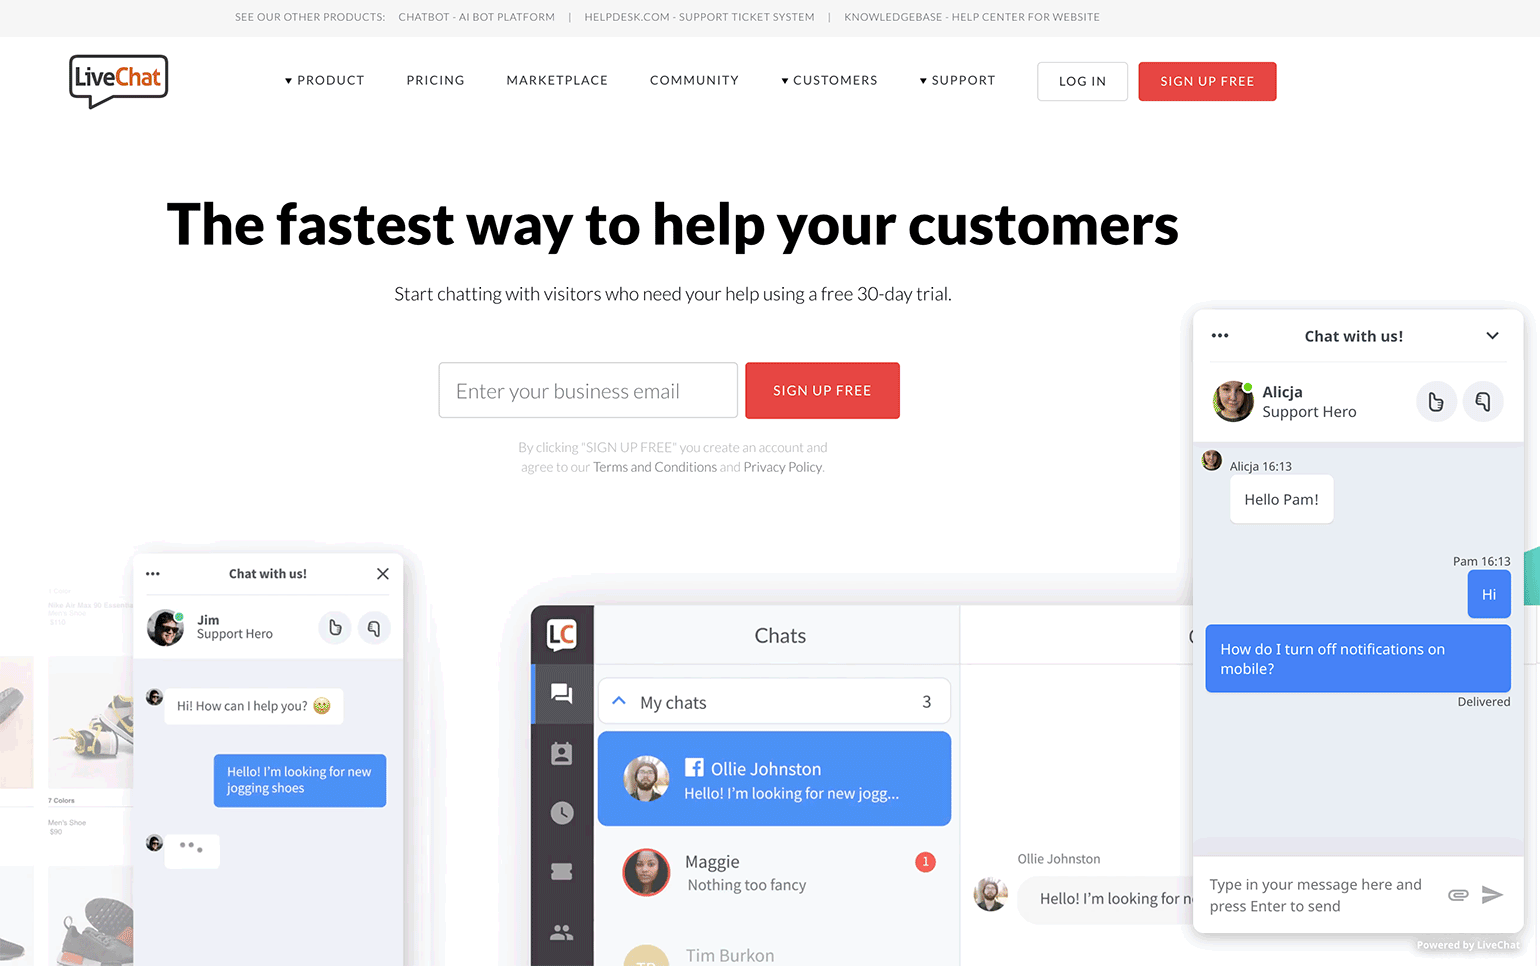
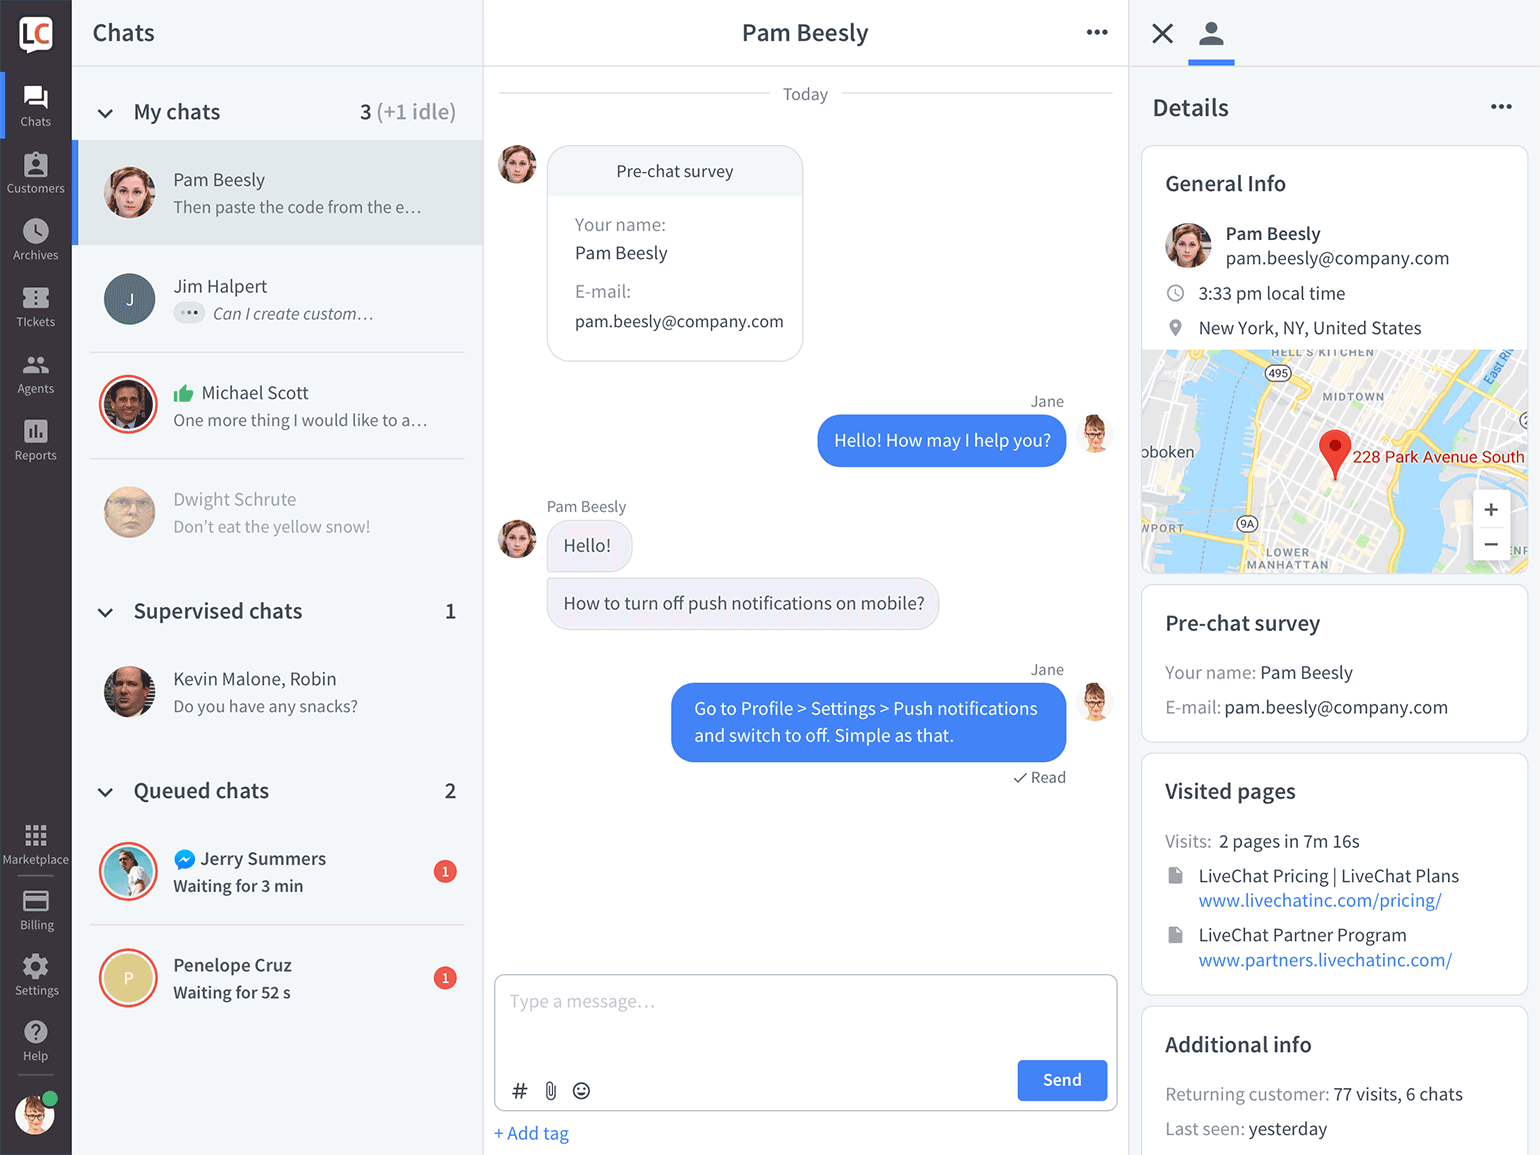
And the LiveChat app—where agents can talk to your customers, handle tickets, check your live chat's performance, and many more.
1. Set goals for LiveChat
It’s quite important to decide what you want to get from LiveChat early on. Because only then, you'll be able to track its performance. What's more, depending on what you want to achieve, you will probably use some features more than others (or use them differently).
If you are using LiveChat for support, your primary goal could be increased customer satisfaction. You can take advantage of canned responses and sneak peek to reduce response time or the ticketing system to never leave any support cases unresolved. Keep track of the most important metrics using the satisfaction and average response time reports.
If you're using LiveChat for sales, your main goals could be increased conversion and reduced cart abandonment rates. Tag each conversation to follow trends, use greetings to target customers who are stalling on product and cart pages. Filter reports by tags to see conversations ending with a purchase or view the tracked sales report to see how much money LiveChat is bringing to your business.
If you are using LiveChat for lead generation, then you probably want to get valuable leads (a lot of them). Use the pre-chat survey to get the information you need before the visitor starts a conversation, use automatic greetings on pages that bring the most valuable traffic. Send info about leads to your CRM with one click, thanks to our integrations with the most popular CRM software like Hubspot, Pipedrive or Salesforce.
2. Create an account
Creating an account takes seconds. You fill out a three-step form, and that’s it. We give you a free 14-day trial. No credit card required.
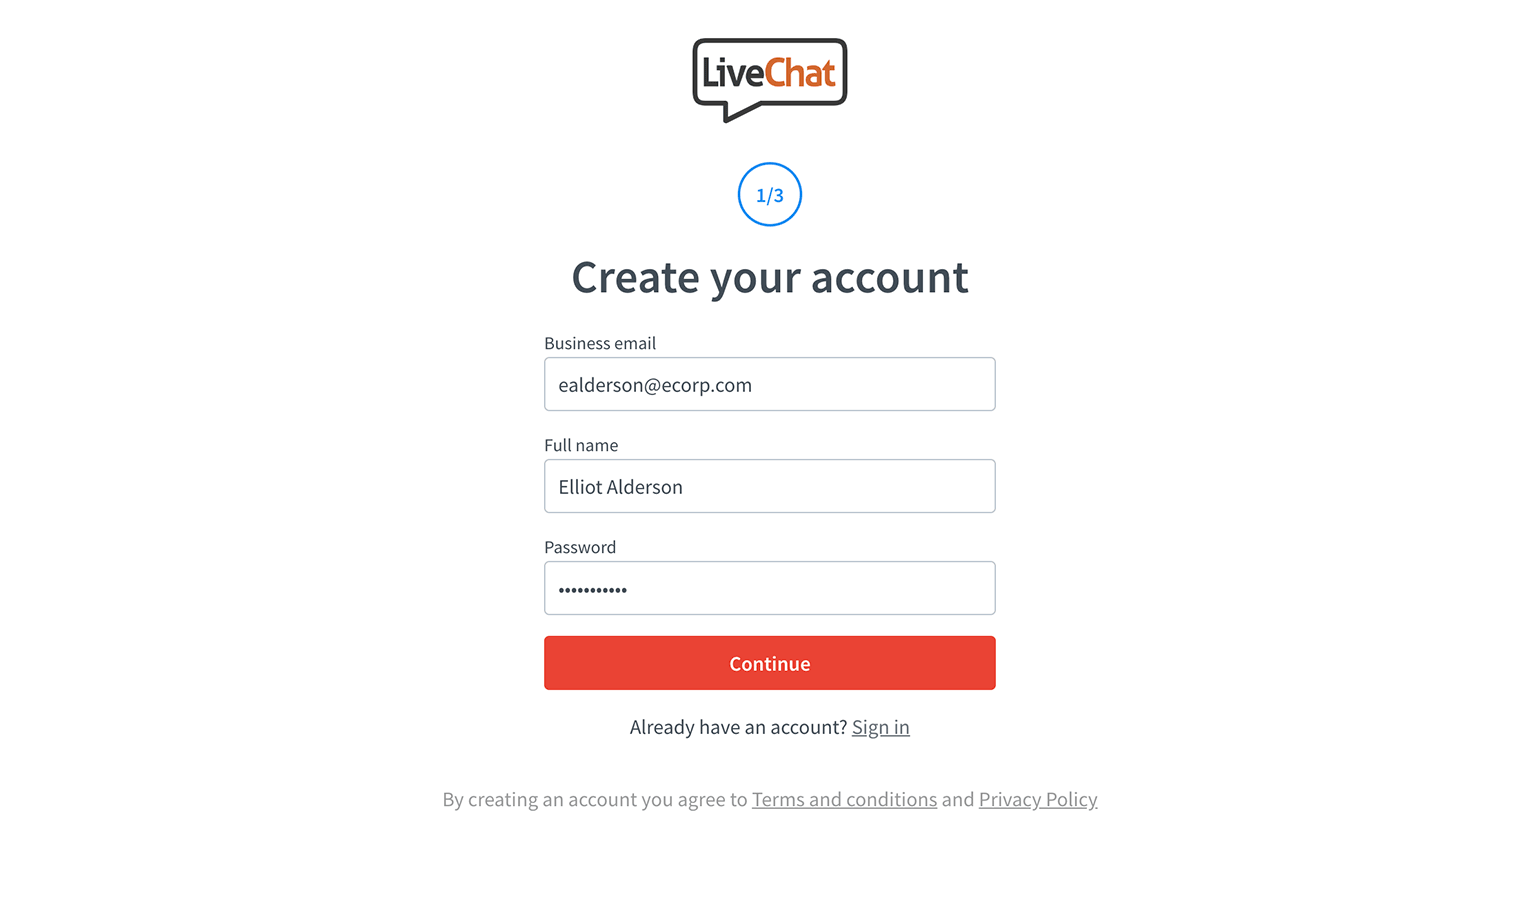
By default, you are on Team plan with an unlimited number of seats (so you can have as many agents online as you wish). If you want to try out a different plan talk to our support team and they will fix it up for you.
Learn more about plans.
Log in to the LiveChat app
When you create an account you are automatically logged in to the LiveChat app. In case you logged out or closed the browser here's how to log in again:
- Go to LiveChat login page.
- Enter the email and password you used during account registration.
- Click on Sign in.
That's it; you are in.
3. Bring people on board
The sooner you add your teammates to LiveChat, the better. As it gives them a chance to learn the app with you. It’s also an excellent opportunity to talk to them about why you need LiveChat and how it can help them in their work.
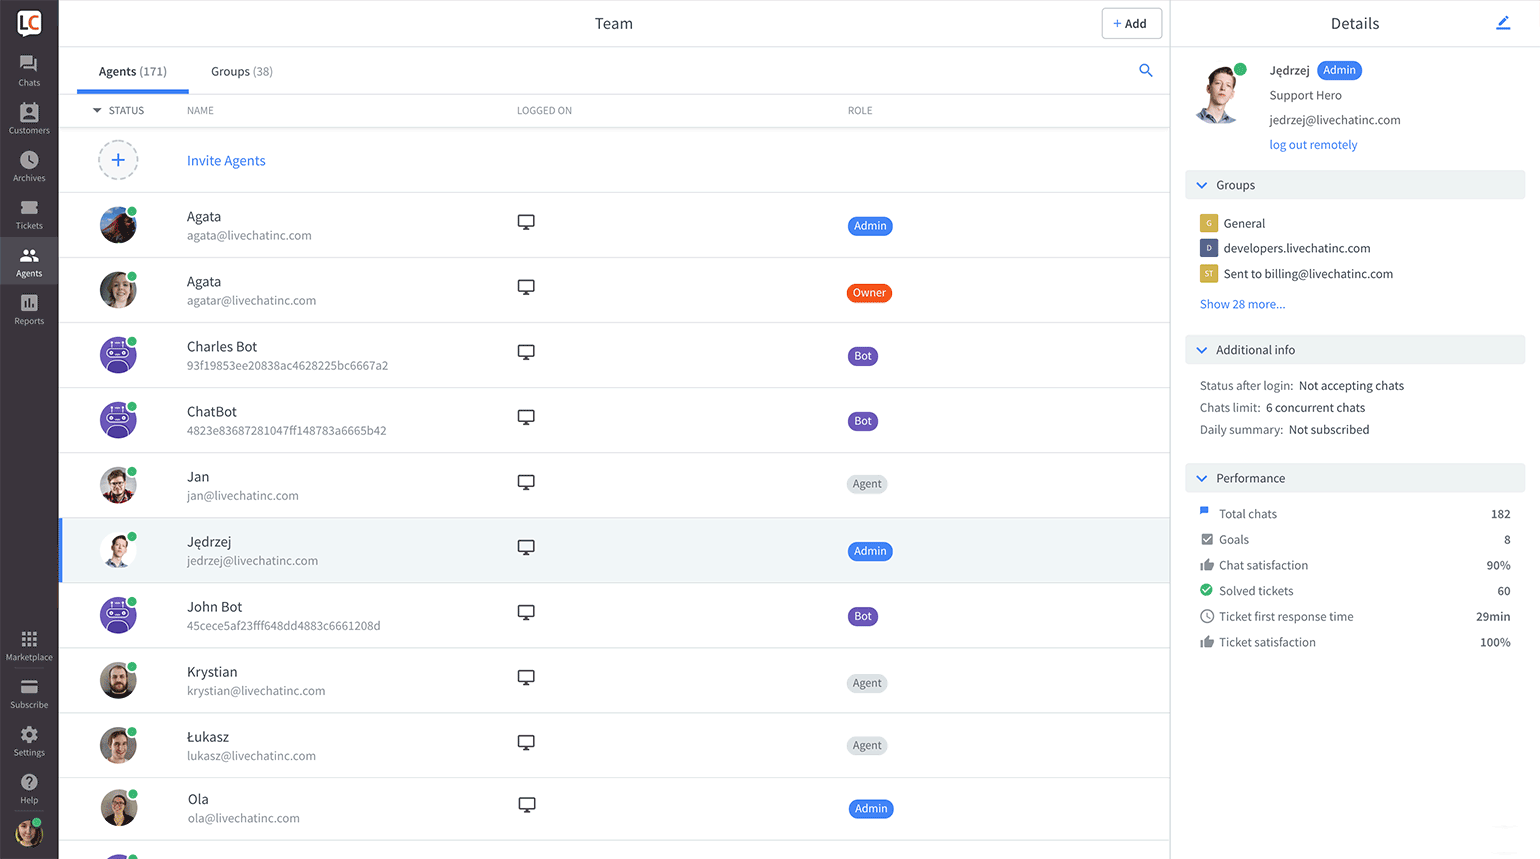
Invite agents
- Go to the Agents section in the app.
- Click on Invite Agents.
- Enter your teammates’ emails and choose a role for them. Once you hit send, they will get invitations to their inboxes with instructions on what to do next.
More about roles
You are the Owner, so you are in full control of the license. Your teammates can either be Admins or Agents. Agents answer chats, tickets, and see reports, but can’t change settings. Admins have all agent permissions, plus they have access to all settings.
Edit agent’s profile
Once you’ve invited your teammates, each one of you can play a bit with your profile settings. Sidenote: the Owner and Admin can change these settings for everyone.
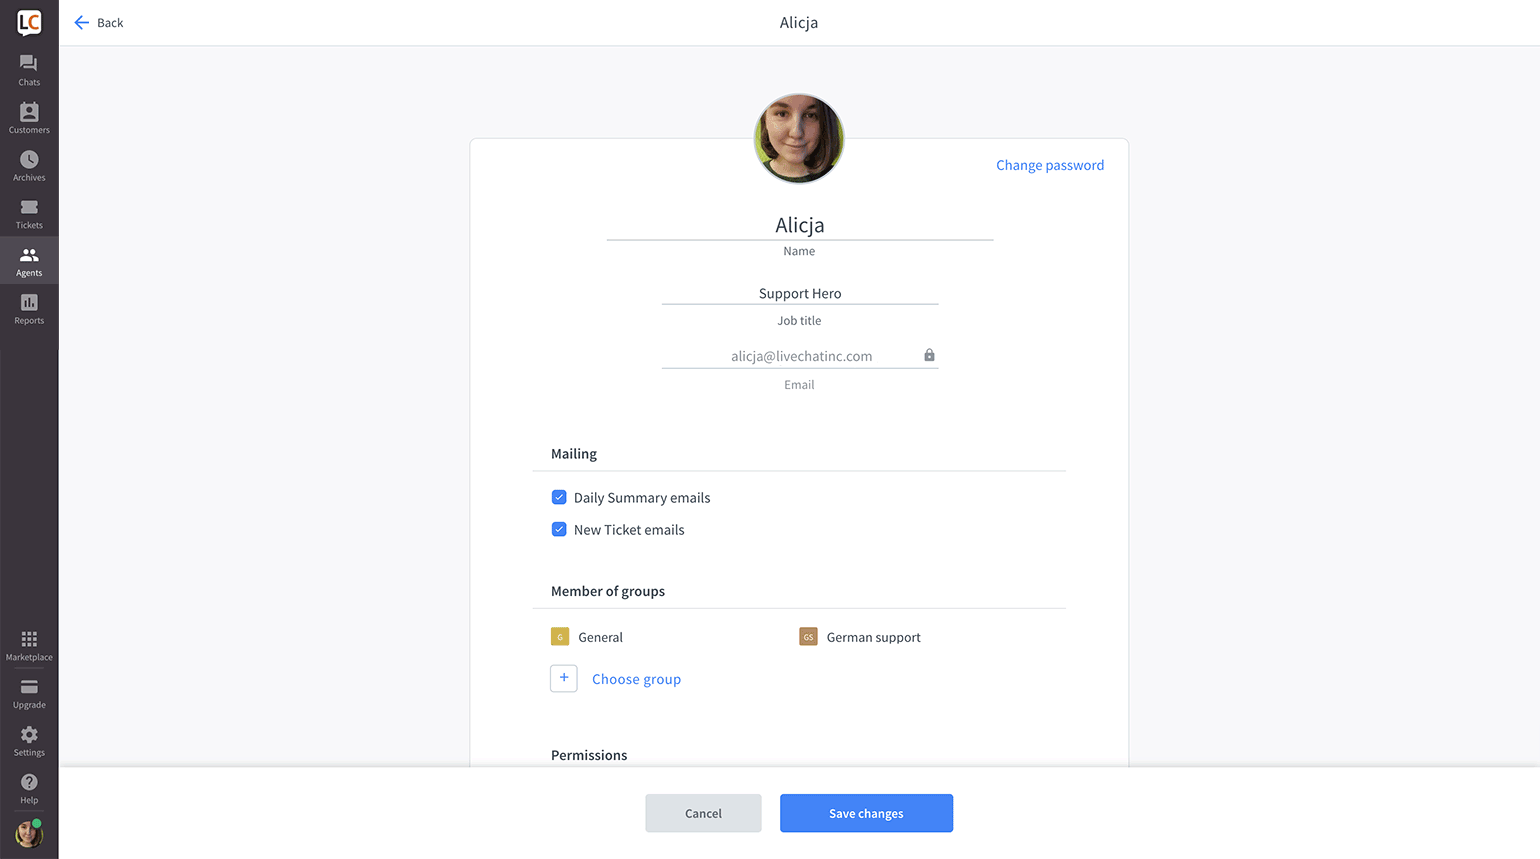
To edit agent profile:
- Go to the Agents section.
- Choose your profile from the list.
- Click on the pencil icon in the top right corner.
- Upload your profile picture (customers love seeing a real face), change your name, and the job title.
- Save changes when you are finished.
Admins and the Owner can also change the chat limit. So how many chats an agent can take at a time. At first, even two chats might seem too many, but after a few days agents are able to handle 6 without breaking a sweat.
4. Configure and do a test run
If you want to start talking to customers immediately and set things up later—skip to next step.
Test LiveChat with teammates and friends
If you want to try things out before going live you can either:
- Send the chat link to your coworkers or your mum, dad, and granny so they can talk to you via chat. You will find your chat link in Settings → Channels → Chat link.
- Add the chat widget to a test/staging version of your website. Go to the next step to learn how to do it.
Check out basic tools and features
Once you are in the app, you might want to click through the sections to get familiar with the app. There are a few things that you can learn while running test chats with your coworkers or friends:
- Agent status—easily switch between accepting (when you can pay attention to chatting) and not accepting chats (when it's lunchtime).
- Canned responses—save template messages to quickly recall them later.
- Sneak peek—see what the customer is typing before they hit enter.
- Tags—tag each conversation to look for patterns, trends and filter reports later.
- Transfers—transfer a chat to a more experienced agent.
- Supervise—overlook and help other agents without leaving your desk.
- Archives—read your past conversations.
- Tickets—manage cases that can’t be resolved on chat.
- Details—view all important information about the customer without leaving the chat.
Configure your account
There are also a few things you can set up with minimal effort:
- Chat widget—customize the chat widget, so it matches your website.
- Language and welcome message—change the chat widget language and set fixed phrases.
- Surveys and forms—turn on/off and edit surveys and forms.
- Greetings—decide when and where automatic messages pop up on to invite your customers to chat.
- Groups and URL rules—divide incoming chats so for example all chats coming from your help pages go to your support team, and all chats coming from checkout go to your sales team.
Oh, one thing, don’t be afraid of experimenting and exploring. You can change settings back and forth as everything is easily reversible (often with just one click) and our support is always happy to help.
5. Add the chat widget to your site and go live
Now that you've played around with the app it's time to go live. Ready? Let’s get the chat widget up and running on your website. There are two ways:
Add a JavaScript code snippet to your site's source code
If your website is custom built by a developer, you will need to add LiveChat code snippet to the source code of your website. If you are tech-savvy you can do it on your own, if not you will have to ask a developer to do it for you. Here's how to add the chat widget to your website.
Add LiveChat to your website with integrations
Using Wordpress, Shopify, BigCommerce, WIX, or Google Tag Manager? LiveChat integrates easily with almost a hundred CMSs and e-commerce platforms. All you need to do is either copy paste the code snippet or install a plugin. It takes just a few minutes and requires no technical skills. Each integration comes with a step-by-step tutorial that you can find in our knowledge base.
Once you finished the installation, head to your website and check how LiveChat looks. It will feel pretty good after the work you’ve already done. Rember: once it’s installed on your website you can get chats right away.
6. First chats
Nervous but excited you answer first chats. Sometimes the number of chats is just right for your team, sometimes you feel like you can handle more and sometimes there are too many spam chats. Here’s what to do in these situations:
Get rid of spam and low-quality chats
If everything seems like it's a spam chat, use a canned response that describes what your company is, sometimes people are just confused and once explained will apologize and leave, if they keep sending irrelevant or offensive messages—ban them so they can't bother you anymore.
You can also track which pages bring the highest number of low-quality chats and delay greetings or remove the chat widget from these particular pages. Learn more about dealing with spam.
Get more chats
- Start using greetings—if your are not doing it already; if you are—check if they are triggered on pages with the heaviest traffic. Learn more about greetings.
- Add eye catchers—grab your visitors attention with custom made pictures that invite them to chat. Learn more about eye catchers.
- Change or make your online hours longer—if your customers often visit your website in the evening or at night maybe you should try expanding your online time, so you're there when they need you. If you can't introduce evening or night shifts in your team, download our mobile app and talk to customers on the go.
LiveChat after work hours
Once you are finished for the day remember to switch your status to not accepting chats. So there are no unanswered chats. If all agents are offline, your site's visitors will see a ticket form. They can leave a message for you that will be saved in the app as a ticket. So you can answer it when you are back at work.
7. Analyze and fine-tune
After a day, a few, maybe a week you can take a look at the reports and see if there are patterns that can help you fine-tune your LiveChat. In the long run, reports are there to show you both LiveChat's and your team's performance.
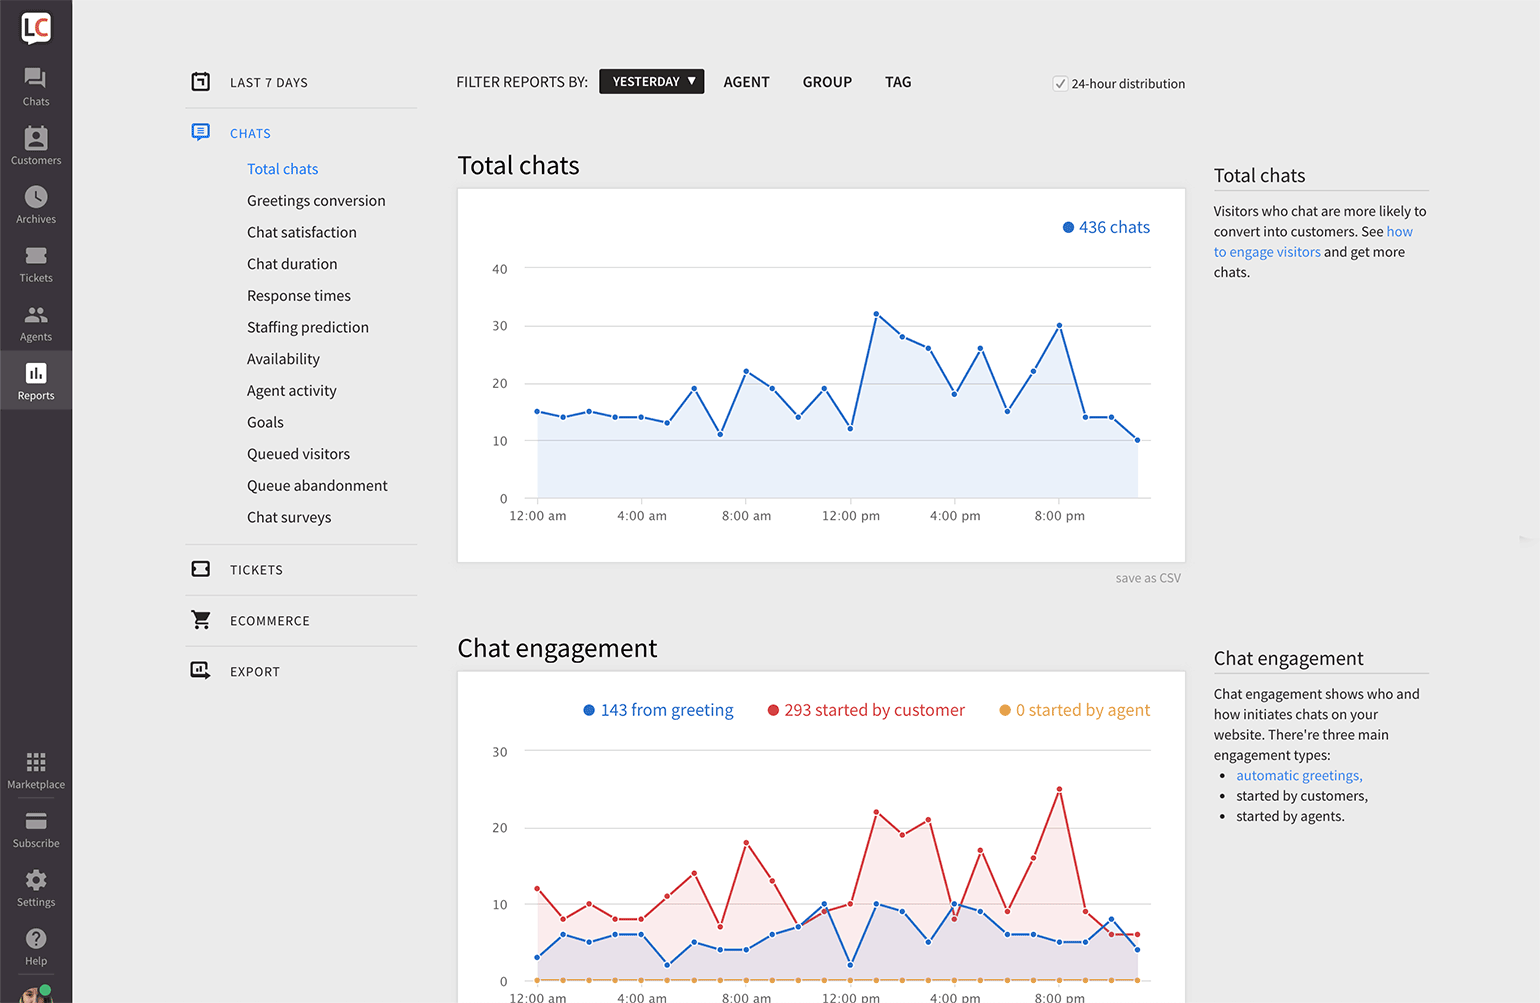
Here are a few reports worth looking at:
- Total chats—a versatile report. Use 24-hour distribution to see when most chats are coming and adjust the number of agents accordingly. If you tag your chats consistently you can also use it to see the volume of chats related to particular topics.
- Greetings conversion—see which greetings convert best and which need some adjustment.
- Chat satisfaction—see if your customers are happy with your support.
- Queue abandonment—if a lot of your customers leave the queue; it might mean that you need more agents online.
- Chat survey—see stats on information left by your customers in the pre-chat and post-chat surveys.
If you decide to switch to Business plan you can also take advantage of additional reports, export all reports as well as use our API to get any data you need.
8. Choose a plan and subscribe
Now that you've tried LiveChat and had real chats with customers you probably know if that's something for you. If the answer is yes and you want to continue using LiveChat after the free trial, you'll need to subscribe. Also, hurray! Thanks for choosing LiveChat.
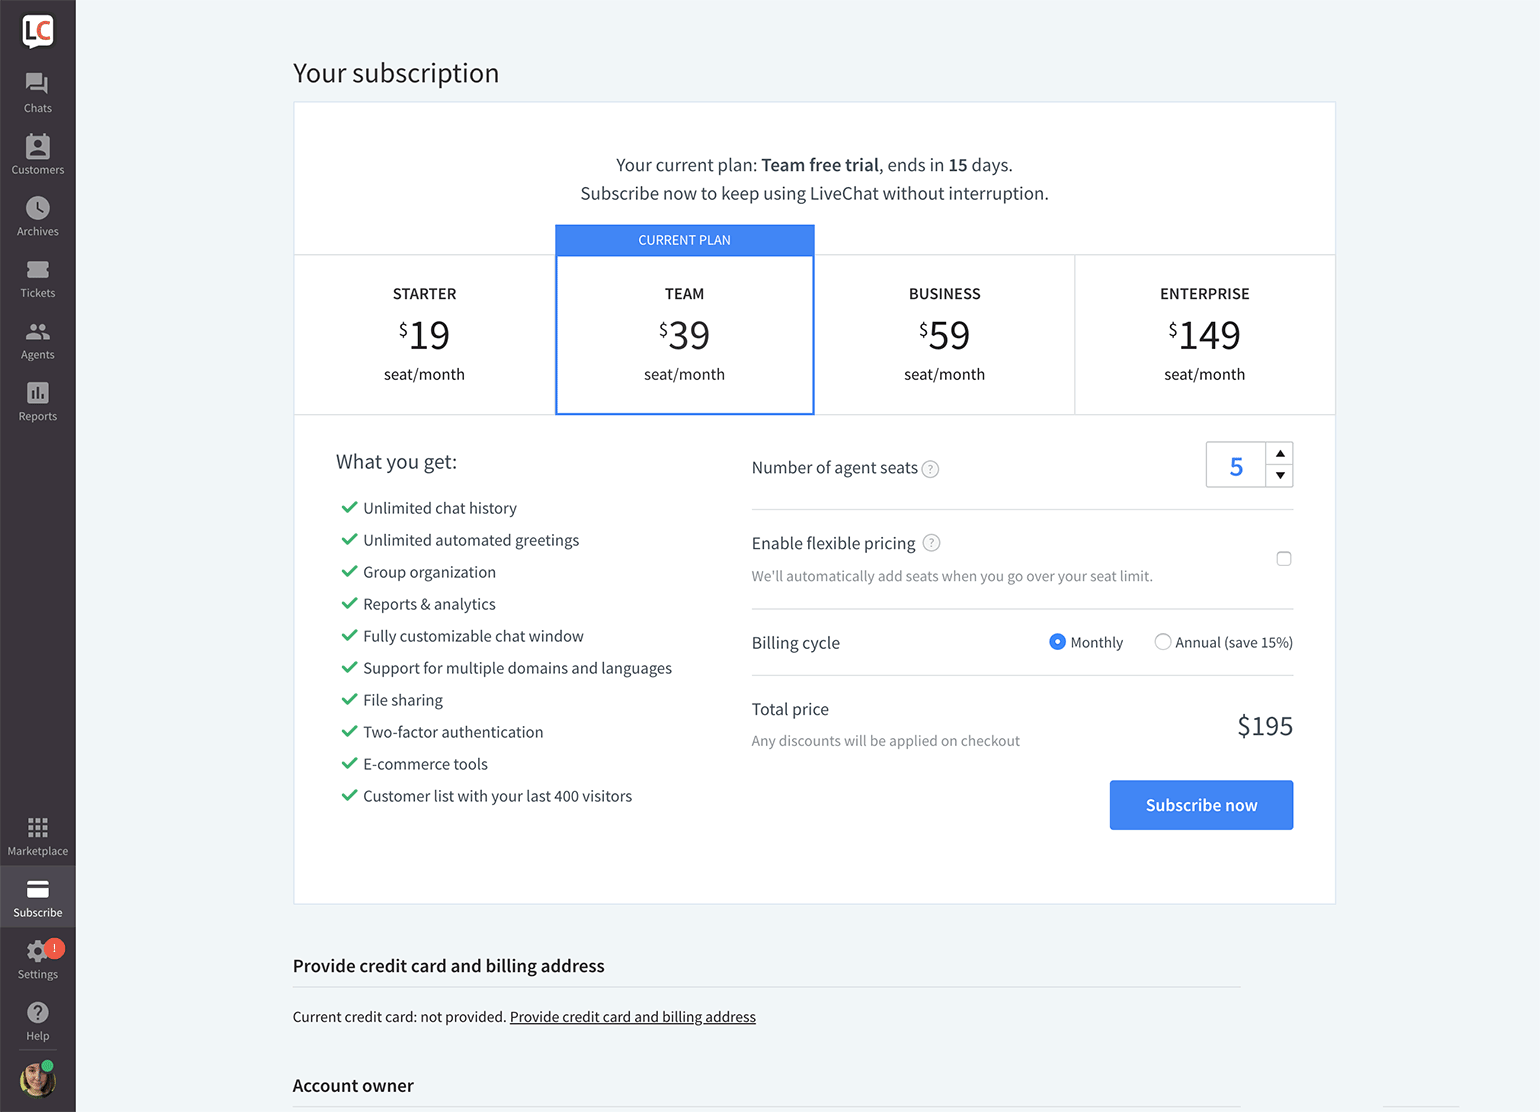
Subscribing is really easy. Go to the Upgrade section and choose a plan, the number of seats (so a number of agents who can be online at the same time) and if you want to be billed monthly or yearly. You will also have to provide your company credit card details.
Once you subscribe, all your invoices will be available to download in this section.
Not sure what plan to choose? Here's an article on choosing the right plan.
9. Change work culture & train your agents
When you introduce LiveChat to your team, you might notice that things are a little bit chaotic at first. That's why we recommend you adjust your current workflow, so it encompasses tasks related to live chat. Here are a few things worth mentioning:
If you don't have a dedicated support team, you will need to decide who is going to take care of chats and when. You can create a schedule where Ben and Jerry take care of chats from 8 to 12 a Thelma and Louise from 12 to 4. So they can handle their other tasks when they are not chatting.
Create procedures, e.g., how to write to customers on chat, as describing your offer on the phone might be completely different in writing. You might want to have guides on using tags and canned responses.
Clearly state the rules on checking the quality of support—chat satisfaction, response times, case resolution time. So you keep on providing great customer support.
Create training procedures. You can decide if a training manual, mock chats, or shadowing and learning with the assistance of a more experienced teammate is best for your team.
If you don't have a dedicated support team you can still assign responsibility for quality control and configuring LiveChat, so Jake who has the most seniority takes care of quality and reporting, and Tom who has a knack for tech can be in charge of setting things up. Both of them can and should consult their decisions with other agents.
Read more about how you can help your team succeed.
10. Go beyond basic features
Once you feel comfortable with LiveChat basics, you can <a href="https://www.livechat.com/help/welcome-to-the-livechat-marketplace/" target="_blank">explore our integrations</a>. Connect apps and services you already use to streamline your work:
- CRM—connect LiveChat to Hubspot, Pipedrive, Salesforce and many more and sync information about customers with one click.
- Analytics—use Google Analytics to know even more about how your customers interact with LiveChat on your site.
- Help Center—let your customers use self-help articles with KnowledgBase.
- Email marketing—expand your Mailchimp subscriber list using LiveChat.
Want to make your customer service even better? Use bots. LiveChat integrates with ChatBot—an online platform that helps you build a working chatbot in 10 minutes.
Again, thanks for using LiveChat! If you have any questions, our support team is there for you 24/7/365.
 Help Center