 Help Center
If you keep track of your clients in Toggl and use LiveChat on your page this integration is fit for you – you can join those two apps via Zapier. Every time your chat visitor shares their data on LiveChat you can mark such chats with a tag and pass selected info to Client's section in Toggl.
Here's a tutorial with instructions on how to create a Zap that will create a new Client in your Toggl after a 'client' tag is added to a chat.
Creating the Toggl – LiveChat Zap
Creating a Zap consists of four main parts:
- Setting up the trigger
- Adding a filter
- Configuring the action
- Launching the Zap
Setting up LiveChat trigger
The first step to set up this integration is to determine a condition that will trigger an action in your Toggl account.
In this integration, Chat changed trigger will be used.
1) Log in to Zapier and click on Make a Zap in the upper menu.

2) Choose LiveChat as the Trigger App.
3) Select Chat changed as the Trigger.
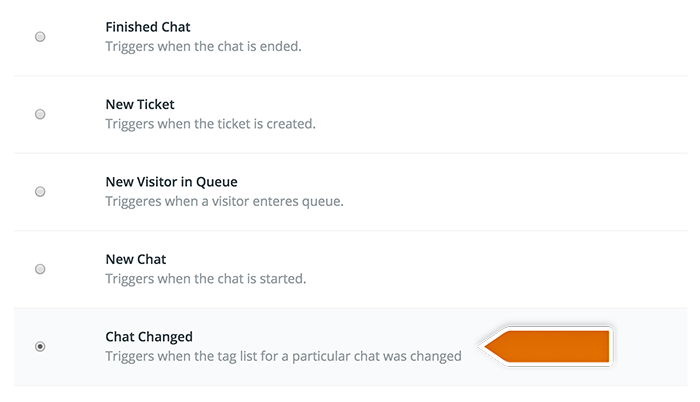
'Chat changed' triggers when a tag is added to or changed for either an ongoing or archived chat.
4) Click on Save + Continue to proceed.
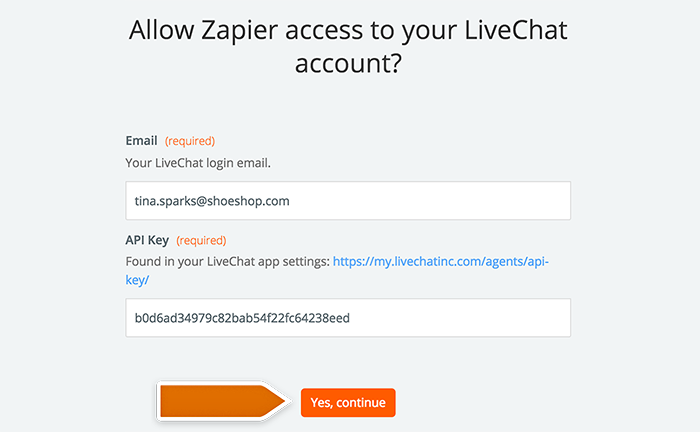
5) Select Connect a New Account and then provide your LiveChat login email and the API key. Next, click on Yes, continue to accept.
6) You can rename your account. Then confirm your choice by clicking on Save + Continue.
7) Select Fetch & Continue to test this step and make sure it is working properly.
Adding a filter
The second step is adding a filter that will only pass the chats with a 'client' tag further.
8) Go to the filter section in Zapier and choose the tag of the chats that you want to pass to Toggl.
9) Then confirm by clicking Continue button.
Configuring the action in Toggl
High time to configure what will happen in Toggl after dedicated tag is added to a chat.
10) Choose Toggl as Action App.
11) Then choose Create Client as the action and confirm by clicking on Continue.
12) Select your Toggl account and Continue.
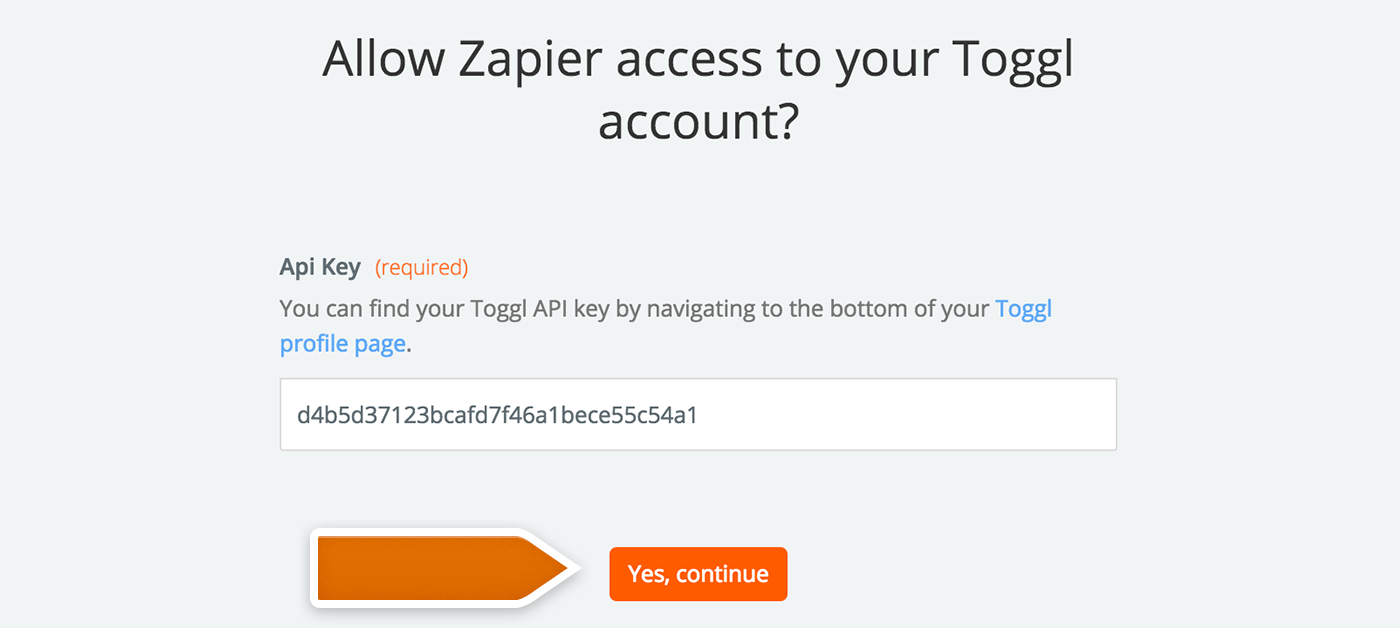
13) Authorize Zapier to access your Toggl by providing API key in the pop-up window, then confirm.
14) Next, decide which data you want to pass to your Toggl.
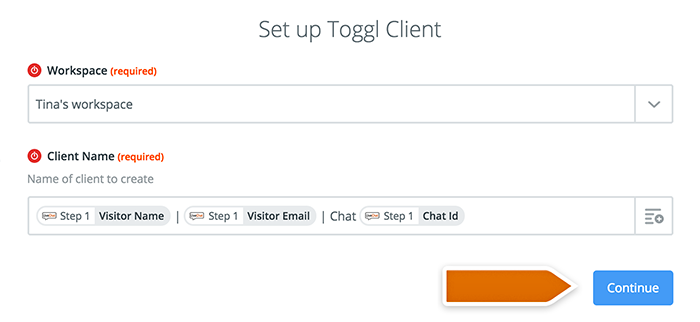
15) After you finish, click on Continue button down the page to proceed.
16) Zapier will ask you to test the Zap. Follow the instructions to make sure your Zap is working correctly.
17) Next, click on the Finish button.
Launching the Zap
So far so good? High time for launching then!
18) Turn the Zap on by clicking on the grey switch and start passing information from LiveChat to Toggl.

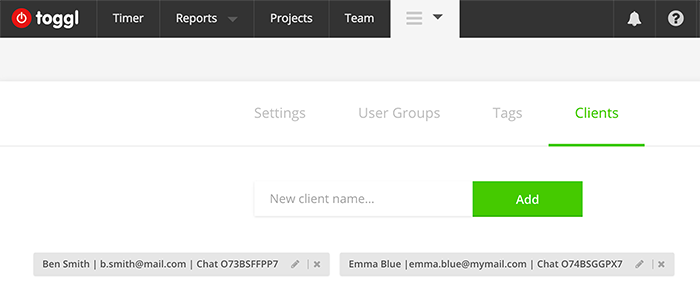
Done! You have just linked your LiveChat with Toggl through Zapier. From now on, clients' data from each chat with a 'client' tag will be added to your Toggl.