 Help Center
Using Zapier, you can connect LiveChat to a number of different services to store chat transcripts, create new contacts in your CRM and much more.
In this tutorial you'll find instructions on how to create a Zap. We explain it on an example integration between LiveChat and Google Contacts.
Take a look at the list of the most popular LiveChat Zaps with the setups.
You can also use our most popular Zaps straight from your LiveChat app. Click here to visit our Integrate using Zapier section and use new Zaps without the need to leave your LiveChat!
Creating your first Zap
Creating a Zap consist of three main parts:
- Setting up the trigger
- Configuring the action
- Launching the Zap
For the purpose of this tutorial, we will create an example Zap that will add a new Google Contact entry for each person that started a chat with you.
Setting up the trigger in Zapier
1) Start off by logging in to Zapier and click on Make a Zap in the upper menu.

2) Choose LiveChat as the Trigger App.
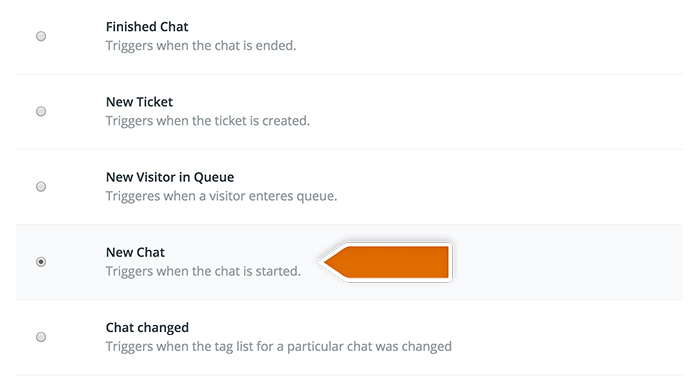
3) Select New Chat to be your Trigger.
4) Click on Save + Continue to proceed.
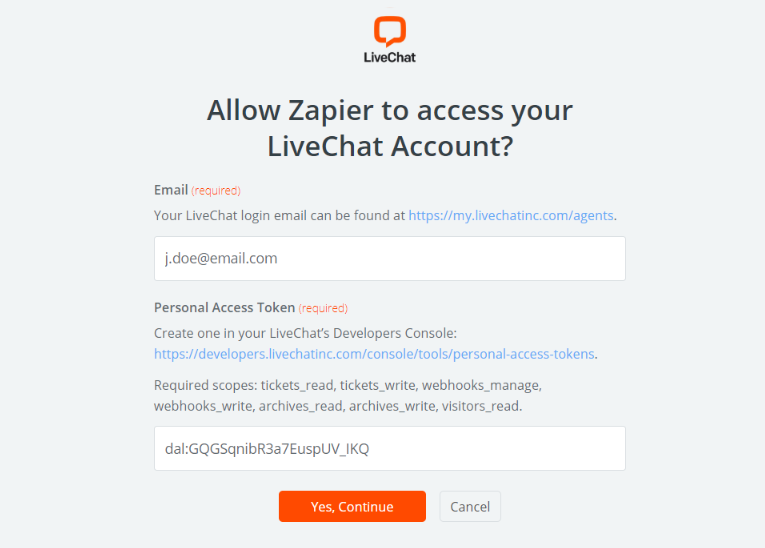
5) Click on Connect a New Account and then provide your LiveChat login email and the PAT (Personal Access Token). Next, click on the orange button at the bottom.
6) You can rename the account and then click on Save + Continue.
7) Select Fetch & Continue to test this step and make sure it is working properly.
Configuring the action
8) Choose Google Contacts as Action App.
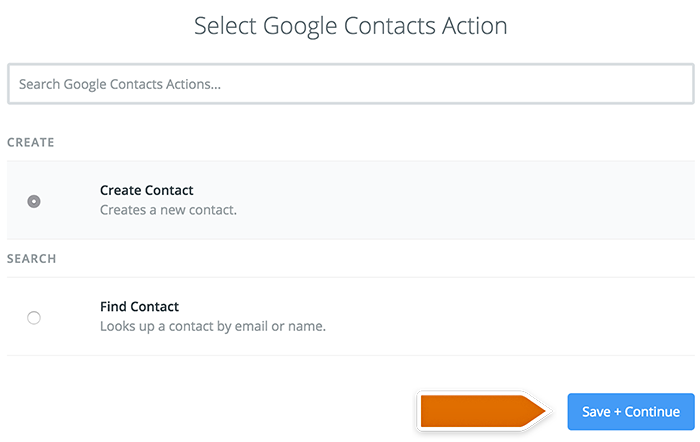
9) Then choose Create contact as the action and confirm by clicking on Save + Continue.
10) Log in to Google Account you want to use by providing login and password.
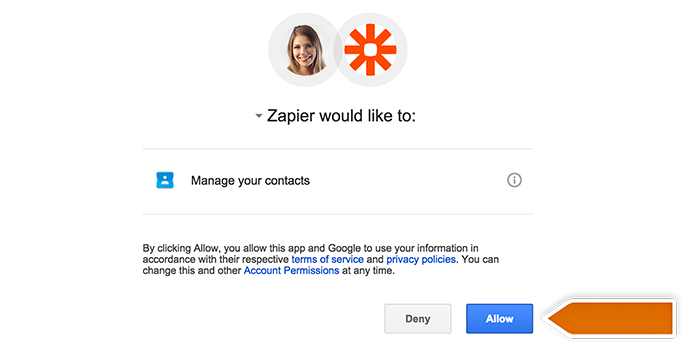
11) Allow Zapier to manage your contacts.
12) Select your Google Account and confirm the choice by clicking on Save + Continue.
13) Test the account and click on Continue if it checks out.
14) Next, set up how a new contact will show up in Google Contacts by choosing the data that will be forwarded.
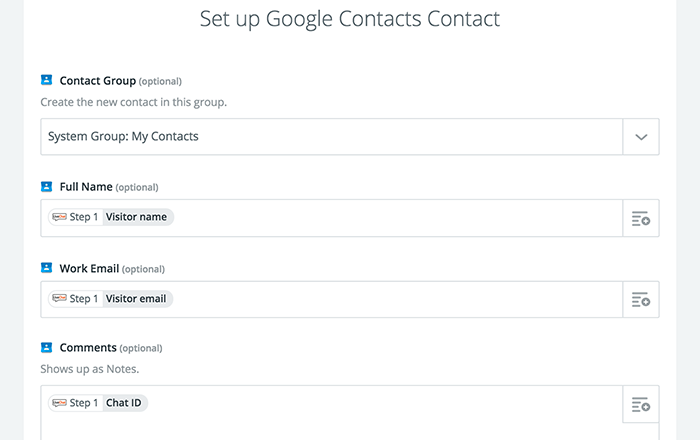
15) After you finish, click on Continue button to proceed.
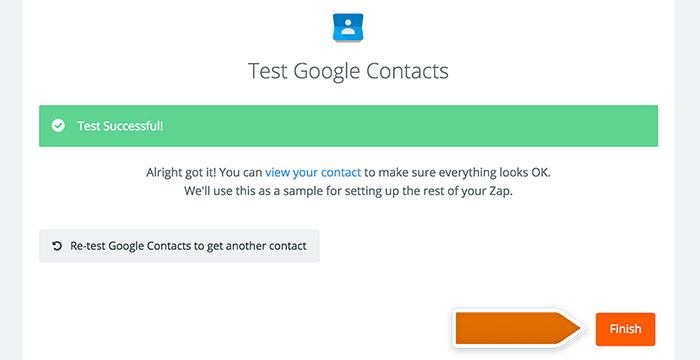
16) Zapier will ask you to test the Zap. Follow the instructions to make sure your Zap is working correctly.
17) Next, click on orange Finish button.
Launching the Zap
18) Turn the Zap on by clicking on the grey switch and start passing information from LiveChat to Google contacts.

Congrats, you have just created your first Zap! At the start of each chat, it will save your visitor's name, email address and add a chat ID of the conversation as a comment.
This is just one of the ways you can set this integration. For example, you can set the trigger to fire when the chat is finished. You can also add Chat Started and Chat Ended variables to the Comments section to get information when the chat started and ended. Check out this example Zap to see how it looks like with those variables added. Try creating Zaps for other services you are using to simplify your work!
Popular LiveChat Zaps
Here is a list of the most popular LiveChat integrations installed through Zapier along with the setups:
- Add LiveChat Contacts to Your Benchmark Email Lists
- Add LiveChat Contacts to Contacts in Autopilot
- Add leads to Zoho CRM when LiveChat chats end
- Add LiveChat contacts as Items in your Podio
- Get Slack messages when LiveChat chats end
- Gather Contact Data in Hubspot after LiveChat chat ends
- Submit HubSpot forms from new LiveChat chats
- Create an issue in Jira after LiveChat chat is finished
- Add Basecamp to-do when LiveChat chat ends
- Create an issue in GitHub after a bug is reported via a chat
- Add chat transcripts as notes to Evernote
- Create RD Station leads from new LiveChat chats
- Add finished LiveChat chat contacts to MailChimp list
- Get emailed at Zapiermail when LiveChat chats end
- Add Pipedrive deals when new LiveChat chats end
- Pass LiveChat contact as New Person to Pipedrive
- Add rows in Google Sheets when LiveChat chats end
- Add Close.io leads from new LiveChat chats
- Add leads to Base when new LiveChat chats end
- Create new Trello cards when LiveChat chat ends
- Add new Asana stories when LiveChat chats end
- Add notes in Capsule CRM when LiveChat chats end
- Log chats to Google documents
- Send Twilio SMS when chat is finished
- Add LiveChat chatters as clients to Toggl
- Create tasks from chats in your Google Tasks account
- Create tasks from chats in your Wunderlist
- Add chat transcripts as tasks in Todoist
- Add tickets as cases in Magentrix
- Add chat visitors to Google Contacts
- Get Pushover Push Notification when LiveChat chat starts
- Save LiveChat Chatter to Nutshell
- Create New Lead in LeadOutcome when chat starts
- Create new Infusionsoft contact from finished LiveChat chat
- Add new lead in Salesforce when LiveChat chat ends
- Create and update Hatchbuck contacts from contacts in LiveChat
- Add new contacts straight from your chats directly to your Mailigen newsletter
- Track the success rate and the amount of chats with the use of ProjectManager
- Gain new subscribers from chats and grow your newsletter campaign with Constant Contact
If you are looking for other integrations with LiveChat through Zapier, visit LiveChat zapbook.