 Help Center
Integrate LiveChat with Zendesk and gain the possibility to create new Zendesk tickets, without leaving your LiveChat application. But that's not all! With our Zendesk integration you can:
- Create new tickets right during a chat with your customer;
- Create new tickets from chats that were already archived;
- Preview the history of previous tickets opened for your customer;
- Automatically forward all offline messages as tickets to Zendesk.
Zendesk LiveChat: Installation
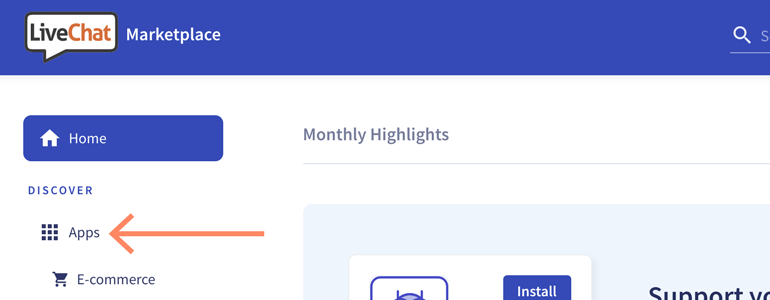
1) Click here to access your LiveChat's Marketplace. To proceed, go to the Apps section.
2) On the list of available apps, look for Zendesk and click on Install button to proceed.

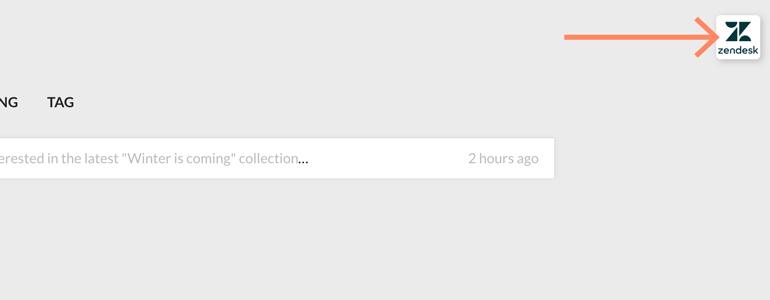
3) After successful installation, go to the Archives section of your LiveChat. There you will see a new Zendesk icon, available at the top right section of your App. Click on it to proceed with Zendesk configuration.
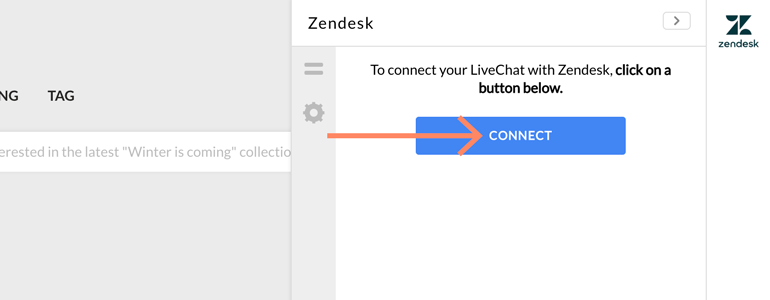
4) Now, click on Connect to link your Zendesk account with LiveChat.
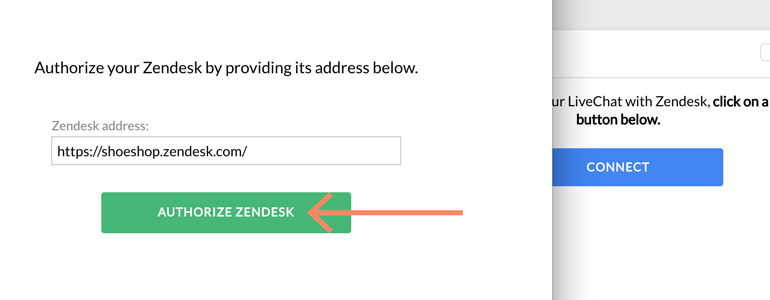
5) You will be prompted with the Zendesk authorization screen. First, provide your Zendesk domain and click on Authorize Zendesk.
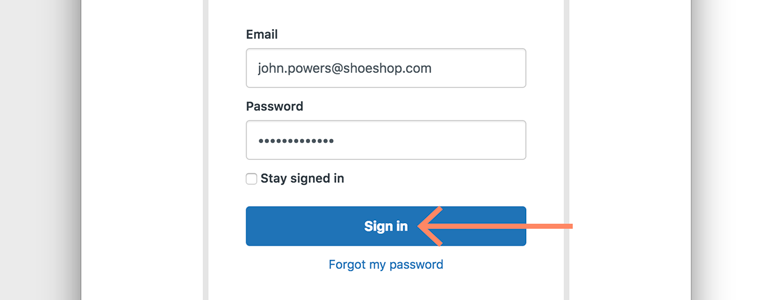
6) Now that your domain is successfully authorized, provide your Zendesk credentials and click on Sign in button.
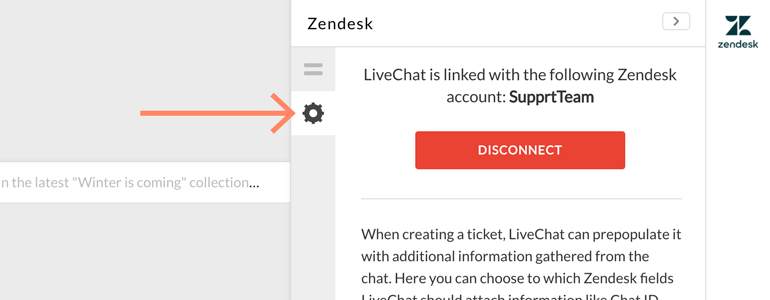
7) There's just one more thing left: Zendesk integration allows you to attach a chat ID to a custom field: those fields are automatically loaded from your Zendesk account. To set that up, go to the Settings section of your Zendesk app.
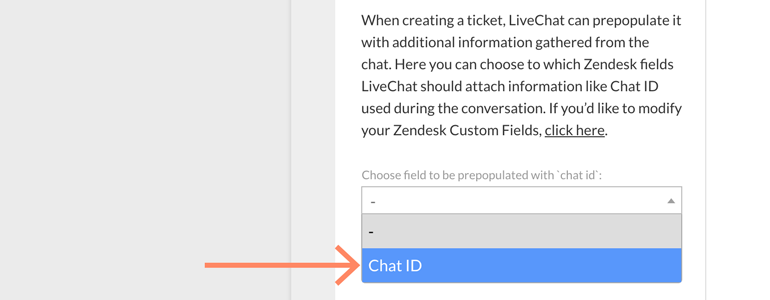
8) Now, choose to which custom field LiveChat should automatically attach the chat ID.
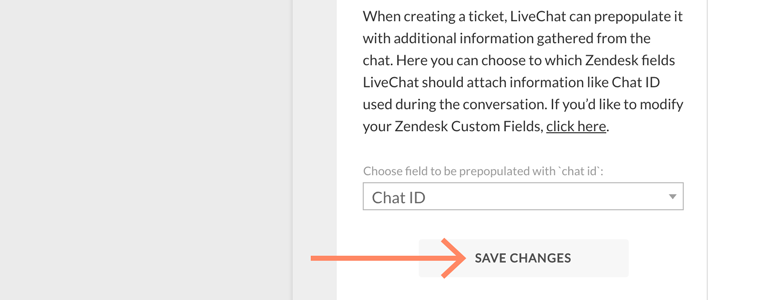
9) If everything is ready, click on Save changes button to finalize the process of installation.
Done! Your Zendesk account is now successfully linked with LiveChat, and you can start using the integration right away! To see what exciting features our Zendesk integration has to offer, check out the chapter below.
Creating a ticket
Zendesk integration allows you to create two types of tickets: simple and advanced.
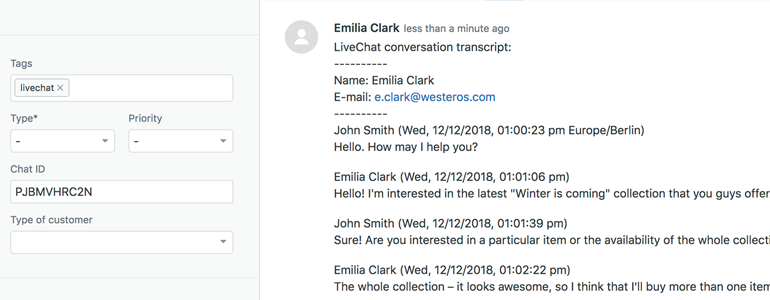
While creating a simple ticket, LiveChat will automatically forward your customer's name, email address and chat transcript to your Zendesk account. Here's the example of how the simple ticket will look like in your Zendesk dashboard:
Advanced tickets give you the option to:
- specify the subject of a ticket;
- edit the content of a ticket;
- choose a Zendesk group and person within a group to which ticket will be assigned;
- attach custom fields taken from your Zendesk account and pre-fill them with additional information;
- decide what type and priority will your ticket have.
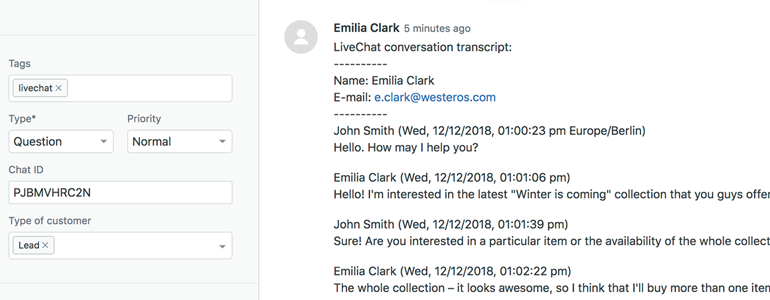
Here's how an advanced ticket will look like in your Zendesk dashboard:
You can create both simple and advanced tickets from your ongoing chats and from archived conversations. So, now that you know the difference, let's learn how to create both simple and advanced tickets with the use of Zendesk integration!
Create a simple ticket
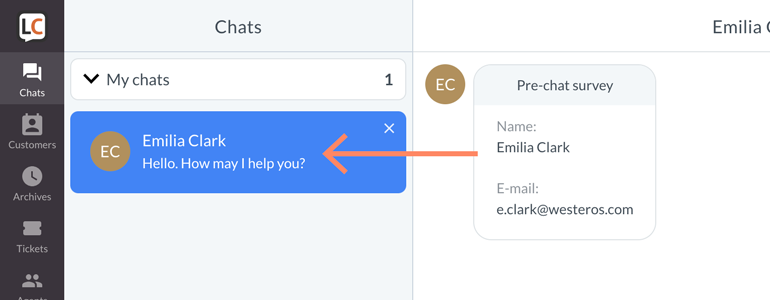
1) To create a simple ticket from an ongoing chat, go to the Chats section and choose one of your ongoing conversations.
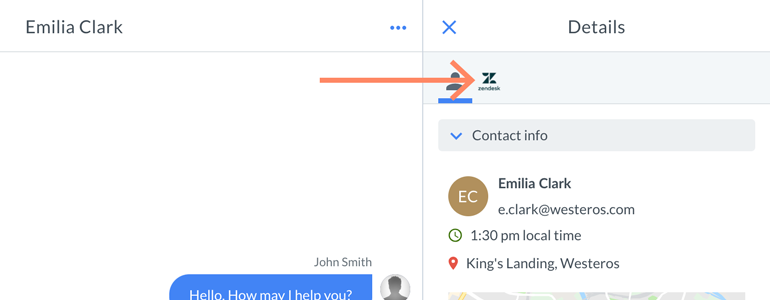
2) Now, open the Zendesk app by clicking on the Zendesk icon, available at the top right section of your LiveChat.
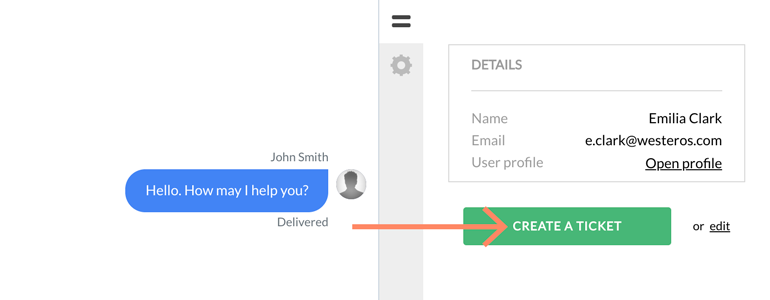
3) If the customer's email address left in your pre-chat survey was used to create a Zendesk ticket before, LiveChat will automatically display this customer's profile. In that case, clicking on Create a ticket button will automatically create a simple ticket in your Zendesk.
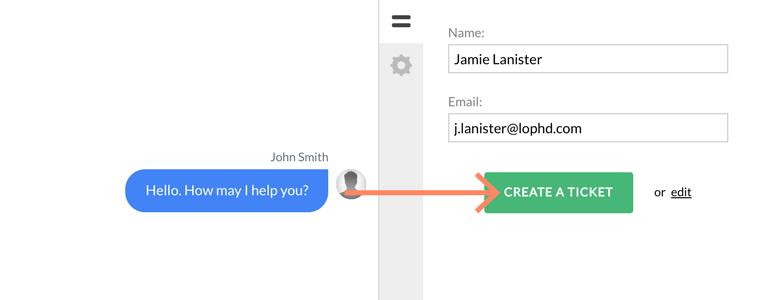
If your customer's email was not used to create a ticket in your Zendesk before, don't worry! LiveChat will load his email from the pre-chat survey and automatically pre-fill the email field or you can just replace this email with the other one, provided by your customer during a chat.
And that's it! Now let's see how to create an advanced ticket for your customer.
Note that you can also create a ticket from the Archives section in your LiveChat.
Create an advanced ticket
1) To create an advanced ticket from an ongoing chat, go to the Chats section and choose one of your ongoing conversations.
2) Now, open the Zendesk app by clicking on the Zendesk icon, available at the top right section of your LiveChat.
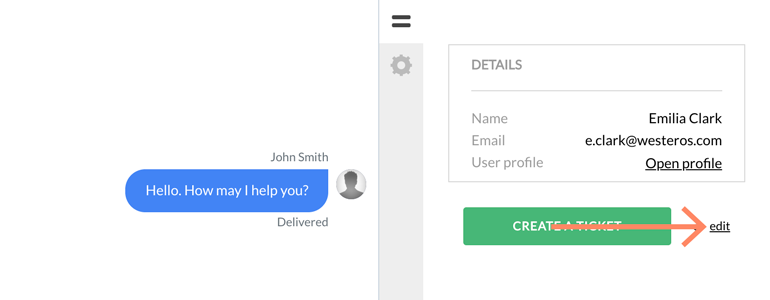
3) Here the flow is similar as when creating a simple ticket: LiveChat will automatically display your customer's profile, if he has left his email address used in your Zendesk before. If that's the case, click on the Edit button.
If your customer's email was not used to create an advance ticket before, this step will apply the same rule as when creating a simple ticket. LiveChat will load your customer's email from the pre-chat survey and automatically pre-fill the email field, or you can just replace this email with the other one, provided by your customer during a chat and click on Edit.

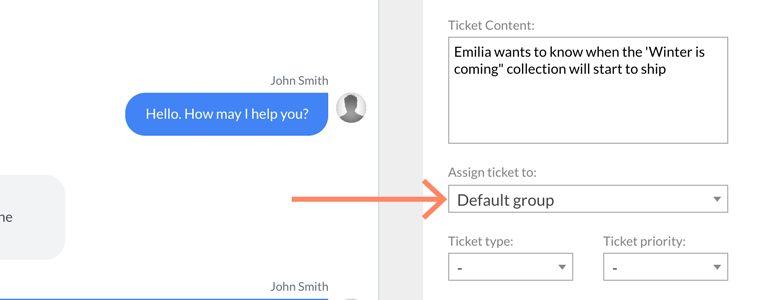
4) Now you can provide your own ticket subject and edit it's content.
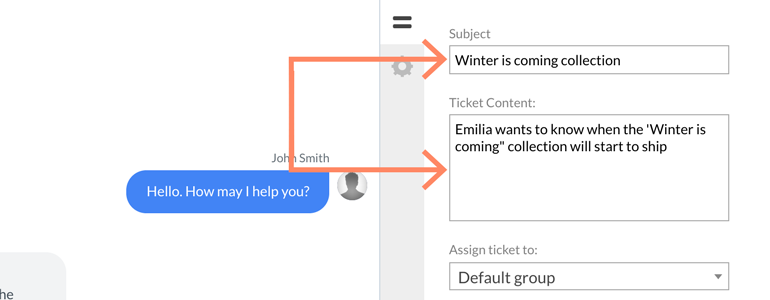
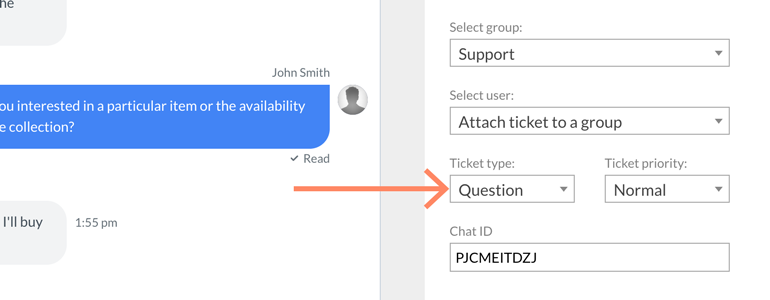
5) You can also assign a ticket to specific group in your Zendesk account.
6) Zendesk integration also allows you to choose the type and priority of a ticket.
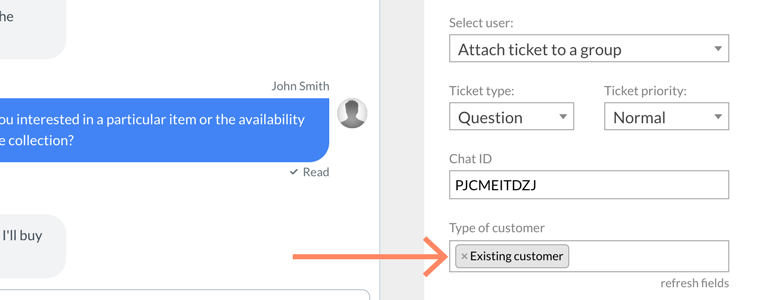
7) As a final option, you can also map the custom fields from your Zendesk with additional information about your customer.
8) Now that your advanced ticket is ready, click on the Create a ticket button.
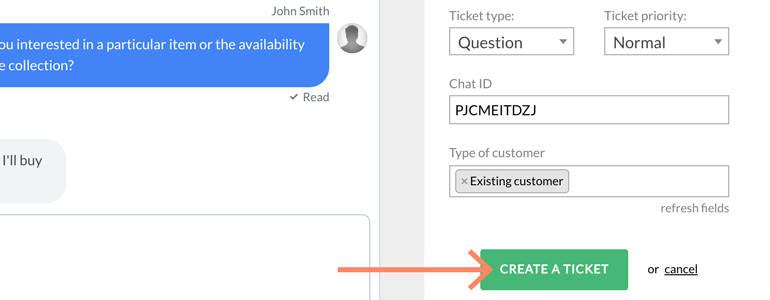
Done! Your ticket should be now visible in your Zendesk dashboard where your team will be able to take care of it from now on.
Note that you can also create a ticket from the Archives section in your LiveChat.
Ticket history
1) To view a history of your customer's previous tickets, simply go to the Chats section and choose one of your ongoing conversations.
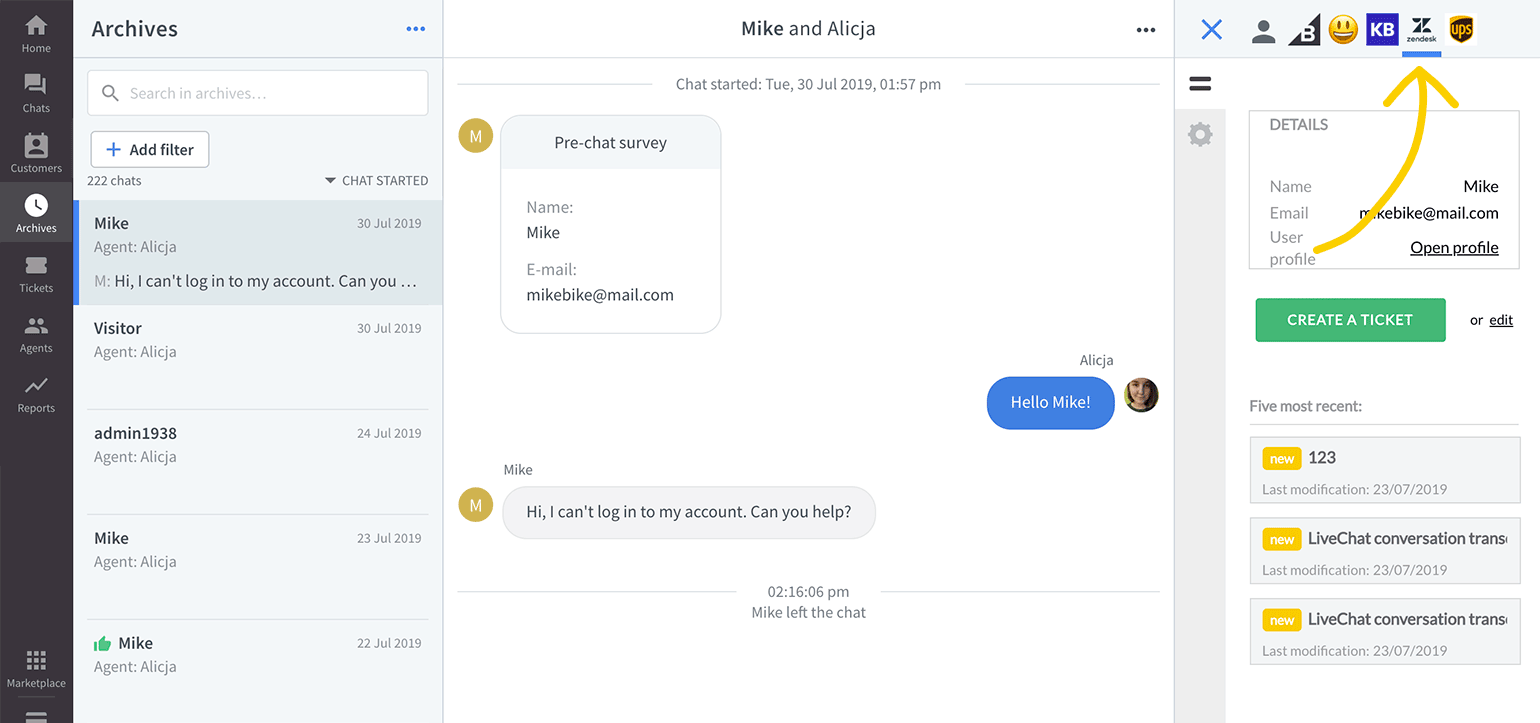
2) Now, open the Zendesk app by clicking on the Zendesk icon, available at the top right section of your LiveChat.
3) After detecting your customer's email, LiveChat will automatically load the last five tickets associated with the provided address and display them below your customer's profile. Also, you can preview the content of a ticket by hovering your mouse over it.
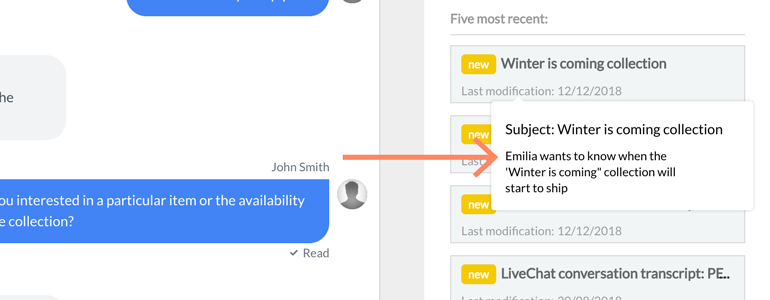
Oh, and one more thing: you can preview the history of your customer's tickets from the Archives section as well!
Pass the agent’s email when you create a ticket
You can automatically pass the agent's email from LiveChat to a custom field in a Zendesk ticket. To do it, follow these steps:
1) Go to Archives and choose any conversation.
2) Choose Zendesk app from the details menu on the right.
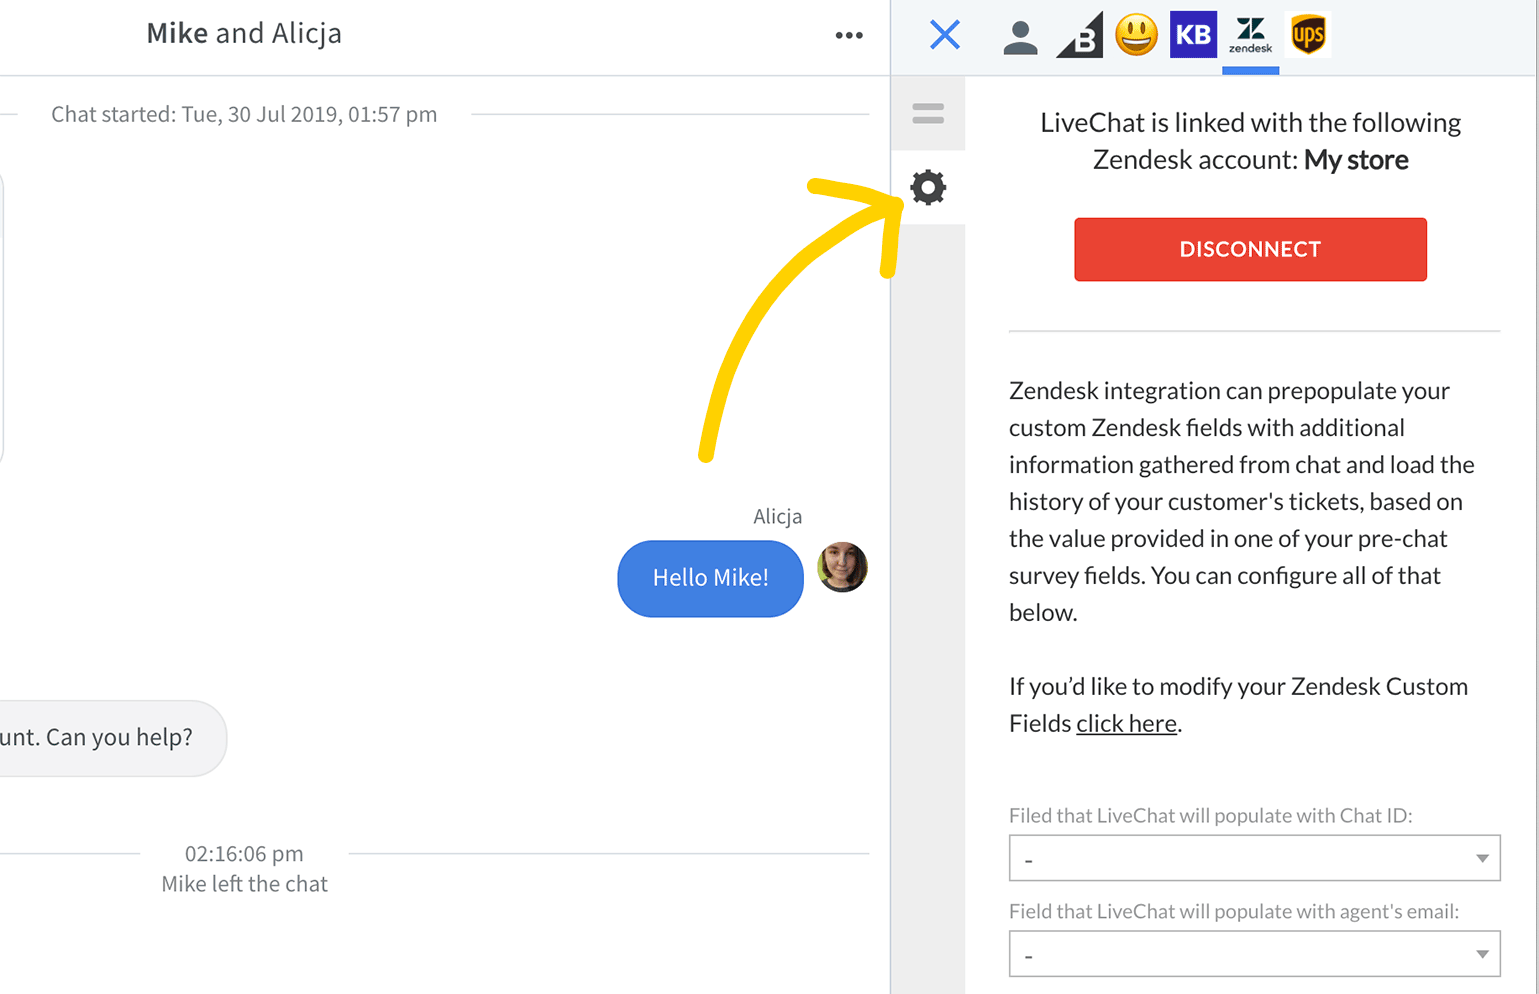
3) Open app settings by clicking on the gear icon.
4) Select a custom field you want to populate with the agent’s email.
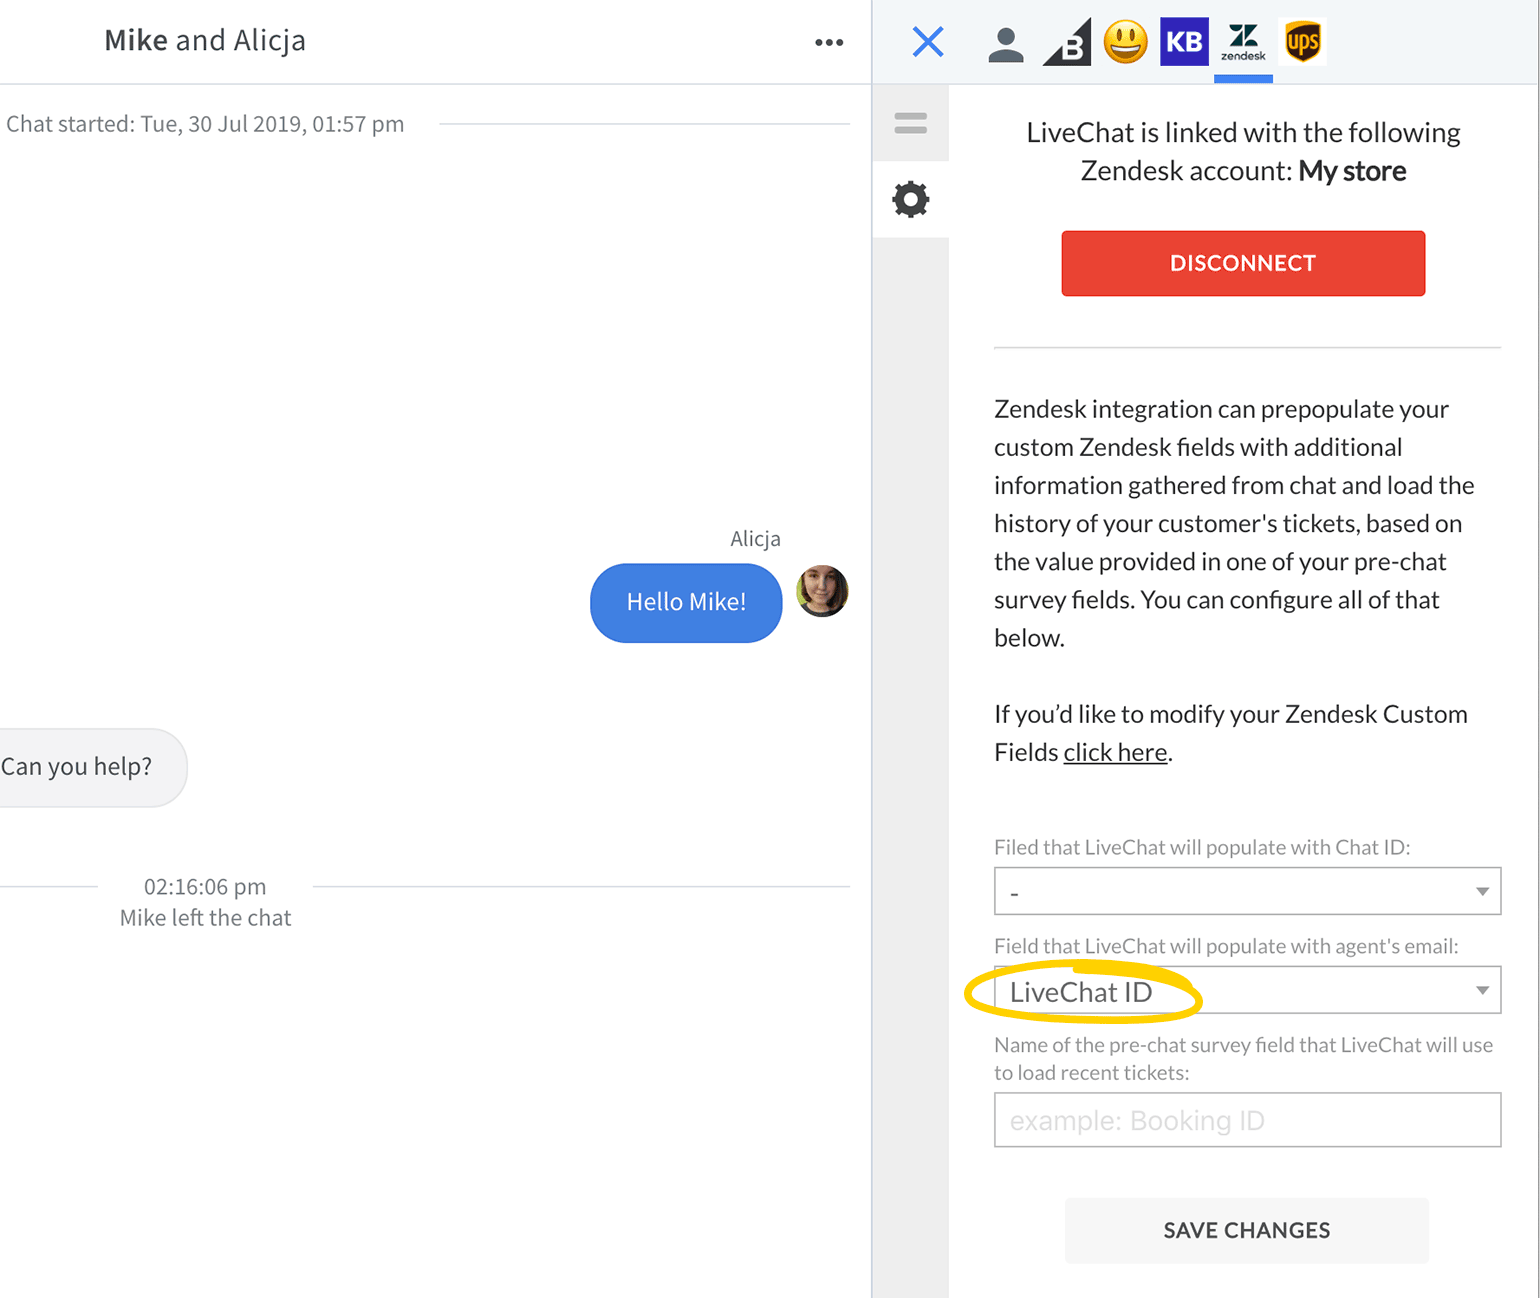
5) Click on Save changes.
Now every time you create a ticket, the agent’s email will be passed on to Zendesk.
Display ticket history based on a custom pre-chat survey field
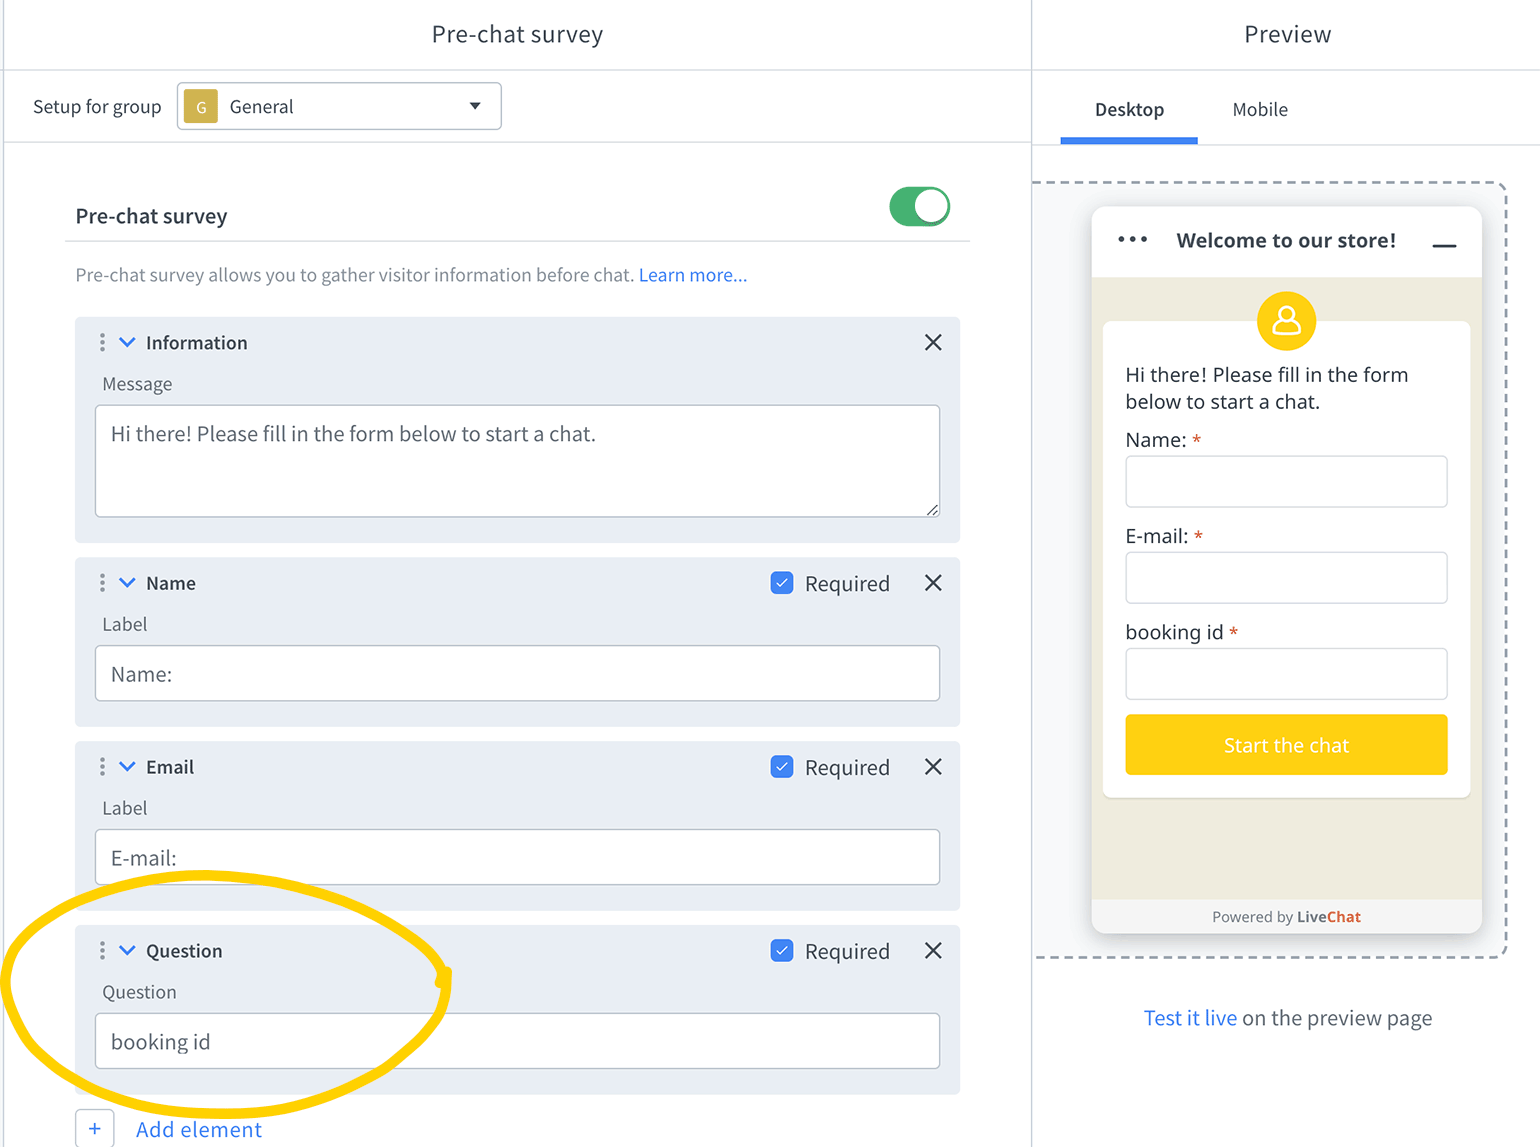
When using the Zendesk app in LiveChat, ticket history is shown based on the customer’s email by default. If you want the tickets to be displayed based on a custom field (e.g., booking id), follow these steps:
1) Go to Settings > Chat surveys & forms > Pre-chat survey. Add a question field and give it a name. You will need to use the name of the field later on. Remember to save changes.
2) Go to Archives and choose any conversation from the list.
3) Choose Zendesk app from the details menu on the right.
4) Open app settings by clicking on the gear icon.
5) Type in the name of the pre-chat survey field you want to use to load related tickets.
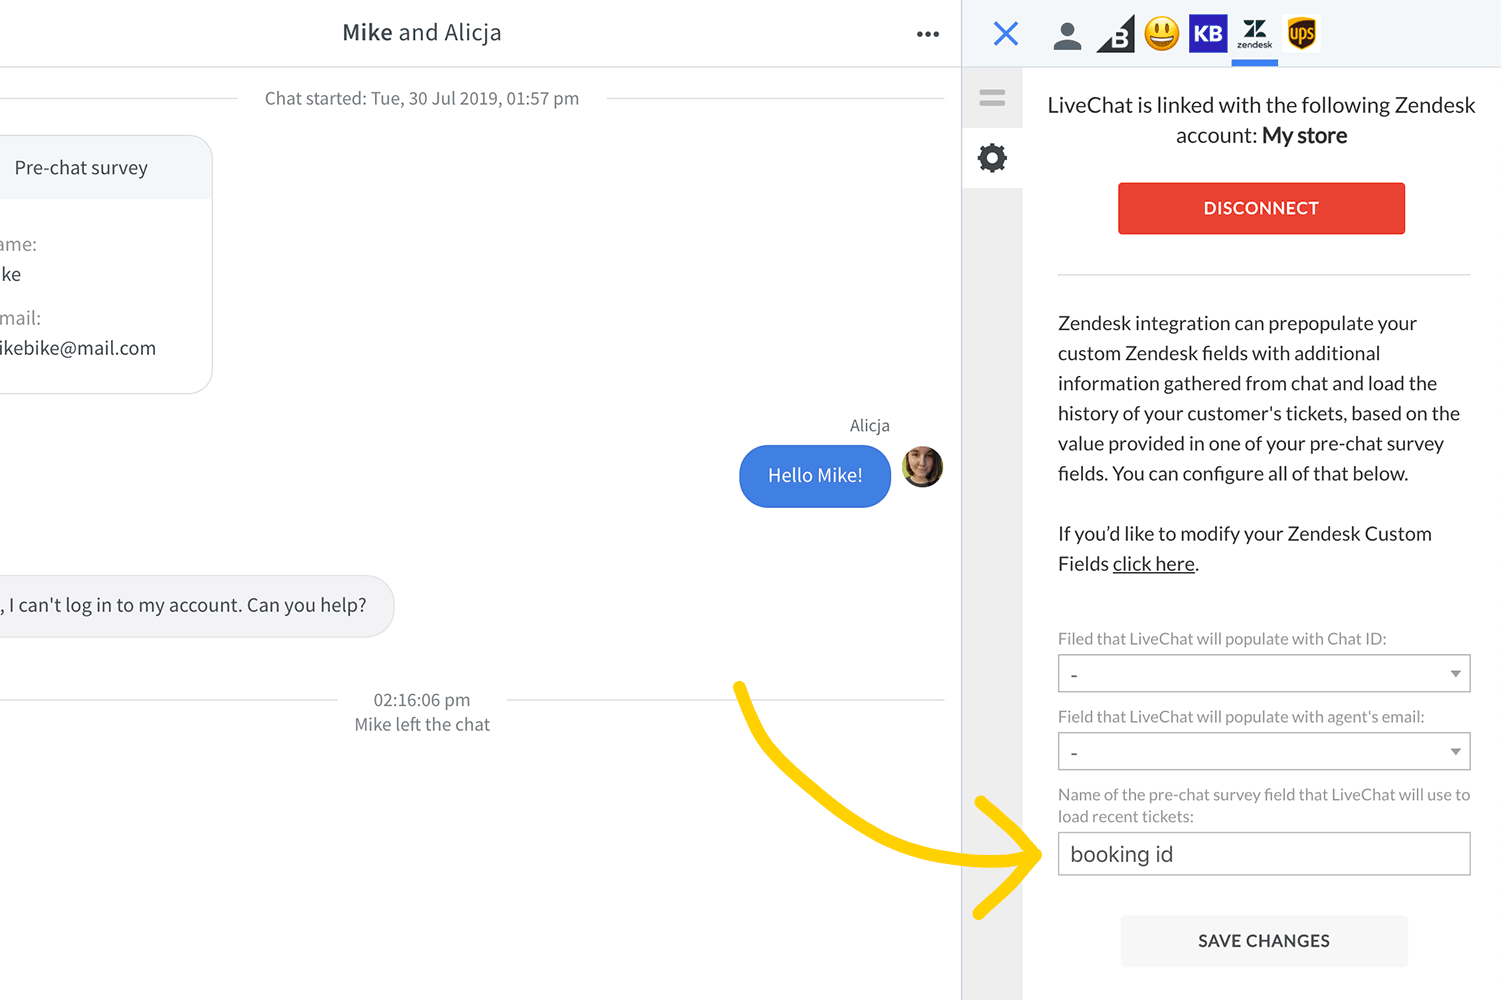
6) Click on Save changes.
From now on, you will be able to see ticket history based on the value provided in one of the pre-chat survey fields. Below you can read about how the search logic behind loading ticket history works in detail.
Search logic explained
The app checks if there's a ticket with a value matching the one provided in the pre-chat survey. If there is, it finds the newest one and loads the Contact and all requested tickets.
If the app can't find a ticket with a value matching the one provided in the pre-chat survey, it loads the Contact and all requested tickets based on the customer's e-mail.
Forwarding offline messages to Zendesk
Here's an easy one: once you'll integrate LiveChat with Zendesk, we will automatically forward all offline messages to your Zendesk. No need for any additional configuration!
And now you know how to use your brand new integration and what features does it offer! Hopefully, you have found this article helpful but if you have any additional questions, feel free to start a chat with us - we are available 24/7/365!